Disassembly – JLG X20JP - X600AJ Service Manual User Manual
Page 172
SECTION 4 - BOOM & PLATFORM
3121623
– JLG Lift –
4-19
DISASSEMBLY
THE SEALS MUST BE REMOVED USING APPOSITE TOOLS, SEAL-
ING SURFACES MUST NOT BE DAMAGED.
• After disassembly all parts must be cleaned and
degreased.
• Clean all parts with compressed air.
• Lubricate all sealing surfaces.
• Make sure that the seals are not damaged during dis-
assembly and assembly.
REMOVE ONLY WHEN THE ACTUATOR IS UNIN-
STALLED FROM THE MACHINE/EQUIPMENT.
• Fix the actuator to the bench.
• Remove valve V, plugs and any bleeder screws on the
body (eg 1, 2).
NOTE: Place a suitable container below the actuator to collect
oil.
• Remove protection ring M.
• Remove the locking pins S.
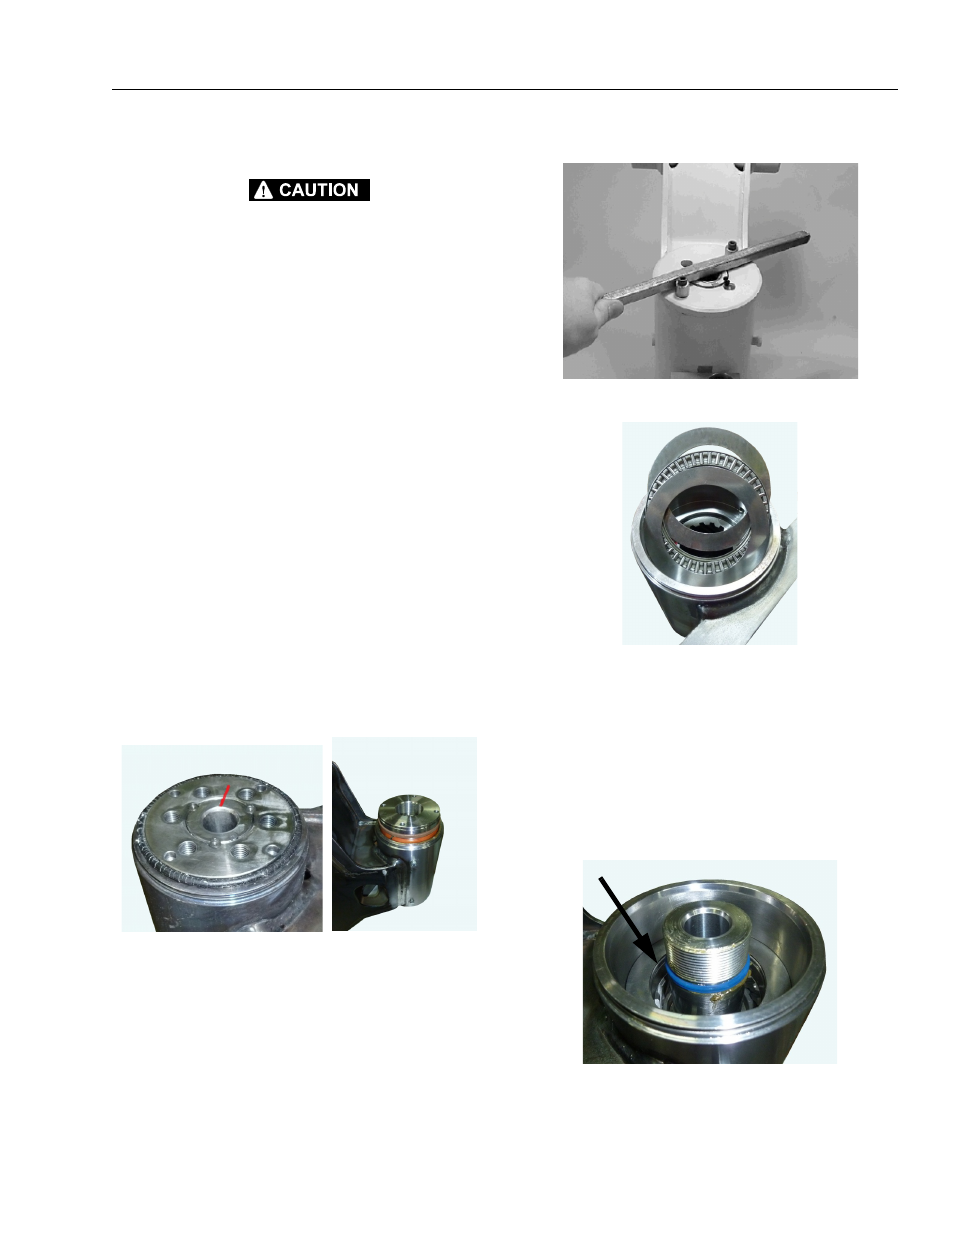
• Loosen flange F from shaft A using hole Ø6 and using
an appropriate wrench. We recommend make equip-
ment to facilitate the operation.
NOTE: Before unscrewing, make a reference between shaft and
flange and measure the gap between them on side A.
• Now carefully remove bearing 5 and thrust ring 4 .
• Using holes Ø6 on the head of shaft and using a
proper wrench, rotate shaft A clockwise to bring piston
P to touche against the stop on body C.
• With the piston stop, rotate the shaft anticlockwise and
this will march by the body.
NOTE: On gear teeth of shaft and piston (before disengaging the
same) make a reference, marking a tooth for every detail
on which engages with reciprocal.
Detail 8, remove before removing shaft!