Balance cleaning – RADWAG BALANCES 3Y SERIES User Manual
Page 15
- 15 -
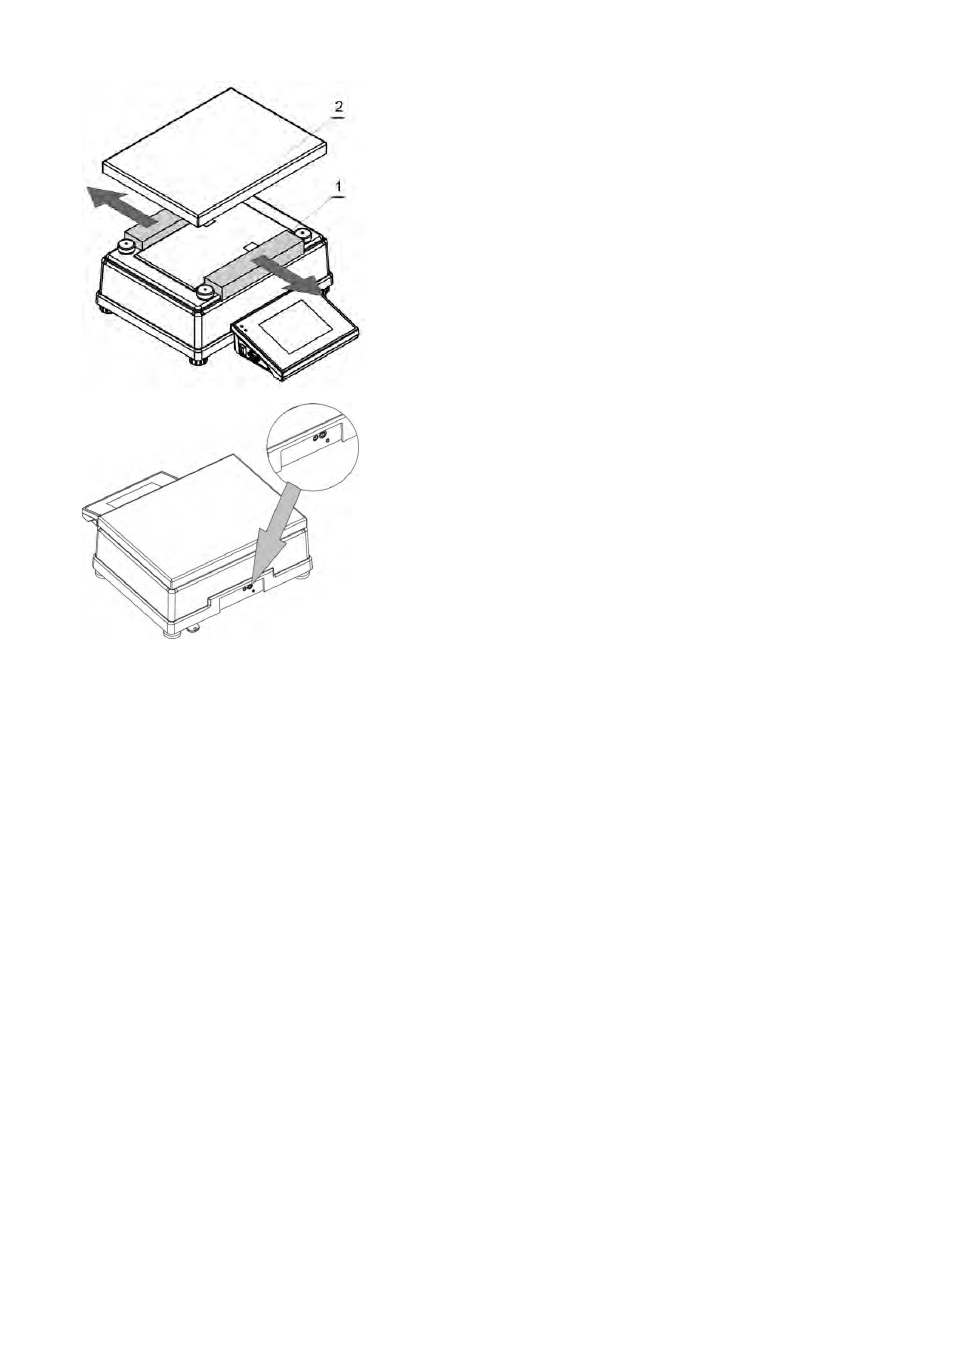
Before installing the balance in its intended place
of use, remove transport protections (1) and
assembly the weighing pan (2) (for APP 10.3Y, one
of the pans only).
On assembling the components, connect all
peripheral devices to the balance and then plug
the instrument to the mains. Power socket is
located at the back of balance’s housing.
On removing the protections and assembling the
weighing pan, connect the terminal to the socket
located at the back of balance’s housing, and
connect all peripheral devices. Only then plug the
balance to mains (mains socket is located at the
back of balance’s housing).
2.6. Balance cleaning
1. Disassembly the weighing pan and portable elements, depending on the balance
type the elements differ (refer to UNPACKING AND INSTALLATION for details).
Use the most gentle movements so as not to damage the mechanism. It is
recommended to use tweezers while removing the pan from microbalances.
2. If possible, use vacuum keyboard cleaner to remove the dust from the weighing
chamber (especially recommended for microbalances)
3. Glass parts should be cleaned using a dry flannel cloth (mild cleanser
may be used if it does not contain any abrasive substances) – for draft
shield disassembly instruction go to the next section of this manual
4. Use a dry flannel cloth in order to clean disassembled parts (mild
cleanser may be used if it does not contain any abrasive substances)
CAUTION:
Cleaning balance’s weighing pan if installed may damage instrument’s measuring
mechanism.
For ease of draft shield cleaning process it is allowed to remove its glass parts as it
has been presented below.