Balances xa 3y; xa 3y.a – RADWAG BALANCES 3Y SERIES User Manual
Page 12
- 12 -
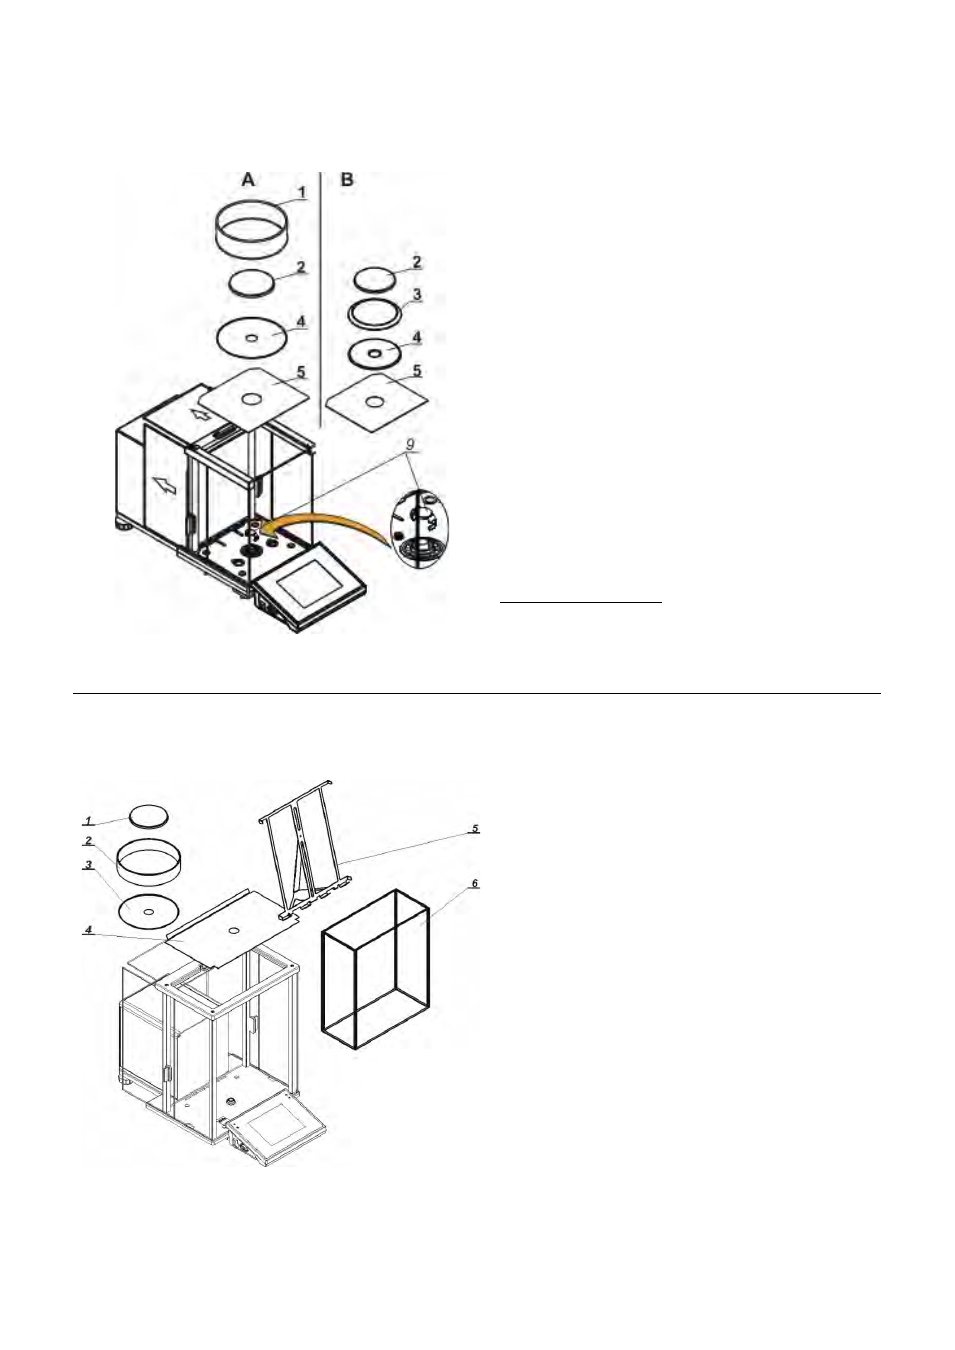
2.2. Balances XA 3Y; XA 3Y.A
A – balance with d=0,01mg unit
B – balance with d=0,1mg unit
After balance installation at operating
place, remove the transport protection (9) -
press the safety catch gently and turn it
accordingly to
remove the safety catch but remember to
retain it should the device be transported in
the future.
Next, assembly the following parts:
−
bottom shield of the drying
chamber (5)
−
centering ring (4)
−
weighing pan (2)
−
pan shield (3) or (1)
After the elements setting, additional
devices should be connected and balance
should be plugged to power source. Power
socket is located on back side of balance
housing.
Pipettes calibration
Remove the pan and put on its place:
- pipettes calibration chamber
- inside the chamber, pan and other
elements should be set up.
Balances XA 3Y.F
After placing the balance in its intended
place of use, assembly all of its standard
components:
- bottom shield of the weighing
chamber (4)
- bottom ring (3)
- standard weighing pan (1)
- pan shield (2)
After assembling all of the components and
connecting peripheral devices plug the
balance to power source using a dedicated
power adapter. Power socket is located on
back side of balance housing.
Before weighing filters remove the pan
shield (2), the standard weighing pan (1)
and the bottom ring (3). Next, inside the
weighing chamber place a glass shield (6)
and assembly a pan-stand for weighing
filters (5).
on completing the above process zero/tare
balance indication. The system is ready
weighing filters procedures.
CAUTION! Any activities have to be carried out very carefully and gently
not to damage the measuring system of the balance.