Control-panel layout – HP Color LaserJet Enterprise CM4540 MFP series User Manual
Page 30
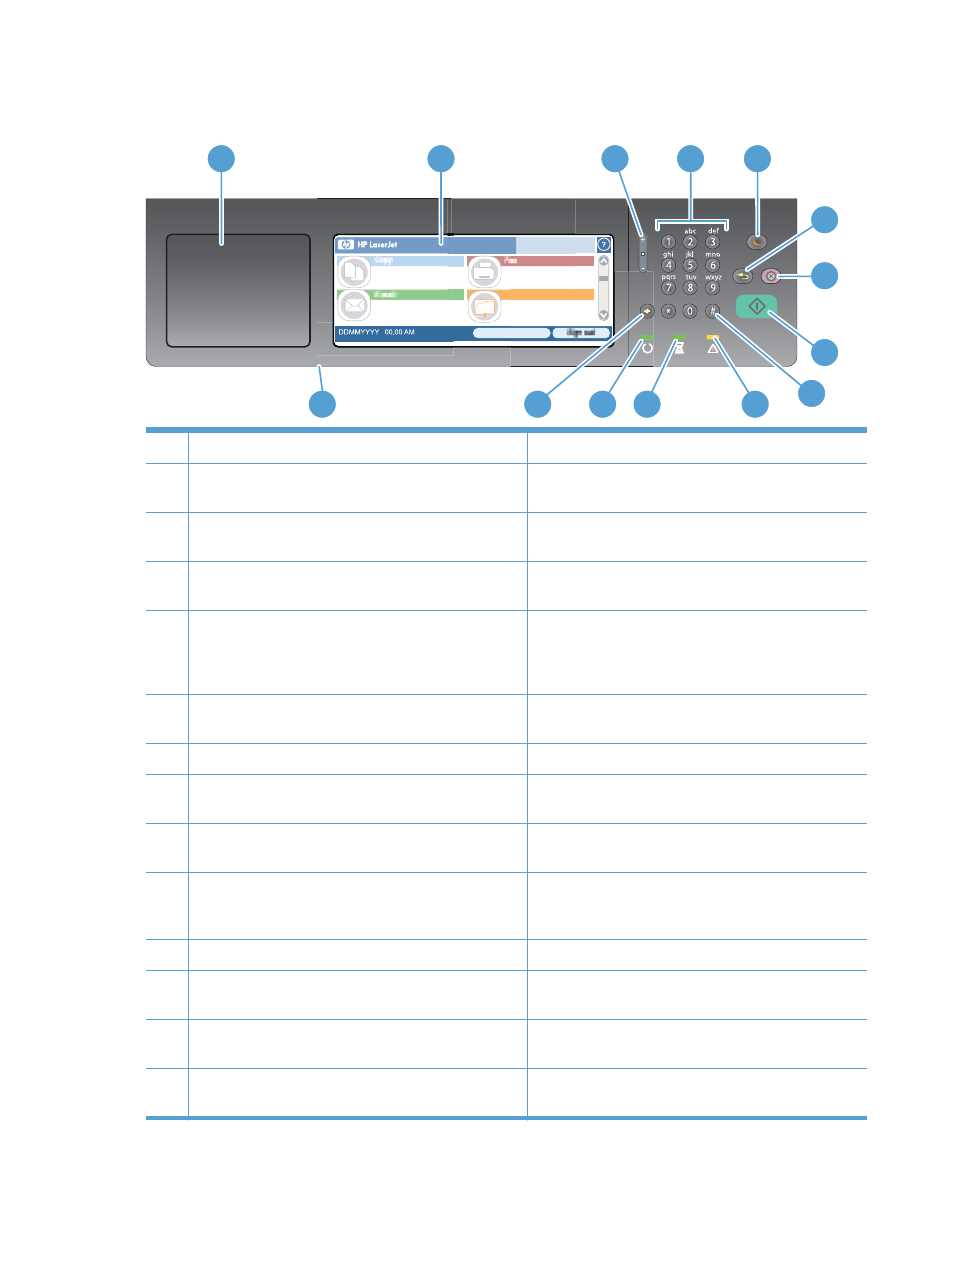
Control-panel layout
7
5
8
6
3
1
4
9
10
14
2
12
13
11
1
Hardware integration pocket
Area for adding third-party security devices
2
Touchscreen graphical display
Use the touchscreen to open and set up all product
functions.
3
Brightness-adjustment button
Use this button to increase or decrease the brightness of
the touchscreen display.
4
Numeric keypad
Use this area to specify the number of copies and other
numeric values.
5
Sleep button
If the product is inactive for a long period of time, it
automatically enters a sleep mode. To place the product
into sleep mode or to reactivate the product, press the
Sleep button.
6
Reset button
Resets the job settings to factory or user-defined default
values.
7
Stop button
Stops the active job and opens the
Job Status
screen.
8
Start button
Begins a copy job, starts digital sending, starts a fax job,
or continues a job that has been interrupted.
9
Pause button
Use this button to indicate a required pause for a fax
number.
10
Attention light
Indicates that the product has a condition that requires
intervention. Examples include an empty paper tray or an
error message.
11
Data light
Indicates that the product is receiving data.
12
Ready light
Indicates that the product is ready to begin processing any
job.
13
Backspace button
Clears the active text or number field, and returns values
to the default settings.
14
USB port (on the bottom edge of the hinged control panel) Connect a USB flash drive for walk-up printing and
scanning.
10
Chapter 1 Product basics
ENWW