Back panel connections, Initial system setup, Back panel connections initial system setup – Teledyne LeCroy PeRT3 Eagle Systems User Manual
Page 8
Version 1.6
PeRT
3
Eagle User Manual
4
LeCroy Corporation
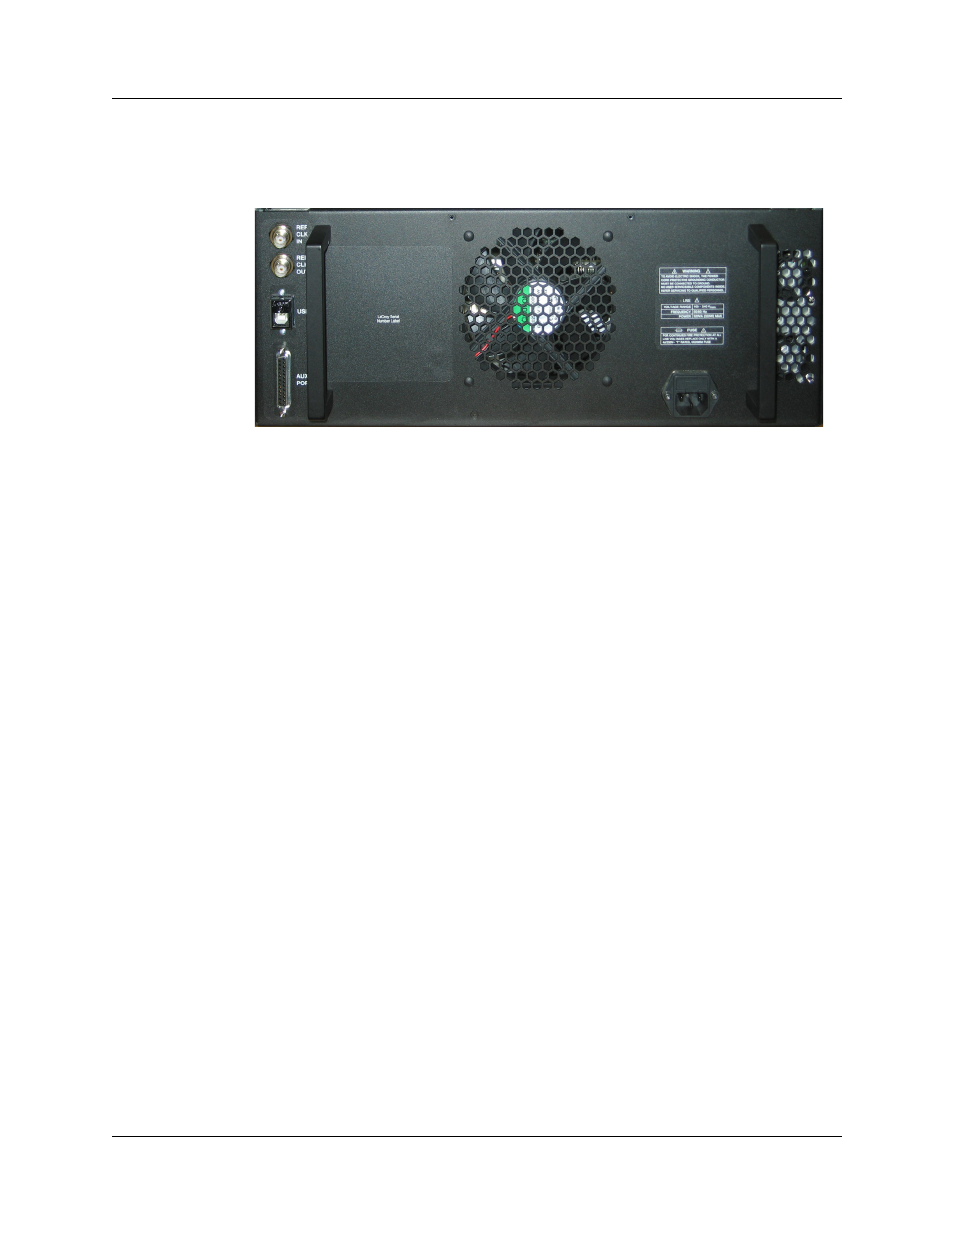
Back Panel Connections
The back panel of the PeRT
3
Eagle chassis has connectors for AC Power, Reference
Clock IN, Reference Clock OUT, USB and Auxiliary Port.
Initial System Setup
Step 1 Remove the PeRT
3
Eagle chassis and place it on a level, clean
surface. Make sure the power switch on the front of the unit is
in the OFF position, plug in the AC power cord to the rear of the
unit and then to a source of AC power (100-240 VAC, 47-63 Hz,
480W max).
Warning!
Do not open the PeRT
3
Eagle enclosure. There are no
user serviceable parts inside. Refer servicing to LeCroy.
See “How to Contact LeCroy” on page 69.
Step 2 Load the PeRT
3
System Software onto your Host PC system
(the system that will be used to control the PeRT
3
). Install the
software by placing the PeRT
3
System Software CD into your
Host PC system, and double click on Setup.exe.
Step 3 If you do not already have .NET 3.5 installed on your host PC,
you will be prompted to install it. Follow the on-screen
instructions to download the .NET 3.5 installation from Microsoft
and install it.
Note: If .NET 3.5 is already installed, the installer will skip this step
and automatically start installing the PeRT
3
software. If this
happens, skip Step 4 below and continue with Step 5.
Step 4 After .NET 3.5 is installed, double click on LeCroyPeRT3.msi to
install the PeRT
3
software.
Step 5 Follow the on-screen installation instructions to complete
installing the software. As part of the software installation
process, the USB drivers for the hardware will be copied to the