Teledyne LeCroy PeRT3 Eagle Systems User Manual
Page 31
PeRT
3
Eagle User Manual
Version 1.6
LeCroy Corporation
27
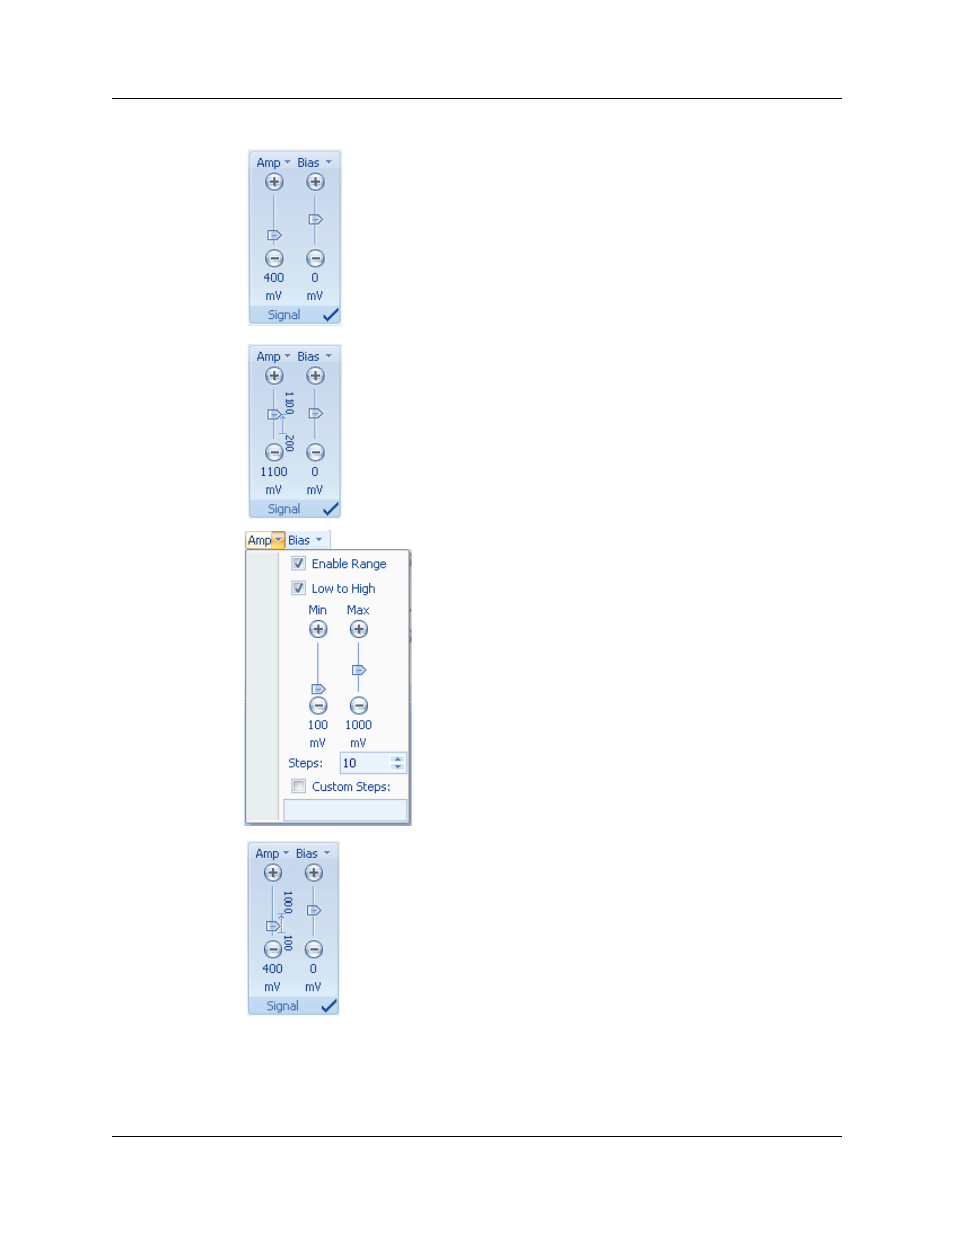
The signal controls appear deceptively simple but allow quick access
to complex test sequences. Each control has a slider bar that can be
used to change the nominal value, with the selected value appearing
below the bar. The "+" and "-" buttons can be used for fine tuning the
value, or the user can click on the displayed value (such as the "400"
displayed to the left in the Amplitude control) and type in a specific
value. Typically each control has a range of allowed values, and if the
value typed in is not supported, the closest available value will be
substituted.
An automatic range of values can be very easily defined by moving the
slider to the starting value of the range, and then holding down the
"Shift" key while dragging the slider to the end value for the range
(either from low to high or from high to low). This creates a sequence
of values from the starting value to the ending value, with a total of 10
(roughly) equal steps in the range. The range is displayed as shown at
the left (in this example, using 200 as the starting value and 1100 as
the ending value).
For more exact control of test ranges, to the immediate right
of each control heading is a small arrow that provides
access to automatic ranges for each control. By clicking this
arrow, the screen displayed on the left appears. This screen
allows the user to enable automated testing of a
well-defined range of values, to define the minimum and
maximum values of the range, to define whether the range
is to be executed from minimum value to maximum value or
vice versa, to define the number of steps within the range,
or to define custom (unequal or non-sequential) steps for the
range. To define a range, click the Enable Range box, set
the minimum and maximum values, set the number of steps,
and click or unclick the Low to High box (if unclicked, the
range will run high to low).
Once a range has been defined, click outside the range box and the
slider bar will now display the defined range as shown on the left. The
minimum and maximum values are indicated and the direction of
change is shown by the arrow.