Installation – Burkert Type 2100 User Manual
Page 19
19
Installation
→
Control function A pressurize the pilot air port 1 with com-
pressed air (5 bar): valve opens.
→
Using a suitable open-end wrench, place the wrench flat on the
tube.
→
Unscrew the actuator from the valve body.
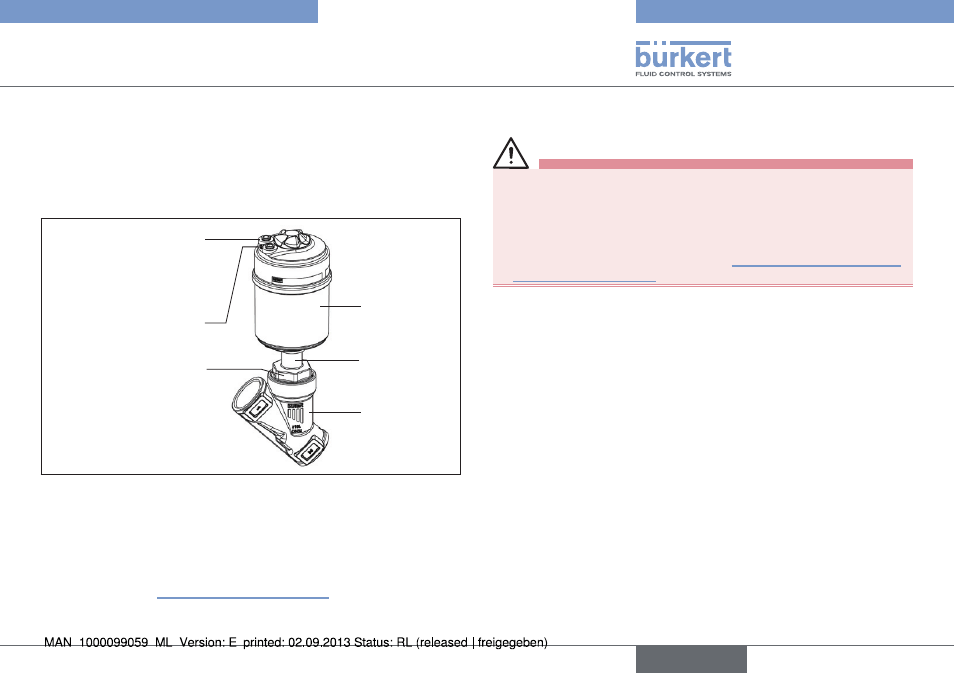
Actuator
Nipple
Valve body
Flats for open-end
wrench
Pilot air port
CFA, CFB, CFI
Air discharge connection
CFA, CFB
Pilot air port
CFI
2
1
Fig. 13: Installation
Other device versions
→
Do not remove actuator unless this is a customer-specific
requirement.
→
Procedure see “Devices with welded body”.
8.3.
Installation
WARNING!
Risk of injury from improper assembly!
Assembly with unsuitable tools or non-observance of the tight-
ening torque is dangerous as the device may be damaged.
• For installation use an open-end wrench, never a pipe wrench.
• Observe the tightening torque (see “Tab. 5: Tightening torques
Dirt trap for devices with authorization in accordance with DIN
EN 161
In accordance with DIN EN 161 „Automatic shut-off valves for gas
burners and gas appliances“ a dirt trap must be connected upstream
of the valve and prevent the insertion of a 1 mm plug gauge.
→
If the authorisation also applies to stainless steel bodies, the same
type of dirt trap must be attached in front of the angle seat valve.
8.3.1. Installation of the valve body
Welded bodies
→
Weld valve body in pipeline system.
Other body versions
→
Connect body to pipeline.
english
Type 2100