Furniture or projector mounting – Extron Electronics IPL T SFI244 User Manual
Page 11
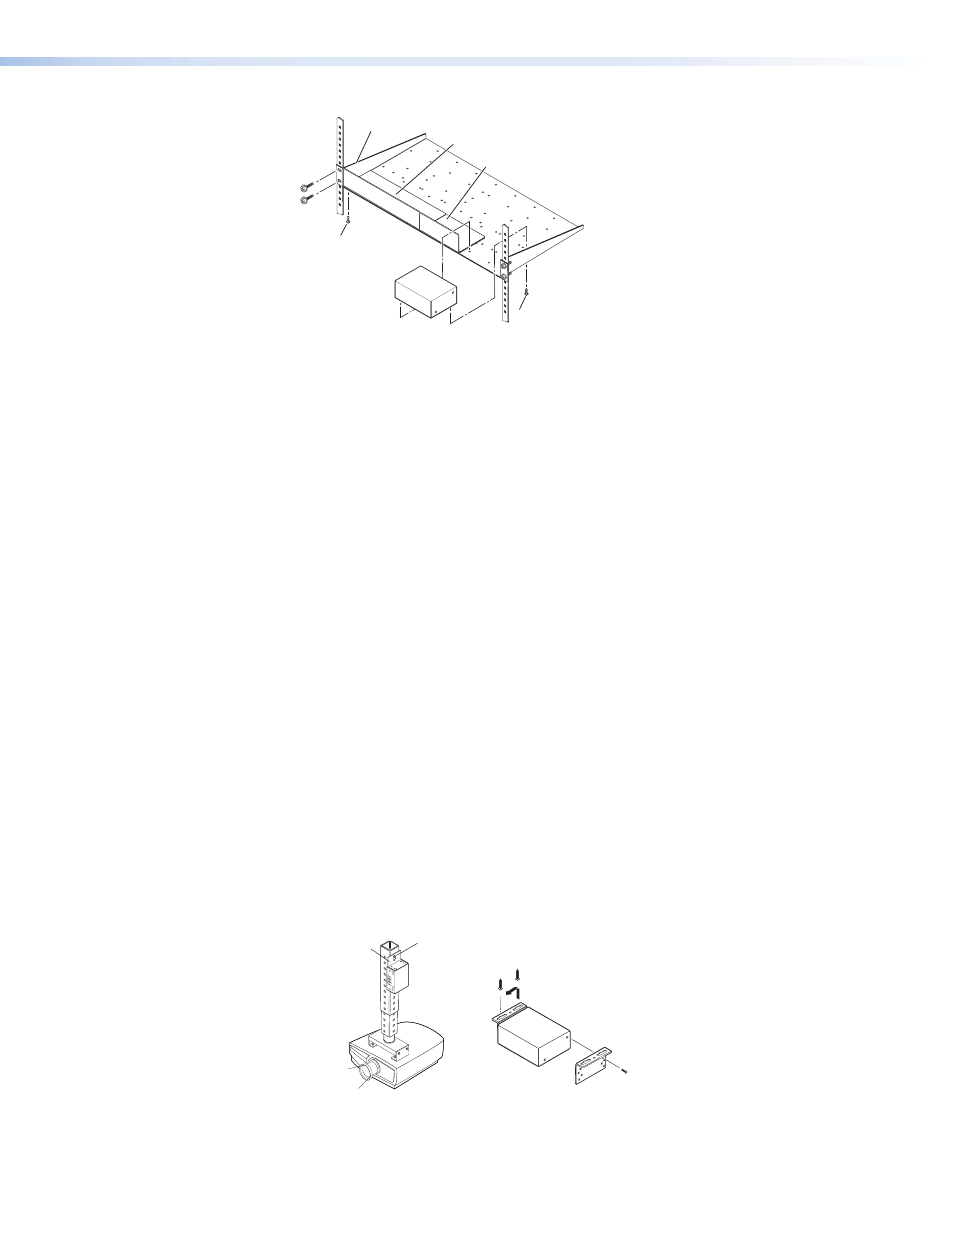
Use 2 mounting holes on
opposite corners.
(2) 4-40 x 3/16"
Screws
RSU 129 Universal Rack Shelf
Both front false faceplates
use 2 screws.
1/4 Rack Width Front False
Faceplate
1/2 Rack Width Front False
Faceplate
Figure 2.
Mounting the Unit on the Standard Shelf
Furniture or Projector Mounting
In addition to using the IPL T SFI244 unit on a rack, it can also be furniture or projector
mounted. Furniture mount or projector mount the unit using the optional mounting kit
(part #70-212-01, furniture, or part #70-217-01, projector) as follows:
1.
Attach the mounting brackets to the unit with the machine screws provided (see
).
2.
If feet were previously installed on the bottom of the unit, remove them.
3.
For furniture mounting, hold the unit with the attached brackets against the
underside of the table or other furniture. Mark the location of the screw holes of the
bracket on the mounting surface.
4.
For furniture mounting, drill 3/32-inch (2 millimeters) diameter pilot holes,
1/4 inches (6.3 millimeters) deep in the mounting surface at the marked screw
locations.
5.
For furniture mounting, insert #8 wood screws into the four pilot holes. Tighten
each screw into the mounting surface until just less than 1/4 inches of the screw head
protrudes.
6.
For furniture mounting, align the mounting screws with the slots in the brackets
and place the unit against the surface, with the screws through the bracket slots.
7.
For furniture mounting, slide the unit slightly forward or back, then tighten all four
screws to secure it in place.
8.
For projector mounting, secure the unit to a projector mount or other surface by
inserting the mounting bolt through the bracket’s slotted hole.
3URMHFWRU0RXQW
)XUQLWXUH0RXQW
,3/
76),
5
&20
7;
/,1.
$&7
5;
,2
,5
&HLOLQJ
'LJLWDO3URMHFWRU
0RXQWLQJ
%ROW
3URMHFWRU
0RXQWLQJ
%UDFNHW
Figure 3.
Mounting the IPL T SFI244
IPL T SFI244 • Installation and Operation
5