Piping and drain hose installation, Caution – Toshiba RAS-M13EKCVP-E User Manual
Page 66
– 66 –
Piping and drain hose forming
• Since condensation results in machine trouble, make sure to insulate both the connecting pipes separately. (Use polyethylene foam
as insulating material.)
1.
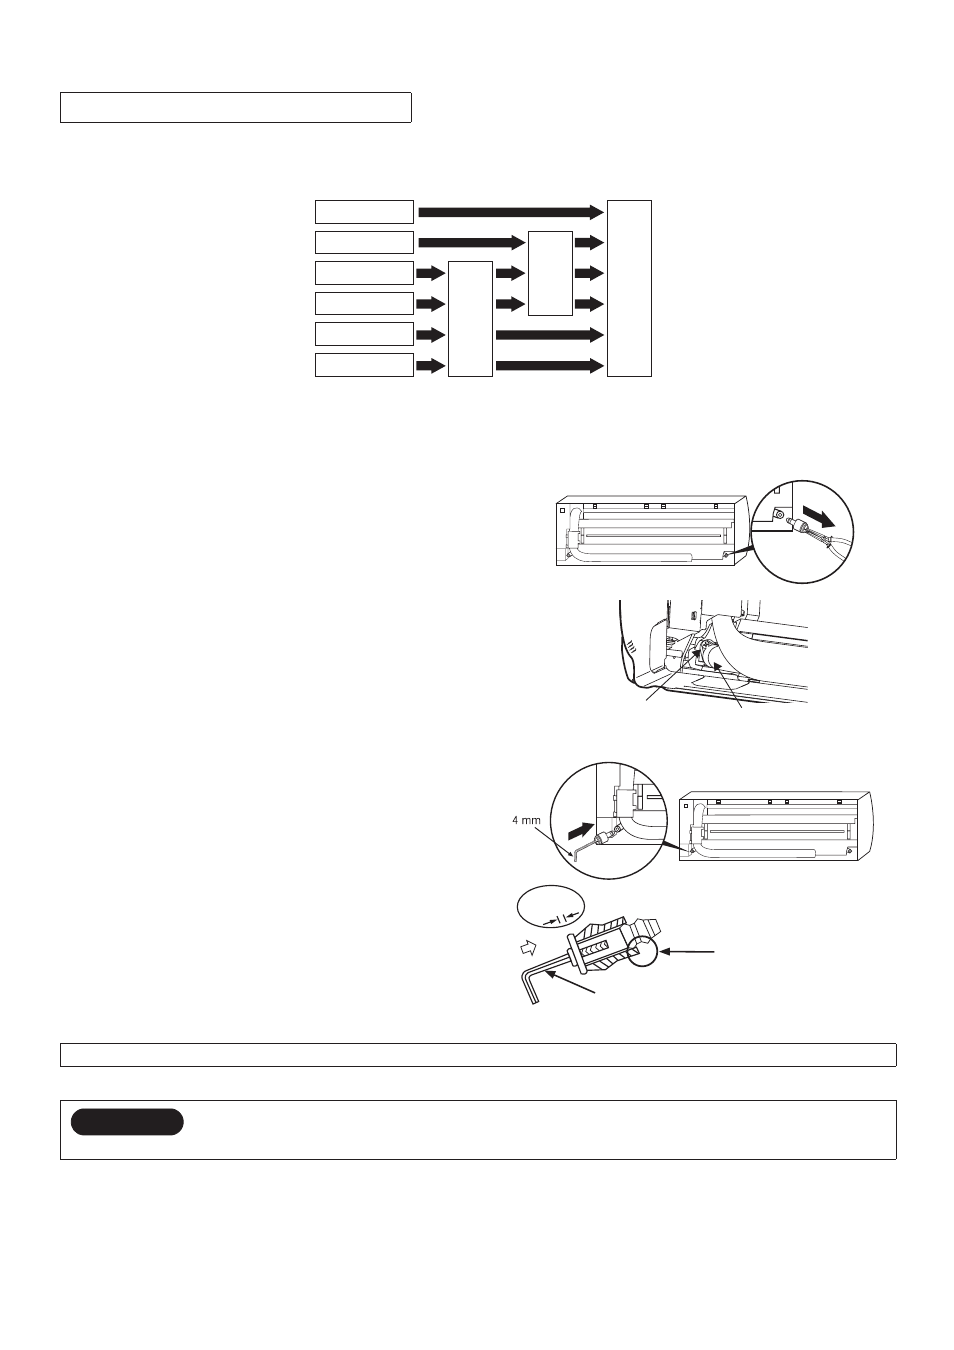
Die-cutting front panel slit
Cut out the slit on the left or right side of the front panel for the left or right connection and the slit on the bottom left or right side of the
front panel for the bottom left or right connection with a pair of nippers.
2.
Changing drain hose
For left connection, left-bottom connection and rear-left connection’s piping, it is necessary to relocate the drain hose and drain cap.
• How to remove the drain cap
Clamp drain cap with needle-nose pliers, and pull out.
• How to remove the drain hose
The drain hose is secured in place by a screw.
Remove the screw securing the drain hose, then pull out the drain
hose.
• How to attach the drain cap
1.
Insert hexagonal wrench (4 mm).
2.
Firmly insert drain cap.
• How to attach the drain hose
Insert the drain hose firmly until the connector contacts the insulation, then secure it in place using the original screw.
Piping and Drain Hose Installation
Always use the original screw that secured the drain hose to the unit. Using a different screw may cause water to leak.
CAUTION
Securely insert the drain hose and drain cap; otherwise, water may leak.
Bottom right
Pipi
ng prep
ar
at
ion
Chang
ing
dr
a
in hose
Bottom left
Rear left
Rear right
Left
Right
Die-cut
ti
ng fr
ont
pan
el sli
t
Screw
Drain hose
Do not apply lubricating oil
(refrigerant machine oil) when
inserting the drain cap. If applied,
deterioration and leakage of the
drain plug may occur.
Insert a hexagon wrench
(4 mm)
No gap