Promise Technology 66 Pro User Manual
Page 22
SuperTrak66™ User's Manual
Chapter 2
- 11 -
Driver Installation for Existing Windows NT 4.0 System
The following procedure details the installation of the SuperTrak66 drivers on a
system with Windows NT version 4.0 or later already installed. Under Windows NT
4.0, insert the included “SuperTrak66 Driver” diskette in drive A: when prompted for
the drivers.
1) From the “Start” menu, choose “Control Panel” in the “Settings.”
2) In the “Control Panel” window, double-click on the “SCSI Adapters” icon.
3) In the “SCSI Adapters” window, choose the “Drivers” tab.
4) Press the “Add” button.
5) Choose “Have Disk” in the “Install Driver” window (insert Driver diskette)
6) Enter the directory location of the driver in the text box (A: or use browse
button to locate file).
7) Click on the filename “sptrak.inf” and press “Open” button.
8) Select “Promise Technology, Inc., SuperTrak IDE Controller” and press “OK.”
9) “Select SCSI Adapter Option” will be displayed. Press “Install,” which
initiates the installation operation.
10) After a successful installation, the “SCSI Adapter Setup” dialog box will
appear which states that the, “Promise Technology, Inc., SuperTrak IDE
Controller” has been installed.
11) Restart the system.
To check if the driver installation was successful, perform the following steps:
1) After restarting the system, return to the Control Panel.
2) Click on the “SCSI Adapters” icon.
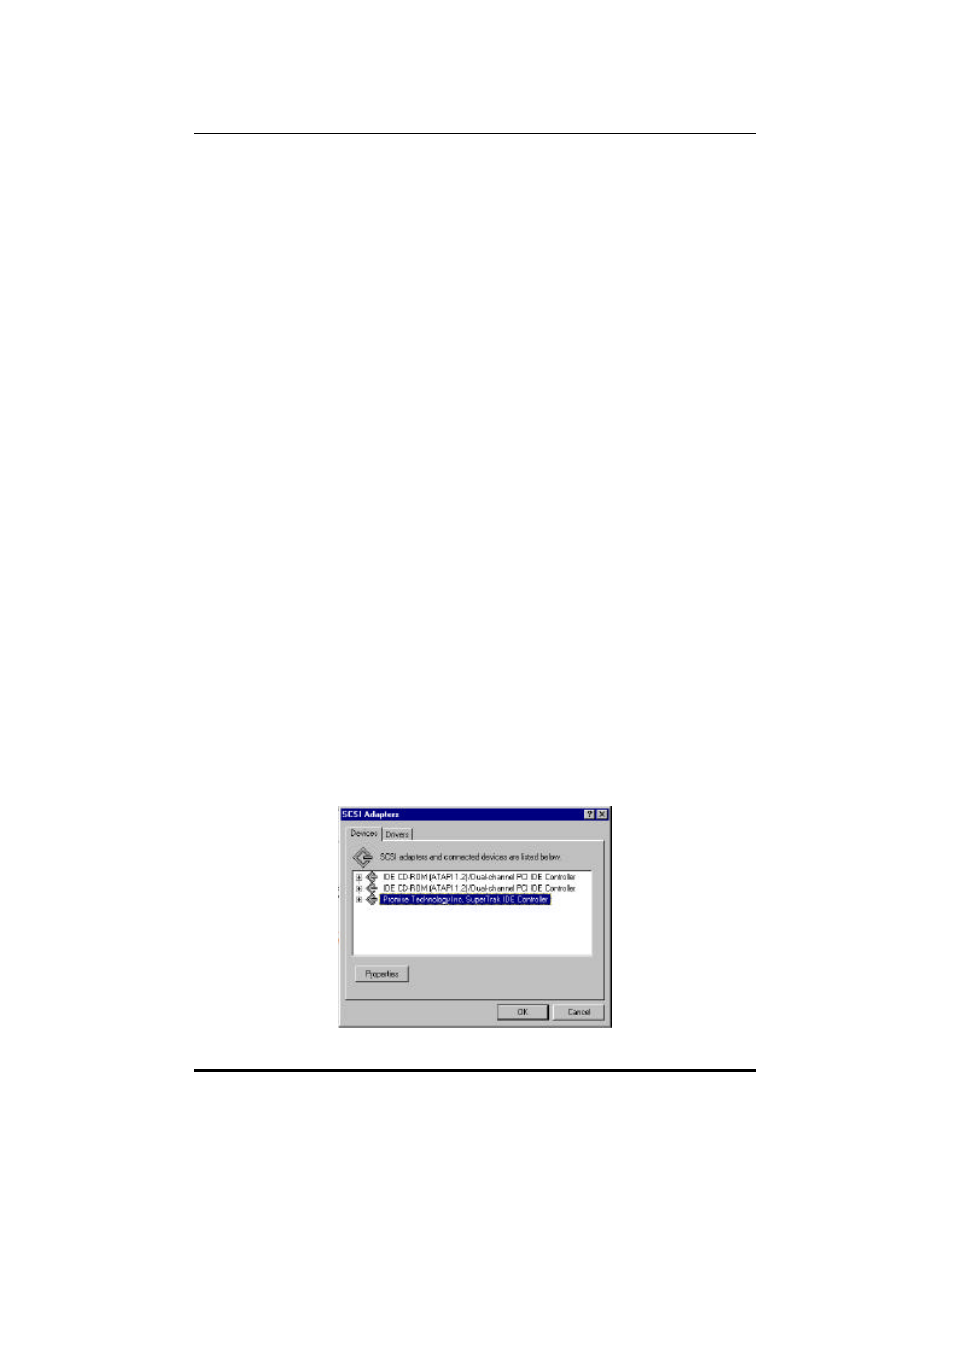
3) Once in the “SCSI Adapters” window, click on the “Devices” tab.
4) In the box titled “SCSI Adapters and connected devices are listed below, ”the
Promise Technology, Inc. SuperTrak IDE Controller” should appear.
Figure 3: Driver Installed Screen in Existing NT