Kohler Command Pro CV980 User Manual
Page 74
7.24
Section 7
Electrical System and Components
Extension.
ǯȱ ȱȱȱ¢ȱ¢ȱȱȱ
end housing, and carefully place the tool
ǻ ȱ¡Ǽȱȱȱȱ
ȱȱ¢ȱȱȱȱȱ
ȱȱĞǯȱȱȱȱȱ
¢ȱ ȱȱȱȱȱ
ǰȱȱȱȱǻƸǼȱȱ
lead grommet in the cutout of the frame. See
ȱŝȬŚŝǯ
Figure 7-47. Installing Brush Holder Assembly
using Tool with Extension.
ŗŗǯȱ ȱȱȱȱȱȱȱȱǰȱ
ȱȱȱȱȱȱȱȱȱ ȱ
the corresponding slot in the grommet of the
ȱǻƸǼȱȱǯ
ŗŘǯȱ ȱȱ ȱȱǰȱȱȱ ȱȱ
ȱȱ ǯȱȱȱȱȱȱ
śǯŜȬşǯŖȱȉȱǻŚşȬŝşȱǯȱǯǼǯȱȱȱȱ
holder mounting screws to 2.5-3.3 N·m
ǻŘŘȬŘşȱǯȱǯǼǯȱȱȱŝȬŚŞȱȱŝȬŚşǯ
Figure 7-48. Torquing Thru Bolts.
Figure 7-49. Torquing Brush Holder Screws.
ŗřǯȱ ȱȱȱȱȱȱȱȱ
the drive lever, and install the spring into the
solenoid. Insert the three mounting screws
through the holes in the drive end cap. Use these
to hold the solenoid gasket in position, then
mount the solenoid. Torque the screws to
ŚǯŖȬŜǯŖȱȉȱǻřśȬśřȱǯȱǯǼ.
ŗŚǯȱ ȱȱȱǻƸǼȱȱȦȱ
to the solenoid and secure with the hex nut.
Torque the nut to ŞȬŗŗȱȉȱǻŝŗȬşŝȱǯȱǯǼǯȱȱȱ
ǯȱȱȱŝȬśŖǯ
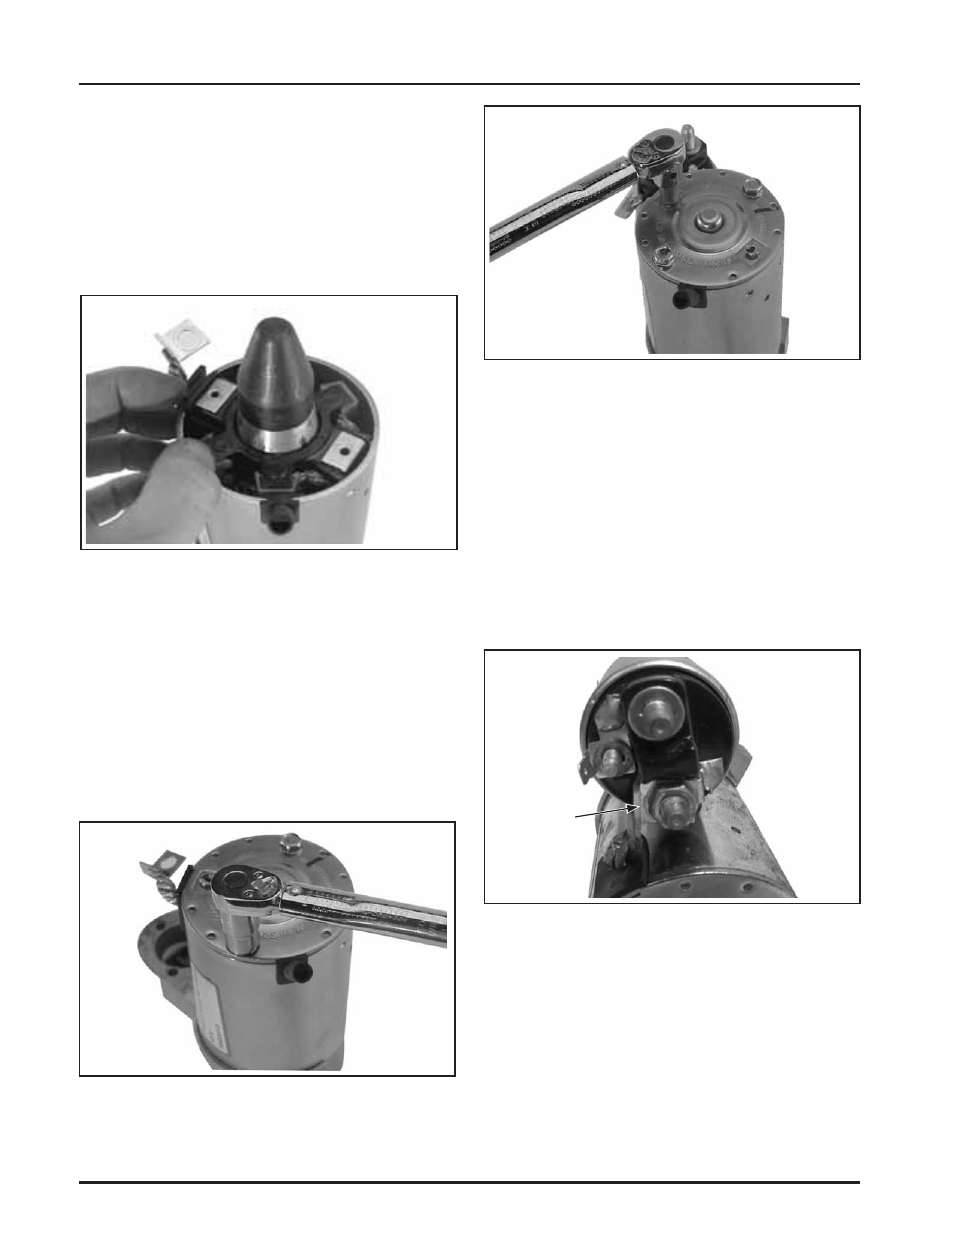
Figure 7-50. Positive (+) Brush Lead Connection.
Positive
Brush
Lead