Kohler Command Pro CV980 User Manual
Page 41
5.13
Section 5
Fuel System and Governor
5
śǯȱ ȱȱ ȱ¡ȱǻ¢ȬǼȱȱȱȱ
ȱȱĞȱȱ ȱȱȱȱ
lever from the carburetor housing. Save the
bushing to use as a driver for installing the new
bushing. Discard the old lever.
ȱ Ŝǯȱ ȱȱǯǯȱȱȱȱĞȱȱȱ
required.
7. Insert the new bushing through the new choke
lever from the outside, and start the bushing in
ȱȱĞȱǯȱȱȱȱȱȱ
the protruding boss on the carburetor housing is
between the two stops formed in the choke lever.
ȱȱśȬřŖǯ
Figure 5-30. Assembling Choke Lever.
8. Turn the old bushing upside down and use it
as a driver to carefully press or tap the new
ȱȱȱȱ¢ȱȱȱĴǯȱ
Check that the choke lever pivots freely without
ȱȱǯȱȱȱśȬřŗǯ
Figure 5-31. Installing Bushing.
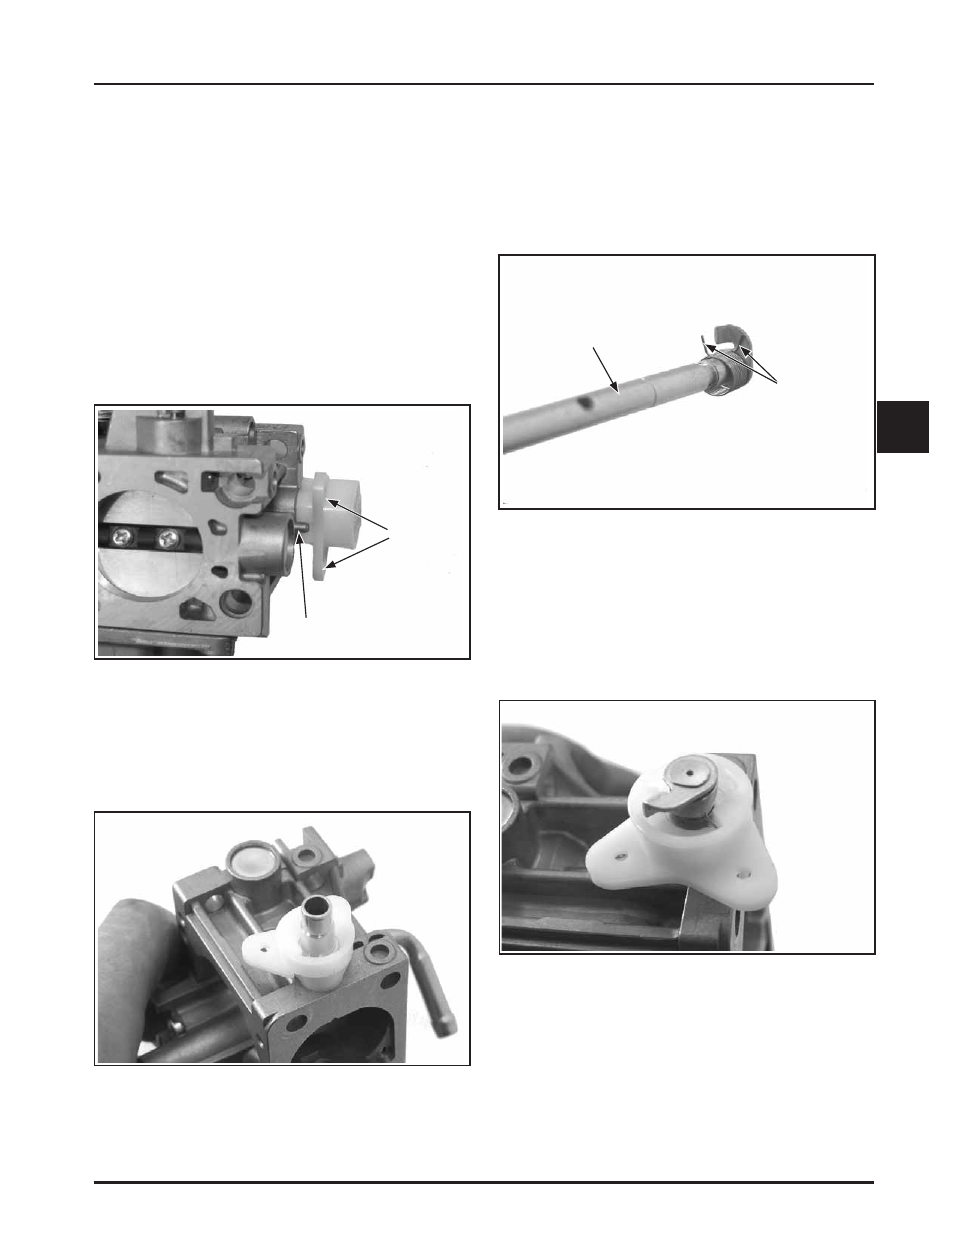
9. Install the new return spring onto the new choke
Ğǰȱȱȱȱȱȱȱȱȱȱ
ȱȱȃȄȱȱȱȱȱȱȱĞǯȱ
ȱȱśȬřŘǯ
DZȱ ȱȱȱ¢ȱȱȱȱȱ
the following step.
Figure 5-32. Choke Shaft and Spring Details.
ȱȱŗŖǯȱ ȱȱȱĞȱȱȱȱȱ
ǯȱȱǻǼȱȱĞȱƝȱȱ
counterclockwise with the inner leg of the spring,
against the formed stop within the choke lever as
¢ȱǯȱȱȱśȬŘşȱȱśȬřřǯȱ
The outer leg of the spring must still be behind
ȱȱȃȄȱȱȱȱĞǯ
Figure 5-33. Installing Choke Assembly
Components.
11. Place a drop of Loctite
®
on the threads of each
new screw. Position and install the new choke
ȱȱȱĚȱȱȱȱȱĞǯȱȱȱ
two screws. Close the choke and check the plate
alignment within the carburetor throat, then
tighten the screws securely. Do not overtighten.
ȱȱśȬřŚǯ
Stops
Boss
Choke Shaft
Spring Ends