Kohler Command Pro CV980 User Manual
Page 105
Section 9
Inspection and Reconditioning
9
9.13
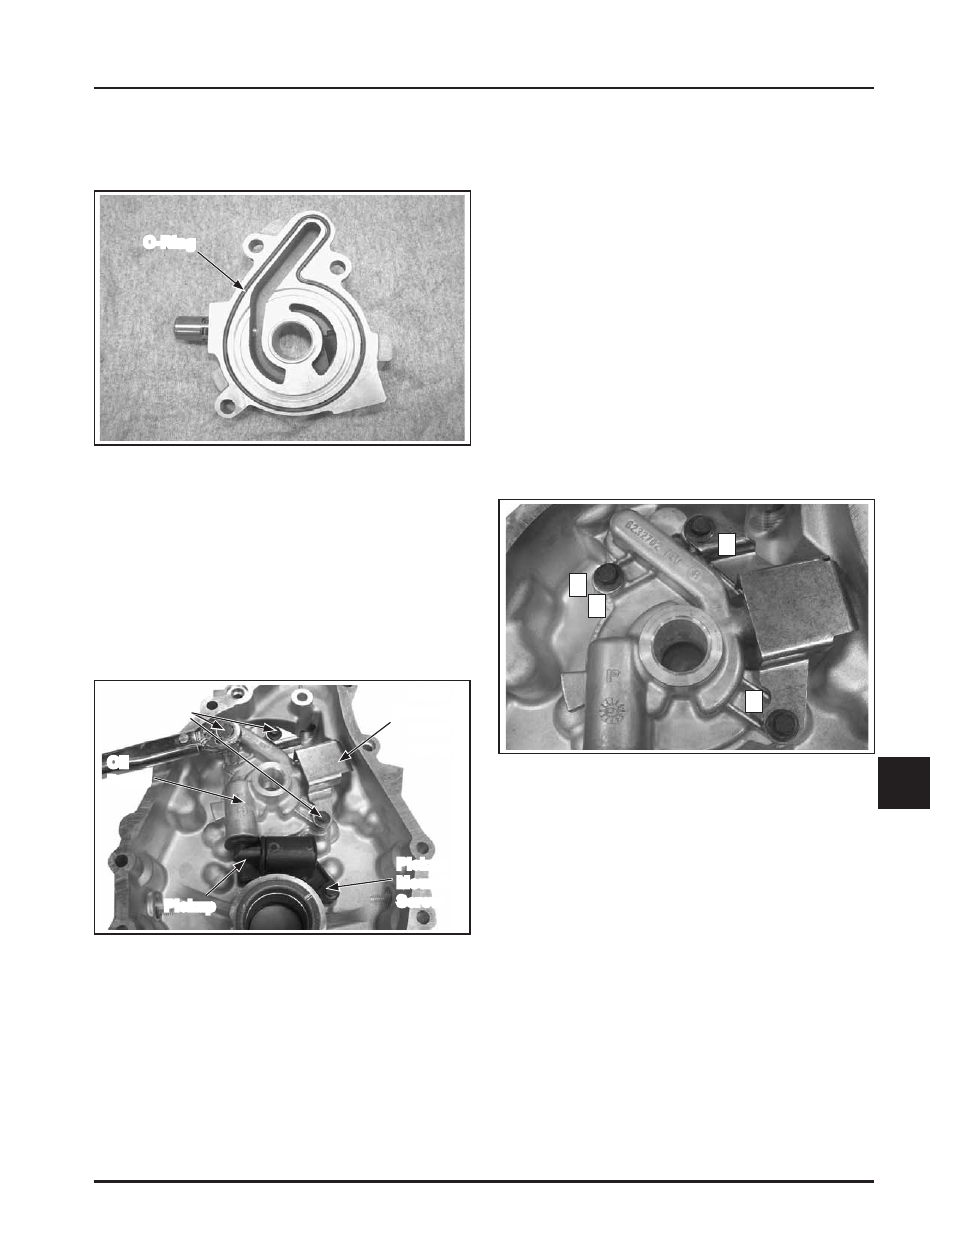
O-Ring
3
2
1
4
4. Install the O-Ring in the groove of the oil pump
housing. Use a small quantity of grease to hold it
in place. See Figure 9-16.
Figure 9-16. O-Ring Installed in Oil Pump Housing.
5. Lightly lubricate the I.D. of the inlet seal with
oil and carefully insert the end of the pickup
through the seal, into the oil pump housing.
6. Install the oil pump housing with the pickup
tube, over the oil pump boss and gears. Position
ȱȱȱĝȱȱ ȱŘȱȱřǯȱȱȱ
three screw hole locations.
Figure 9-17. Installing Oil Pump and Pickup.
7. Check the alignment of parts and torque the
ȱȱȱ ȱȱęȱȱȱ
ȱ ȱȱȱşȬŗŞǯ
ȱ ȱ ȱȱ¡ǯȱĚȱ ȱȱ DZ
a. Install fastener into location No. 1 and
lightly tighten to position the pump.
b. Install fastener into location No. 2 and fully
torque to the recommended value.
c. Install fastener into location No. 3 and fully
torque to the recommended value.
d. Finish torquing fastener in location No. 1
to the recommended value.
First
Time
Installation:
10.7 N·m (95 in. lb.)
All
Reinstallations:
6.7 N·m (60 in. lb.)
Figure 9-18. Oil Pump Screws Torque Sequence.
ȱ Şǯȱ ȱȱȱȱȱȱ ȱȱ
10.7 N·m (95 in. lb.) into a new hole, or 7.3 N·m
(65 in. lb.) into a used hole. See Figure 9-17.
Mounting
Screws
Pickup
Oil
Pump
%DIÀH
(Covering
Relief
Valve)
Pickup
Mounting
Screw