Release the mouse button at the position, Ab c – JVC VR-N1600E User Manual
Page 69
61
2
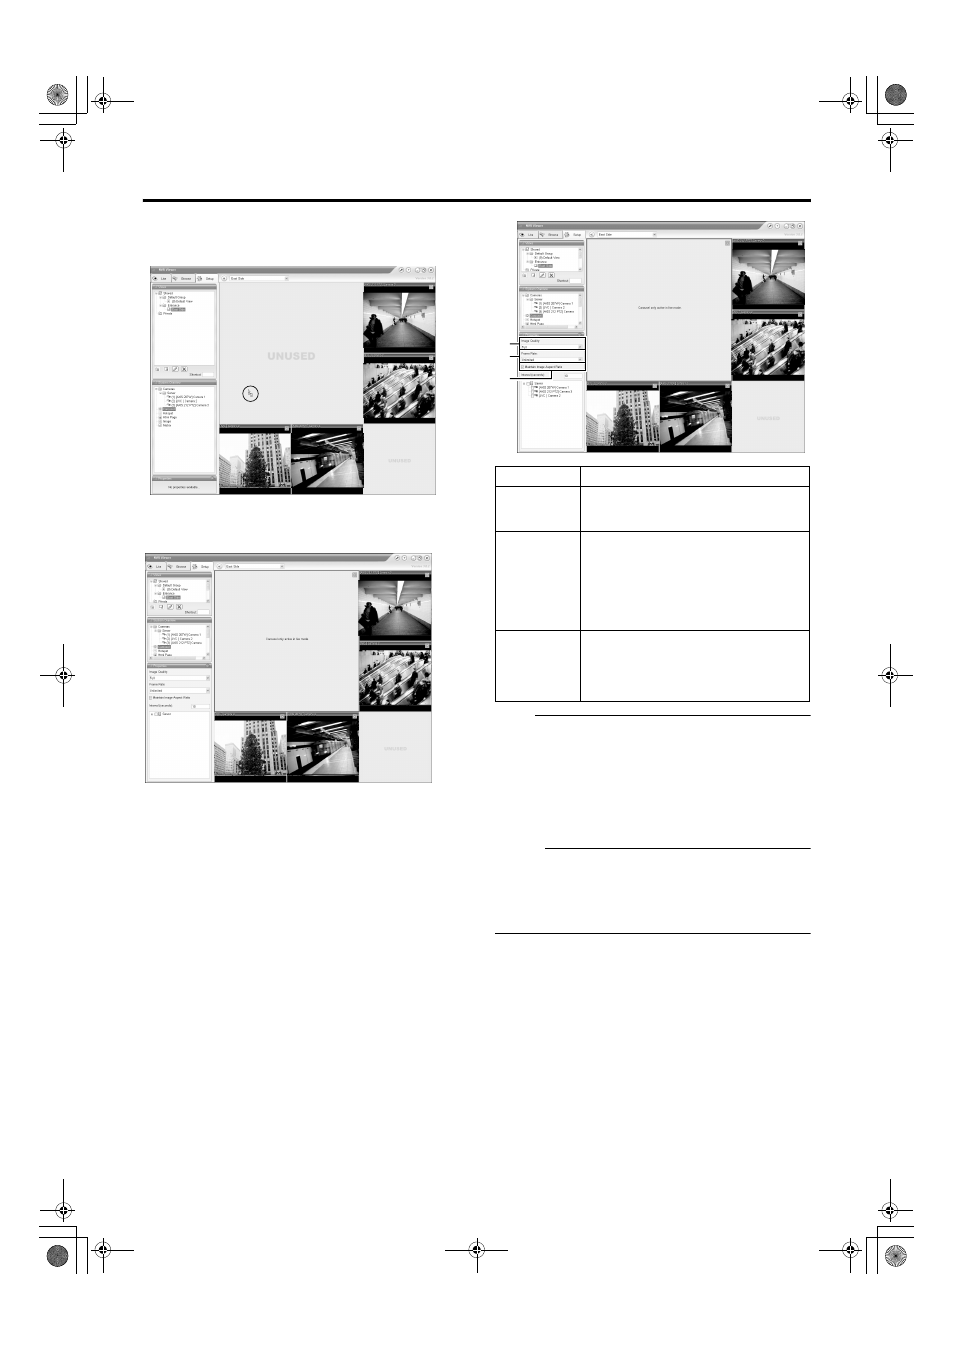
Click and drag the [Carousel] icon in the
[System Overview] section to the position that
you want to set in the view
3
Release the mouse button at the position
4
Select the preset carousel position and specify
its properties in the [Properties] section
● Begin by selecting the cameras to include in the
carousel. You can also select all cameras on a server
at once by selecting the check box next to the [Server]
icon.
Note :
● The recording frame rate may deteriorate if you change
the picture quality. The [Image] settings may affect the
recording performance. As such, use this function with the
value fixed at
AFullB.
● When you drag the timeline browser using the mouse
during playback, the frame rate setting is
AdisabledB.
[Searching Recorded Image Using the Timeline Browser]
(A Page 40)
Memo :
● The green border indicates that the position is used for the
carousel feature.
● The sequence in which cameras appear in the carousel is
automatically determined by their names. The cameras
appear recurrently in alphabetical order.
[NVR] Camera3
[NVR] Camera4
[NVR] Camera3
[NVR] Camera4
[NVR] Camera2
Item
Description
A
Image
Quality
Enables you to adjust the image resolution
and picture quality during viewing. Select
AFullB at all times.
B
Frame
Rate
This is the viewing frame rate.
Select [Unlimited] (default value; same as
live settings), [Medium] (25 % of the frame
rate), or [Low] (5 % of the frame rate),
depending on the frame rate specified in
[Live Settings] (A Page 52) on the [Camera
Settings] screen.
C
Maintain
Image
Aspect
Ration
If this check box is selected, images will not
be stretched to fit the size of the display
position. Images will be displayed in the
aspect ratio (horizontal to vertical ratio of the
screen) that they have been recorded.
[NVR] Camera3
[NVR] Camera4
[NVR]Camera1
[NVR] Camera2
A
B
C
VR-N1600_J.book Page 61 Tuesday, June 3, 2008 2:26 PM