Playing back recorded images via mouse control – JVC VR-N1600E User Manual
Page 46
38
This section describes the procedures for viewing recorded
images by controlling the mouse.
Displaying the [Browse] Screen
1
Select [Live] from the main menu
● The NVR Viewer starts up and the [Live] screen
appears.
2
Double-click the [Browse] tab on the NVR
Viewer.
● Similarly, click the [Browse] tab when the [Screen
Setup] screen of the NVR Viewer is displayed.
● It may take a few minutes before the [Browse] screen is
displayed.
● If you have specified the camera recording settings
without closing the [Browse] screen, the playback
images may not appear immediately after you have
exited the camera settings.
In this case,
AUnable to connect to the server!
Reconnecting to the server
B or AUnable to connect to
127.0.0.1:80 on the device name(camera name)!
Reconnecting to the server
B will appear on the
[Browse] screen. (127.0.0.1:80 is the IP address of
this unit that is currently in operation. )
● If playback is executed when there are no recorded
images, the
AConnection: NVR]Camera1 on
127.0.0.1:80
B message will continue to appear on the
Playback screen.
● To exit the NVR Viewer, click the Close button.
Memo :
● Each image bar comes with an online indicator at the top
of the [Browse] screen. The indicator lights up in green
each time a new image is displayed.
● Recorded images are saved in the database. “Database”
refers to data recorded in this unit.
● When ABefore Database StartB appears on the [Browse]
screen, no database (recorded image) is found in the
position prior to the currently viewed image.
● When AAfter Database EndB appears on the [Browse]
screen, no database (recorded image) is found in the
position after the currently viewed image.
Note :
● If several sections are opened on the left side of the
[Browse] screen, it may not be possible to display them all
in the screen. In this case, double-click the section bars to
close the sections.
● Do not switch the view frequently between [Live] and
[Browse] within a short time interval.
Playing Back Recorded
Images via Mouse Control
Notes:
● The recording frame rate may decline when you are
using the [Browse] screen.
● When access to the hard disk occurs frequently, such
as when recording and playback of recorded images are
performed simultaneously, the playback image may
pause and the audio sound may be interrupted. (This
has no impact on recording to the system or additional
hard disk.)
● The audio setting is restored to ANo Audio SourcesB
when you return from the setting screen to [Browse].
Select the audio parameters again.
● Set the time zone of the PC to the same time zone as
this unit. If recorded images are viewed on a PC with a
different time zone, the time displayed on the recorded
images of this unit will be converted to the time in the
PC’s time zone.
● When the time zone in [OS Setting] is altered, press the
[LIVE/BROWSE] while holding down the [FUNCTION]
button to reboot the NVR Viewer.
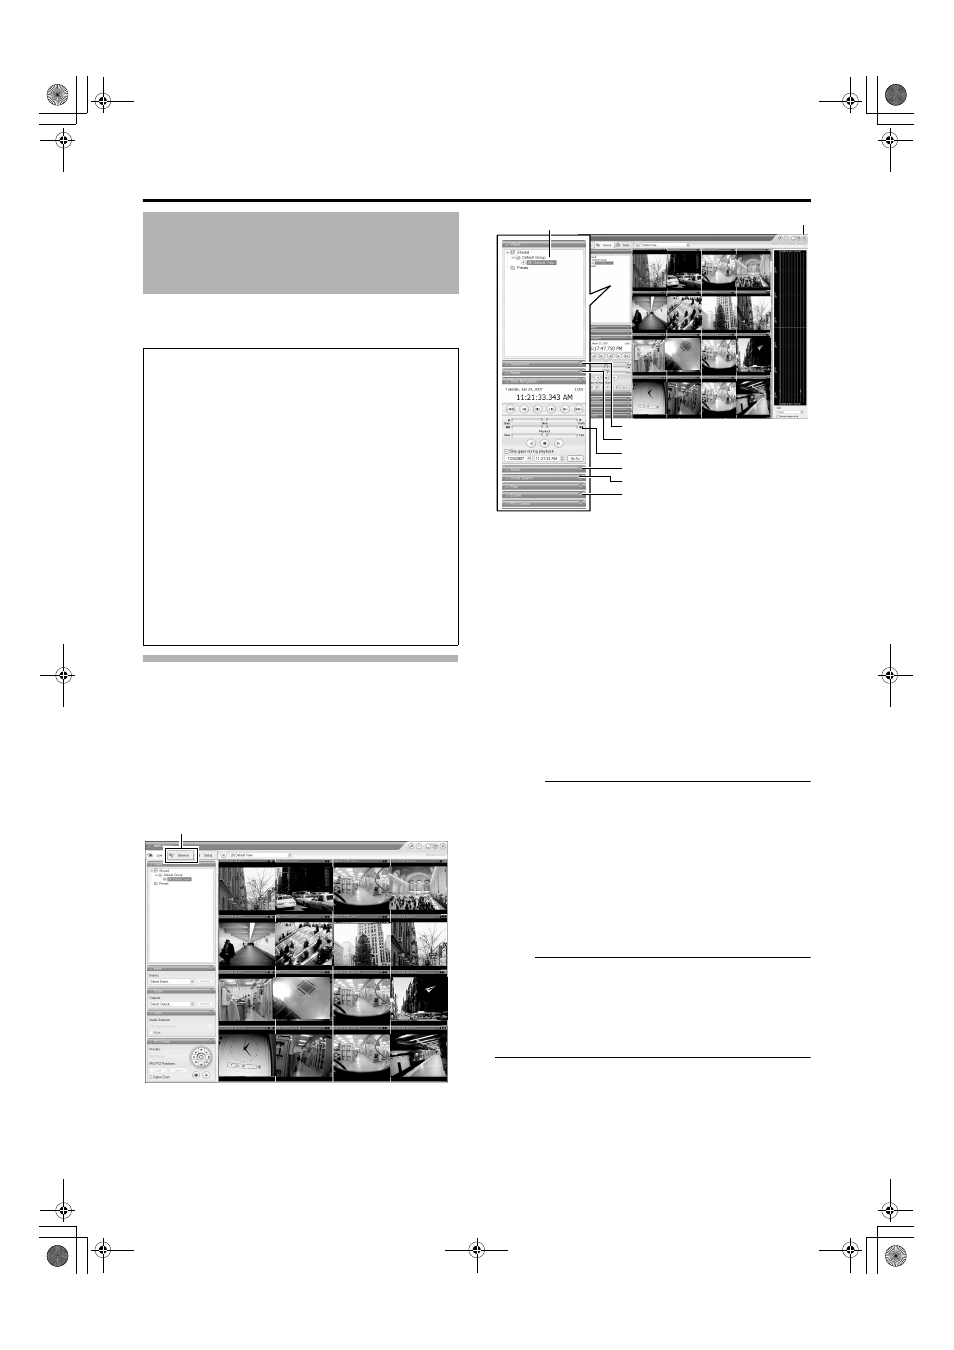
[Browse] Screen
[Browse] Tab
NVR Viewer
[Views] Section
[Sequence] Section
[Alerts] Section
[Time Navigation] Section
[Audio] Section
[Smart Search] Section
[Export] Section
[Browse] Screen
[
ן] Button
VR-N1600_J.book Page 38 Tuesday, June 3, 2008 2:26 PM