Viewing live images via mouse control, Displaying the [live] screen, Select a view – JVC VR-N1600E User Manual
Page 40: Select a camera
32
This section describes the procedures for viewing live images by
controlling the mouse.
Displaying the [Live] Screen
1
Select [Live] from the main menu
● The NVR Viewer starts up and the [Live] screen
appears.
● When the [Browse] or [Screen Setup] screen of the
NVR Viewer is displayed, click the [Live] tab.
● To exit the NVR Viewer, click the [ן] button.
● If you have specified the camera record settings without
closing the [Live] screen, live images may not appear
immediately after you have exited the camera settings.
In this case,
AUnable to connect to the server!
Reconnecting to the server
B or AUnable to connect to
127.0.0.1:80 on the device name(camera name)!
Reconnecting to the server
B will appear on the [Live]
screen. (127.0.0.1:80 is the internal IP address of this
unit that is currently in operation. )
Memo :
● Depending on the condition of the network circuit, it may
take some time before images from the camera are
displayed.
● Depending on the connection of the additional hard disk,
several minutes may be required for the [Live] screen to
appear.
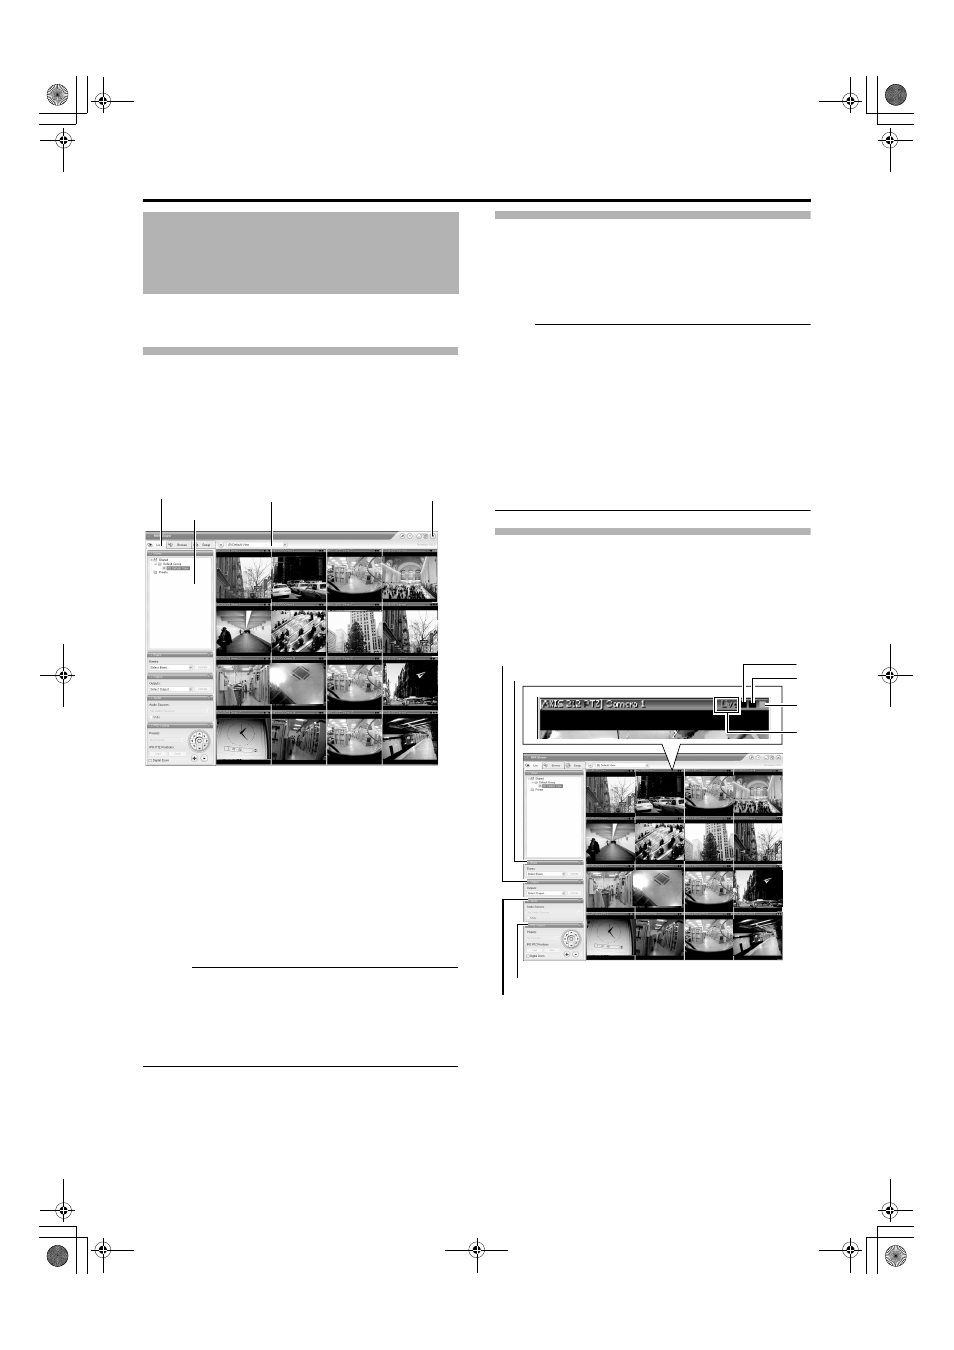
Select a view
For details on the view settings, refer to [Screen Setup] (A Page
56).
1
Select a view from the [Views] section, or from
the view list at the upper end of the window
Note :
● Do not switch the view frequently within a short time
interval.
● When live images do not appear on VN-C625U/VN-
C655U, set the password for connecting VN-C625U/VN-
C655U on the camera unit as well as this unit again. For
details on the setting procedures, refer to the
[INSTRUCRTIONS] of the camera in use and procedures
for setting the root password on the [Edit device settings]
screen in this manual (A Page 83).
● The audio setting is restored to ANo Audio SourcesB when
you return from the setting screen to [Live]. Select the
audio parameters again.
Select a Camera
1
Select a camera by clicking on the bar at the
upper end of the screen of the camera to select
using the mouse
● When you have selected a camera, the blue bar at the
top of each live image changes to a lighter blue tone.
Viewing Live Images via
Mouse Control
[Live] Screen
View List
[Views] Section
[Live] Tab
[
ן] Button
A
B
C
D
[Event] Section
[PTZ Control] Section
[Outputs...] Section
[Audio] Section
[Live] Screen
VR-N1600_J.book Page 32 Tuesday, June 3, 2008 2:26 PM