Configuring nas – JVC VR-N1600E User Manual
Page 145
137
1
Click [HDD Utility] under [Main Menu] (A Page
● The [HDD Utility] screen appears.
2
Click [Details]
3
Enter the [User name] and [Password] that are
configured on the NAS device for access to NAS
in [NAS User Settings], and click [Set]
4
Enter
A IP Address h shared nameB as the IP
address and shared name of the NAS device in
the [Address] field under [NAS Drive], followed
by clicking [Add]
Example)
192.168.0.200 h
5
If the NAS device is the only device for
recording images, deselect the [Enable
archiving to internal HDD] check box
6
Click [Close]
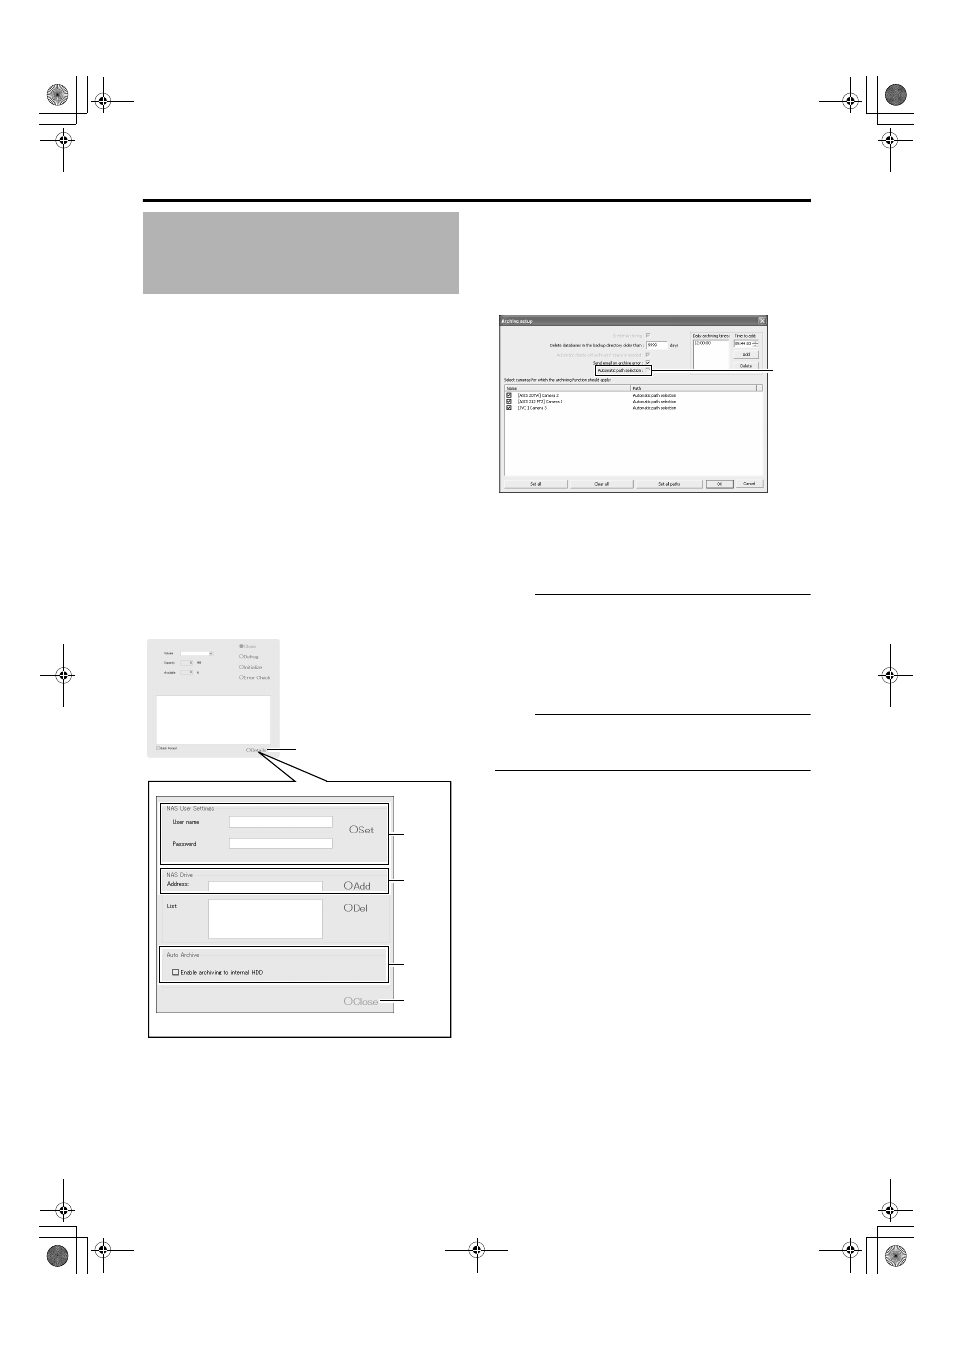
7
Click [Main Menu]-[Camera Record Setting]-
[Archive Setup...] (A Page 104)
● The [Archive Setup] screen appears.
8
Deselect the [Automatic path selection] check
box
9
Configure each drive as destinations for storing
images of the respective cameras.
Note :
● Performing the above setting only after the NAS device
setting is complete and when the device is connected to
the network.
● If you change the archive destination after applying the
setting, playback of previously archived data will fail.
● The configurable items may differ according to the camera
in use.
Note :
● After configuring the NAS drive, an error message will
appear on the NVR Viewer for several minutes, and live
images may not be displayed during this interval.
Configuring NAS
2
3
4
5
6
[HDD Utility] Screen
8
[Archive Setup] Screen
VR-N1600_J.book Page 137 Tuesday, June 3, 2008 2:26 PM