Gateway 9415 User Manual
Page 90
85
www.gateway.com
11
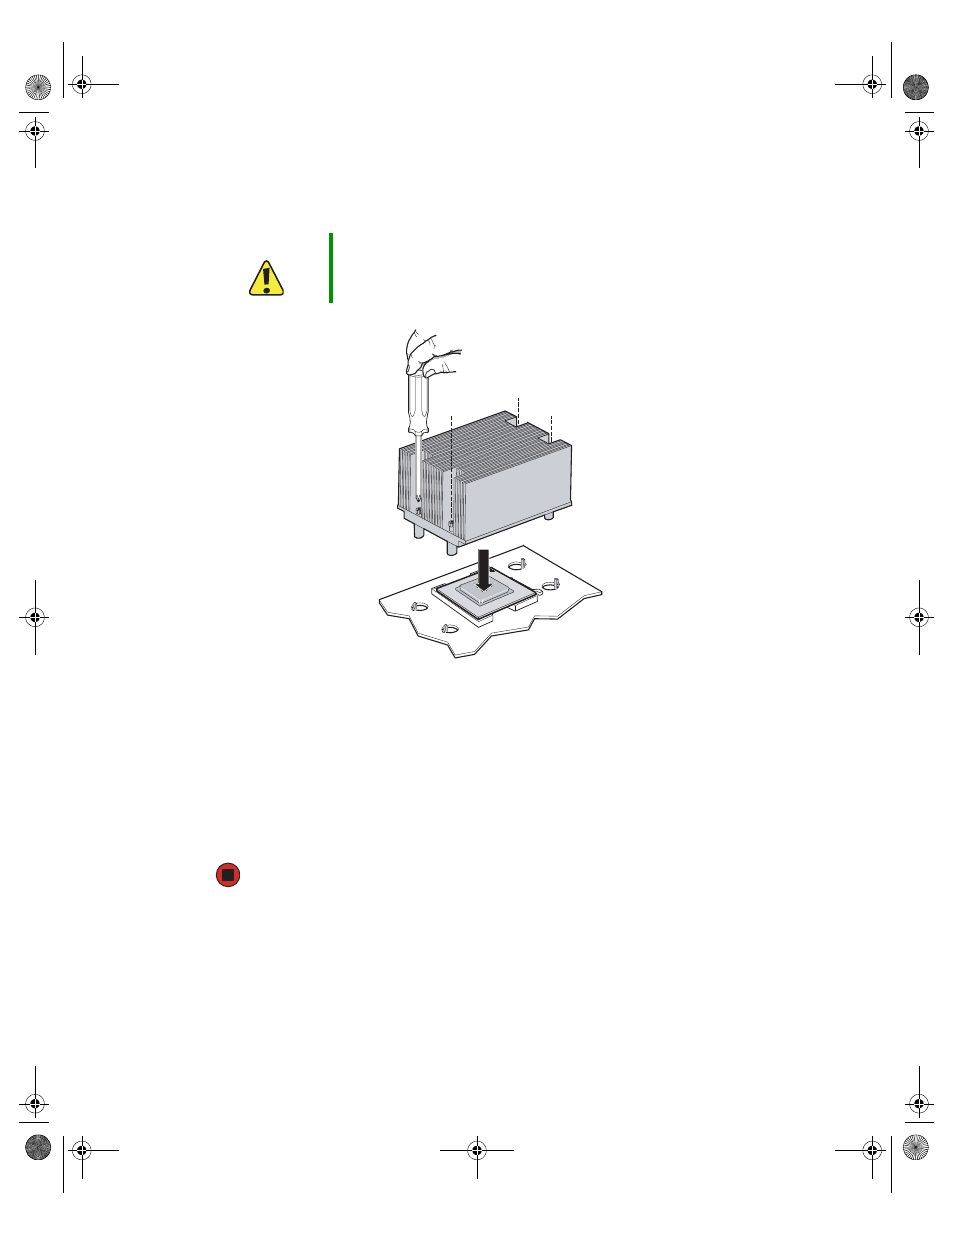
Place the heat sink over the processor, lining up the four captive screws with the four
posts surrounding the processor.
12
Loosely screw in the captive screws on the corners of the heat sink, gently tightening
diagonal screws (screw in one screw, then the screw located diagonally to the first
screw). Do not fully tighten one screw before tightening another.
13
Gradually and equally tighten each captive screw until each is firmly tightened. Do
not over-tighten the screws.
14
Follow the instructions in
“Installing the processor air duct” on page 48
15
Follow the instructions in
“Closing the server case” on page 44
.
Caution
The heat sink has Thermal Interface Material (TIM) located on the
bottom of it. Use caution when you unpack the heat sink so you do
not damage the TIM.
8510522.book Page 85 Wednesday, March 16, 2005 11:19 AM
- E-2300 (134 pages)
- E-4100 (144 pages)
- ALR 7300 (138 pages)
- E-4650 (134 pages)
- E-6300 (136 pages)
- E-9232T (96 pages)
- 610 (108 pages)
- ProfileTM 5 (292 pages)
- Profile 6 (130 pages)
- E SERIES E-6000 (190 pages)
- SZSL95IN0XXXXXXXX (132 pages)
- 8400 (34 pages)
- DX4800 (94 pages)
- GR380 F1 (17 pages)
- MAN FX510 (150 pages)
- GM5688E (140 pages)
- GR585 F1 (14 pages)
- 6400 (148 pages)
- GM5478 (2 pages)
- 7400 (156 pages)
- E-5250 (46 pages)
- FX6710 (1 page)
- E-9425R (118 pages)
- ALR 7200 (134 pages)
- FX542X (154 pages)
- 7250R (135 pages)
- 7250R (26 pages)
- DX430X (96 pages)
- 8450R (172 pages)
- 8450R (4 pages)
- 7450R (124 pages)
- E-5400 (130 pages)
- E-5200 (46 pages)
- PC (110 pages)
- GR160 F1 (14 pages)
- ALR 8300 (128 pages)
- eMachine 3 (96 pages)
- 980 (131 pages)
- 9210 (106 pages)
- E1400 (136 pages)
- FX542XT (94 pages)
- E3400 (126 pages)
- Media Center (28 pages)
- MT-6733 (3 pages)