Making automatic corrections – Blackmagic Design DaVinci Resolve Studio (Dongle) User Manual
Page 351
336
Lesson 12
P
erforming Primary Color Corrections
Making Automatic Corrections
Because unforeseen or unavoidable situations occur during production, clips can be recorded
with an incorrect color tint, have highlights that are dull, or shadows that are muddy. Therefore,
you always start the color correction process by balancing every shot in your program.
Doing so unifies your shots for the creative look you may later apply to them. You can color
balance shots using many techniques, but let’s start with the easiest method: a method that
makes the artificial intelligence engine in DaVinci Resolve 16 do the heavy lifting.
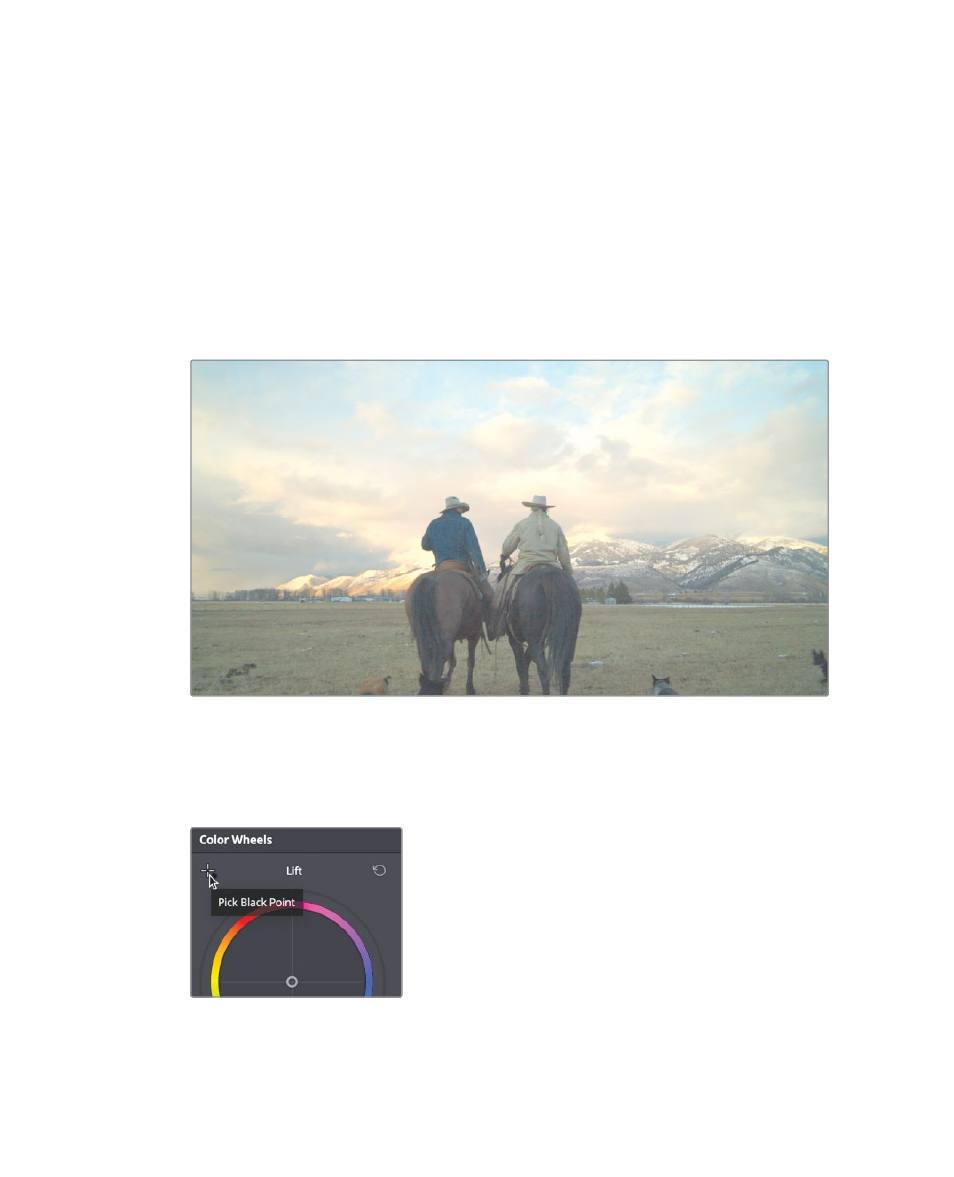
1
In the color page timeline, click clip 07 and move the playhead until you see the horses
in the frame.
You typically start color correction by adjusting the contrast in a shot, setting the
darkest and brightest points. You can do so using the black point picker and white
point picker in the Color wheels palette.
2
In the upper-left corner above the Lift color wheel, click the black point picker.
Using this control, you will locate and select the darkest point in the image. It should
be in an area that you think represents absolute black in the shot.