Adding the first effect – Blackmagic Design DaVinci Resolve Studio (Dongle) User Manual
Page 279
264
Lesson 10
Creating Graphics and Effects in Fusion
Adding the first effect
To understand the basic principles of working with nodes instead of layers, let’s add a
simple effect to this clip. The most common tools or effects that you will want to use are
located in the toolbar.
1
Hover your mouse pointer over the first tool in the toolbar to display a tooltip with the
name of the tool.
A thin divider separates each of the six toolbar categories. From left-to-right the
categories are: generators, color, compositing/transforms, masks, particles, and 3D.
Generators
Color
Compositing/
transforms
Masks
3D
Particles
You build effects by connecting tools between the media in and media out nodes.
In this example, you’ll add a color corrector tool from the color category.
2
Move your mouse over the first tool after the first divider in the toolbar.
3
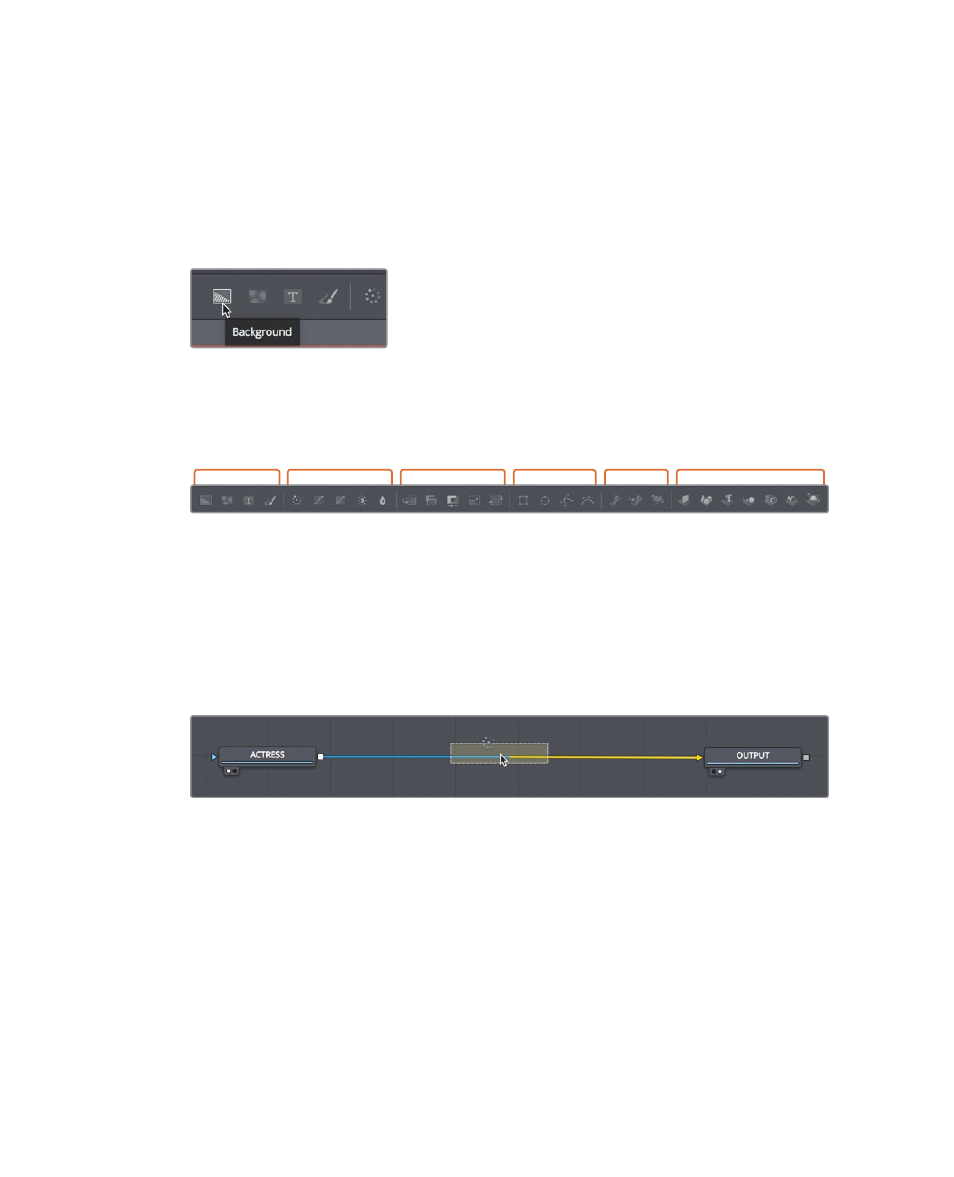
Drag the color corrector tool over the connection line between the ACTRESS node and
the OUTPUT node.
4
When half of the line turns blue, release the mouse button to insert the color corrector
tool as a new node.
5
In the node editor, select the color corrector, and press the 2 key.
The color corrector results appear in viewer 2, while the original clip remains visible
in viewer 1.
When a node is selected in the node editor, the parameters for adjusting that node
appear in the Inspector.