Understanding the merge node – Blackmagic Design DaVinci Resolve Studio (Dongle) User Manual
Page 283
268
Lesson 10
Creating Graphics and Effects in Fusion
Understanding the merge node
The merge node is one of the most important and commonly used tools on the Fusion
page. It composites, or blends, two images. You can add the merge node—as you would
add other effects—by dragging it from the toolbar and inserting it in the node editor
between the color corrector and OUTPUT nodes.
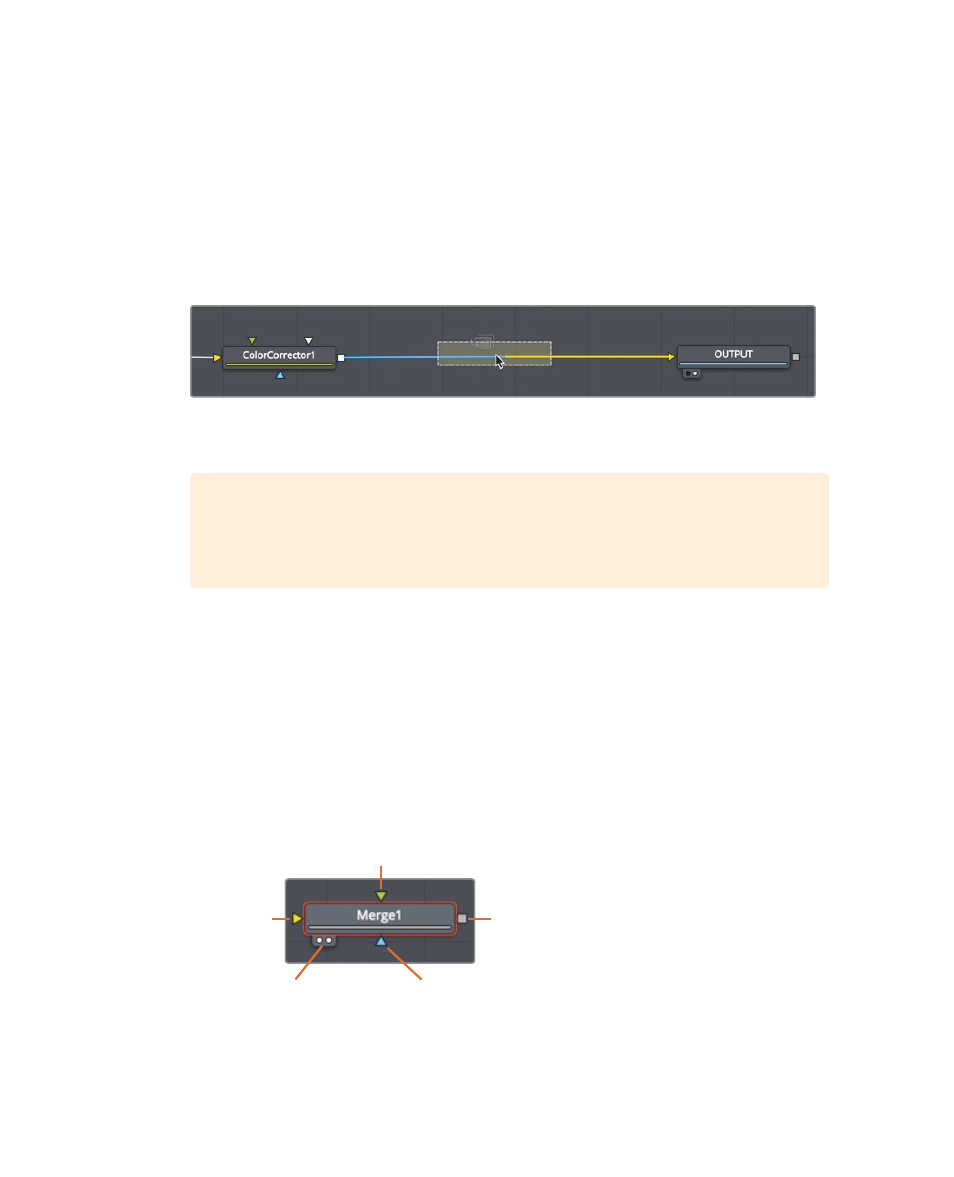
1
Directly after the second divider in the toolbar, drag the merge node into the node editor,
and hover it over the connection line between the color corrector and OUTPUT nodes.
2
When half of the line turns blue, release the mouse button to insert a merge node
between the color corrector and OUTPUT nodes.
TIP
Shift-dragging a node extracts it from the node tree and enables you to
reconnect it at a new location. Alternatively, selecting a node and pressing
Delete or Backspace entirely removes that node from the node editor.
The merge node is now connected into the node tree and you can use it to composite
the HUD graphic over the shot of the actress. Before you combine the two images, let’s
explore the merge node in more depth.
A merge node has three inputs: one for a background image (yellow triangle). You can
think of this as a clip on V1 in the edit page timeline. The green triangle represents a
foreground image, similar to a clip on V2 in the edit page timeline. A third input (blue
triangle) is used exclusively for masking. Like all nodes, the merge node also includes
an output (white square).
Anatomy of a Node
Viewer assignment
buttons
Effect mask
input
Output
Foreground input
Background
input
When you insert a merge node, it automatically connects the incoming connection line
to the background input. It is up to you to manually connect the foreground image. In