Viewing trigger information for drum trigger, Trigger settings (trig) – Roland TM-6 Pro Drum Trigger Module User Manual
Page 19
19
Trigger Settings (TRIG)
4
Press the [F3] (SET) button.
In this case, the value is automatically set to “19,” which is
the minimum value that can cancel triggering for trigger
input 2.
Value
Explanation
0–80
Strength of crosstalk
cancellation
The value will not exceed 40 when you set crosstalk
cancellation automatically. If you need to set this value
above 40, use the [–] [+] buttons to edit the value.
5
Repeat steps 3 and 4 to make crosstalk
cancellation settings.
MEMO
You can also use the cursor buttons and [–] [+] buttons
to make crosstalk cancellation settings manually.
6
Press the [EXIT] button several times to
return to the KIT screen.
Viewing Trigger Information for Drum
Trigger
You can view realtime information that shows the force
(velocity) with which each drum trigger is struck, how far
the hi-hat is open.
1
In the TRIGGER SETUP screen (p. 14), select
“MONITOR” and press the [ENTER] button.
2
Press the [F1] (MONITOR) button.
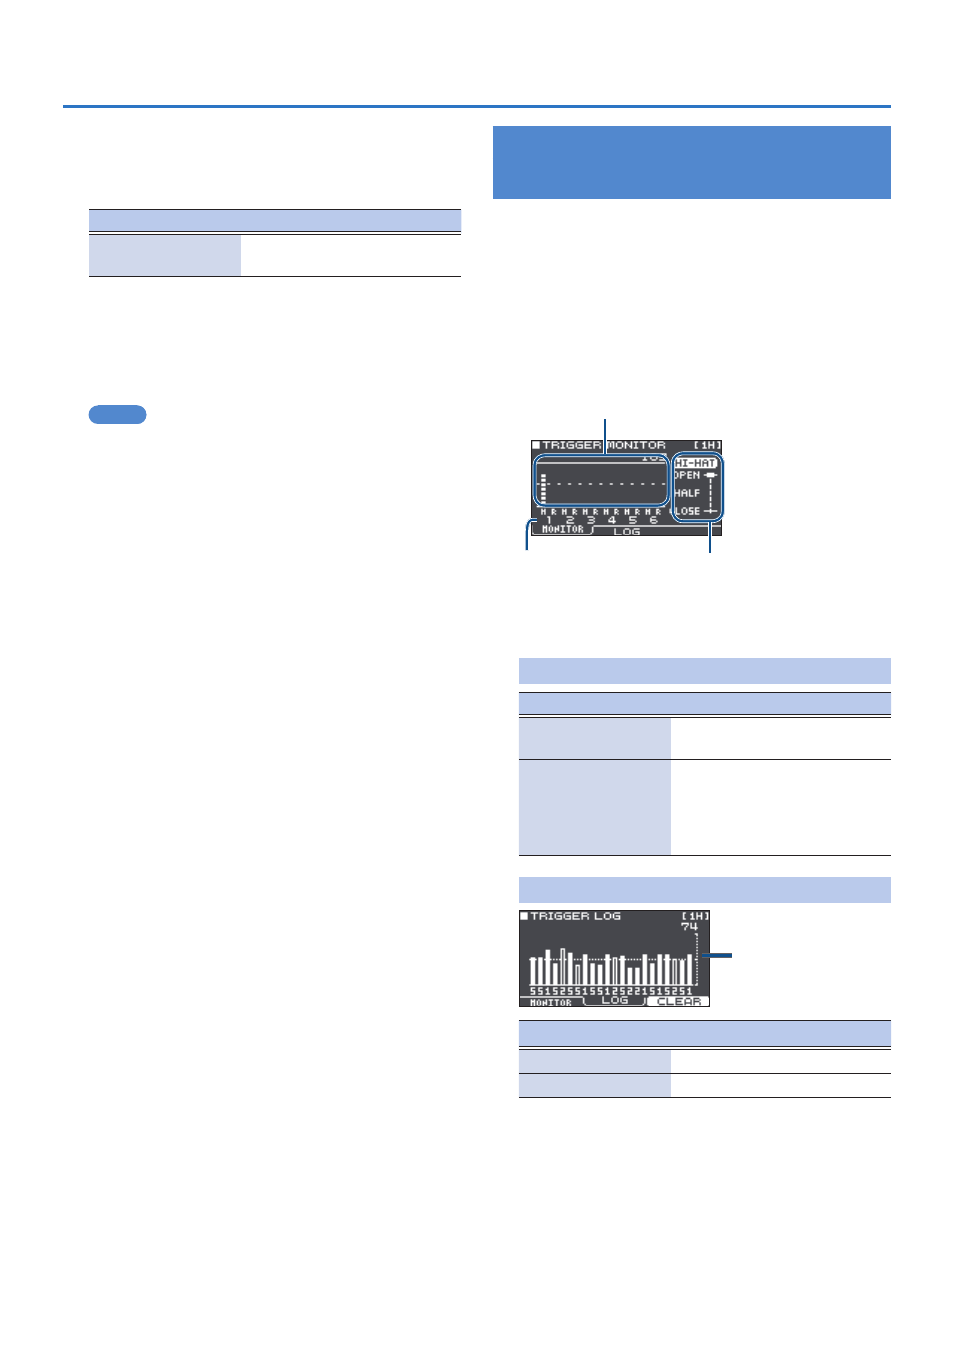
The TRIGGER MONITOR screen appears.
Velocity meter
Indicates the striking force (velocity) for each trigger
Trigger input number
Hi-hat open/close status
3
Strike the drum triggers.
The meter indications in the screen will move in realtime,
allowing you to view the following information.
[F1] (MONITOR) button
Display
Explanation
Velocity meter
Shows the striking force
(velocity).
HI-HAT
Shows how far the hi-hat is
open. The indicator will move
toward “OPEN” as the hi-hat
opens, and toward “CLOSE” as
it closes.
[F2] (LOG) button
Shows the velocity
of each successive
trigger strike.
Display
Explanation
Velocity meter
Shows a record of the velocity.
[F3] (CLEAR) button
Clears the record of velocity.
4
Press the [EXIT] button several times to
return to the KIT screen.