Detailed trigger settings, Making hi-hat settings, T settings (p. 17) – Roland TM-6 Pro Drum Trigger Module User Manual
Page 17: Trigger settings (trig)
17
Trigger Settings (TRIG)
Parameter
Explanation
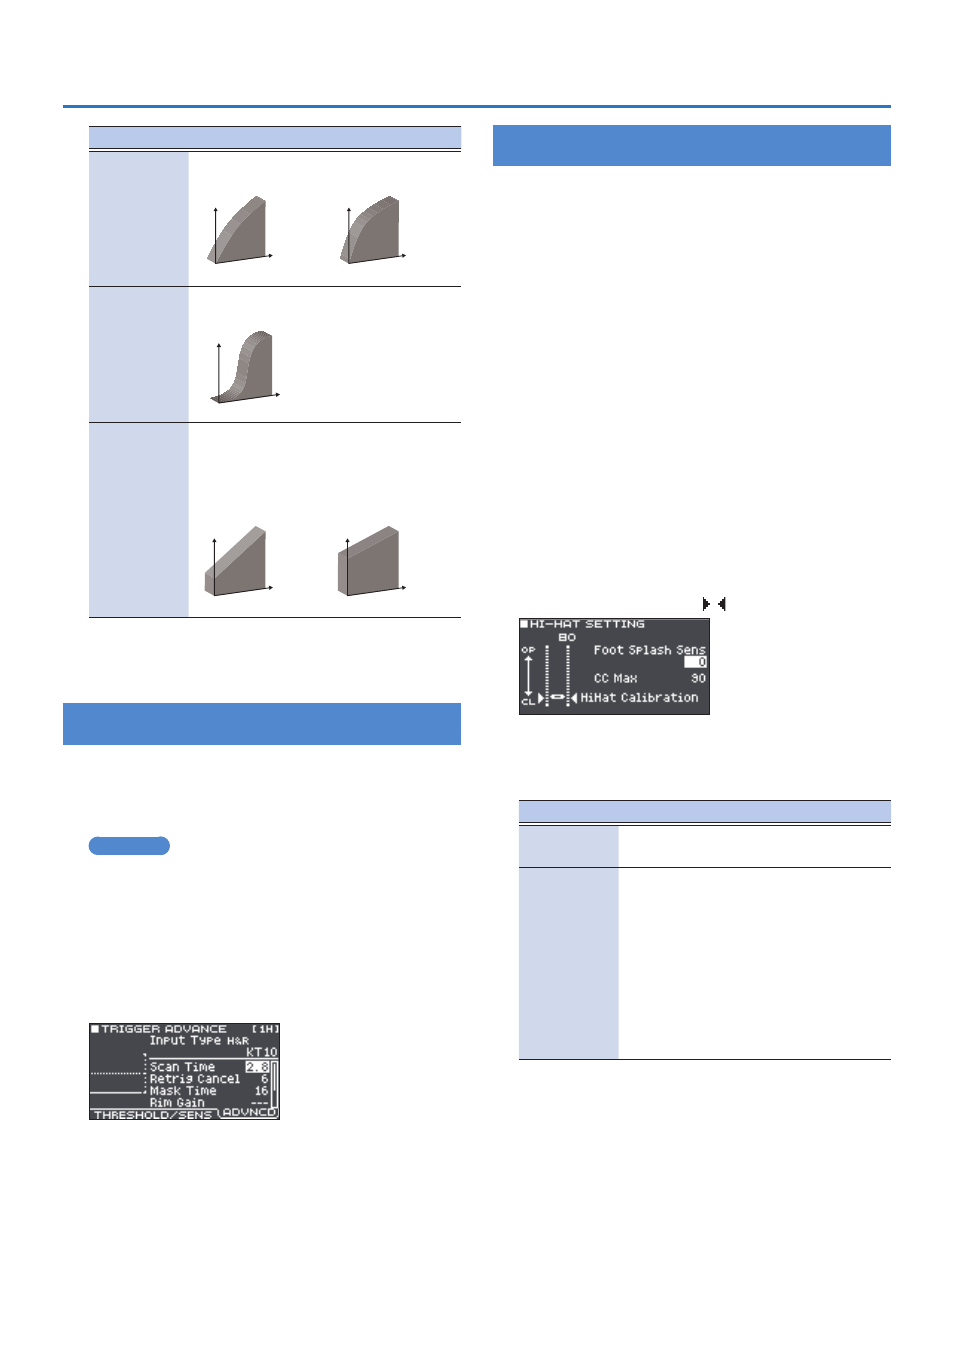
LOG1, LOG2
Compared to “LINEAR,” a soft playing
produces a greater change.
LOG2
LOG1
LOG2
LOG1
Volume
Volume
Playing
dynamics
Playing
dynamics
SPLINE
Extreme changes are made in response
to playing dynamics.
SPLINE
Volume
Playing
dynamics
LOUD,
LOUD2
Very little dynamic response, making it
easy to maintain strong volume levels.
In cases such as when using RT
series triggers, this lets you play at a
consistent level.
LOUD2
LOUD1
LOUD2
LOUD1
Volume
Volume
Playing
dynamics
Playing
dynamics
5
Press the [EXIT] button several times to
return to the KIT screen.
Detailed Trigger Settings
Edit these settings only when you need to make detailed
adjustments such as fine adjustment of the drum trigger
sensitivity or signal detection.
Normally there is no need to make these settings.
Reference
For details on the parameters that can be edited, refer to
“Data List” (PDF).
1
In the TRIGGER SETUP screen (p. 14), select
“PARAM” and press the [ENTER] button.
2
Press the [F3] (ADVNCD) button.
The TRIGGER ADVANCE screen appears.
3
Select the drum trigger that you want to
4
Use cursor buttons to select a parameter,
and use the [–] [+] buttons to edit the value.
5
Press the [EXIT] button several times to
return to the KIT screen.
Making Hi-hat Settings
If you’re using a VH-10 or VH-11 V-hi-hat (subsequently
called a “VH”), adjust the offset on the TM-6 PRO.
This adjustment is required in order to correctly detect
open, close, and pedal operations.
Before you continue, you must set the trigger type to “VH-
10” or “VH-11” (p. 14).
1
After making the hi-hat settings, release
your foot from the pedal, and while keeping
your foot off the pedal, turn on the power of
the TM-6 PRO.
2
Loosen the clutch screw and let the hi-hat
rest naturally on the motion sensor unit.
3
In the TRIGGER SETUP screen (p. 14), select
“HI-HAT” and press the [ENTER] button.
4
While reading the meter displayed on the
right side of the TM-6 PRO’s screen, adjust
the offset with the VH’s offset adjustment
screw.
Adjust the offset so that the
appear in the meter.
5
As necessary, use the cursor buttons to
select a parameter and use the [–] [+]
buttons to edit the value.
Parameter
Value
Explanation
Foot Splash
Sens
-10–+10
Amount of how easy to
make the foot splash
CC Max
90, 127
Amount of control
change that is
transmitted in stepping
the hi-hat pedal down
completely.
* There’s no need to
change this setting if
you’re performed only
with the TM-6 PRO and
the drum trigger.
6
Press the [EXIT] button several times to
return to the KIT screen.