Level selection, Options tab – Grass Valley NV9000 Web Suite v.1.2 User Manual
Page 60
50
Options Tab
Configuration Pages
Level Selection
Choose ‘Use All’ in the ‘Levels’ region if you want the matrix view to allow the use of all NV9000
levels.
The long list of levels that is normally available is the “universal set” of all “virtual” levels ever
used by NVISION series routers and includes levels that are probably not defined in your
router control system. This list is defined in the virtual levels table of NV9000-SE Utilities. You
can trim the list in NV9000-SE Utilities if you find it cumbersome.
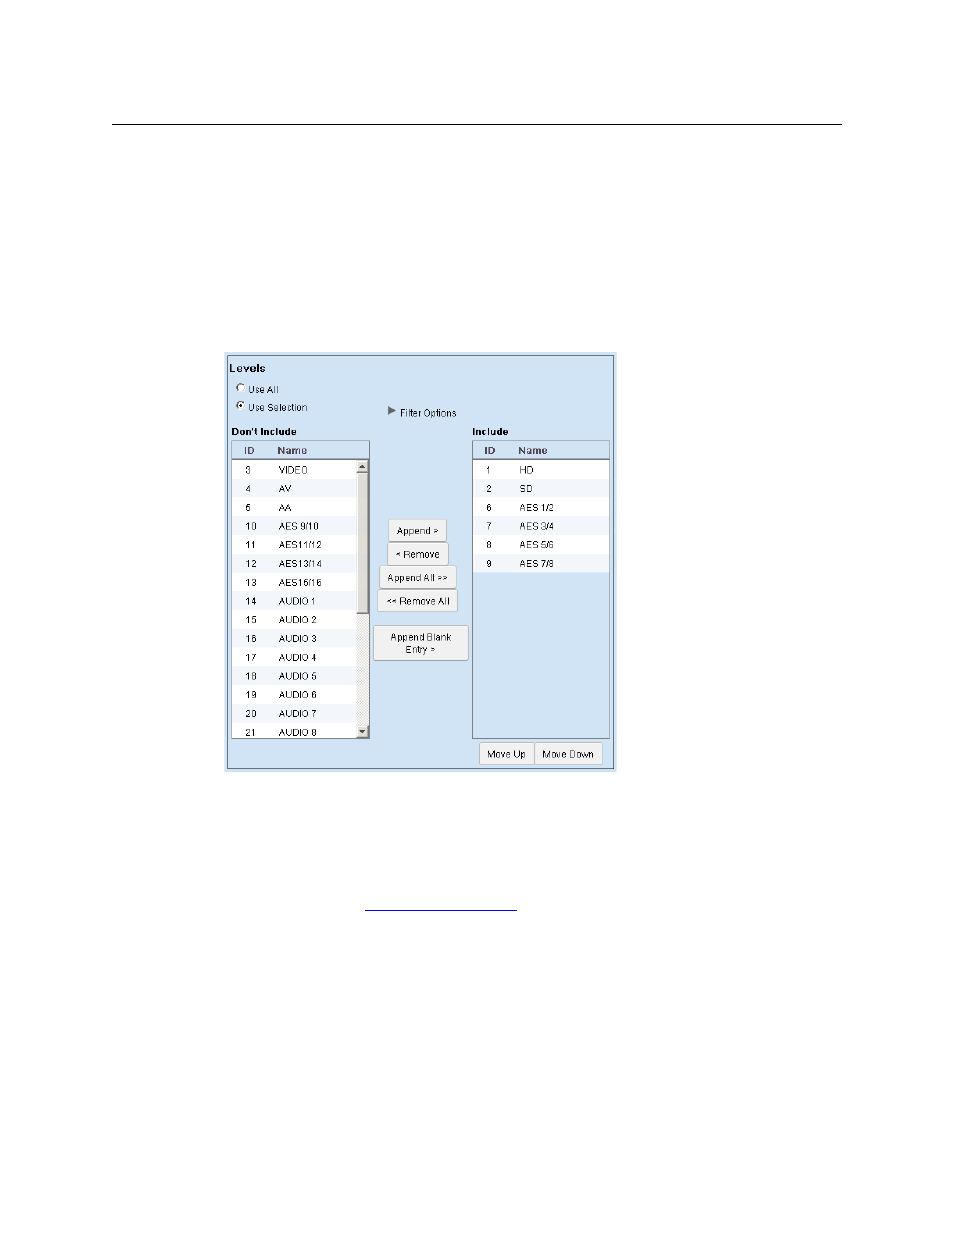
Choose ‘Use Selection’ in the ‘Levels’ region if you want to specify which levels are available to
the user. The ‘Levels’ region expands to allow you to form the level selection:
The items on the left
—
under “Don’t Include”—
are the levels that are not available in the matrix
view.
The items on the right
—
under “Include”—
are the levels that are available in the matrix view.
The filter options control what levels you can see (or select) in either list of levels. The filters do
not affect which levels are actually present in the lists. If you do not use the filters, all levels in the
list are displayed. See
, following.
To move levels from the “Don’t Include” list to the “Include” list, select one or more entries in the
“Don’t Include” list and click the ‘Append >‘ button or click ‘Append All >>’.
To move levels from the “Include” list to the “Don’t Include” list, select one or more entries in the
“Include” list and click the ‘< Remove‘ button or click ‘<< Remove All’.
Click ‘Append Blank Entry’ if you want to create a blank line that functions as a separator in your
‘Include’ list. The separator can help you organize the list. The separator also creates a blank row
in the table that is displayed in the page (or pages) of the tab you are editing.