Performing simple locks and protects, Breakaway and level mapping, Definitions – Grass Valley NV9000 Web Suite v.1.2 User Manual
Page 105: Breakaway and level, Mapping
95
NV9000 Web Suite
User’s Guide
Performing Simple Locks and Protects
To lock a destination, click the lock icon for the destination. The lock icon turns red and the high-
lighted button(s) for the destination also turn red.
To protect a destination, click the shield icon for the destination, as shown. The shield icon turns
yellow and the highlighted button(s) for the destination also turn yellow.
The number within the square is the database ID of the NV9000 user name for the user who
performed the lock or protect. The NV9000 user name is also displayed in the button when the
buttons are medium or large size. (See
To release a lock or protect, simply click the lock or protect icon for the appropriate destination.
To release a lock or protect, (1) you must be logged in as the person who made the lock or
protect and (2) your current user name must be the one you had at the time you made the
lock or protect. You cannot release a lock or protect made by someone else.
There is no forced release in the Web Suite.
Breakaway and Level Mapping
Breakaway and level mapping are slightly more complex than simple takes. They require a
dialog in which to specify the details of the breakaway or level mapping.
Definitions
In the Web Suite, breakaway is where you deselect at least one level for the take. Otherwise,
the take is all-level and is not treated as a breakaway.
In the Web Suite, level mapping is where at least one level of the source is routed to a differ-
ent level in the destination.
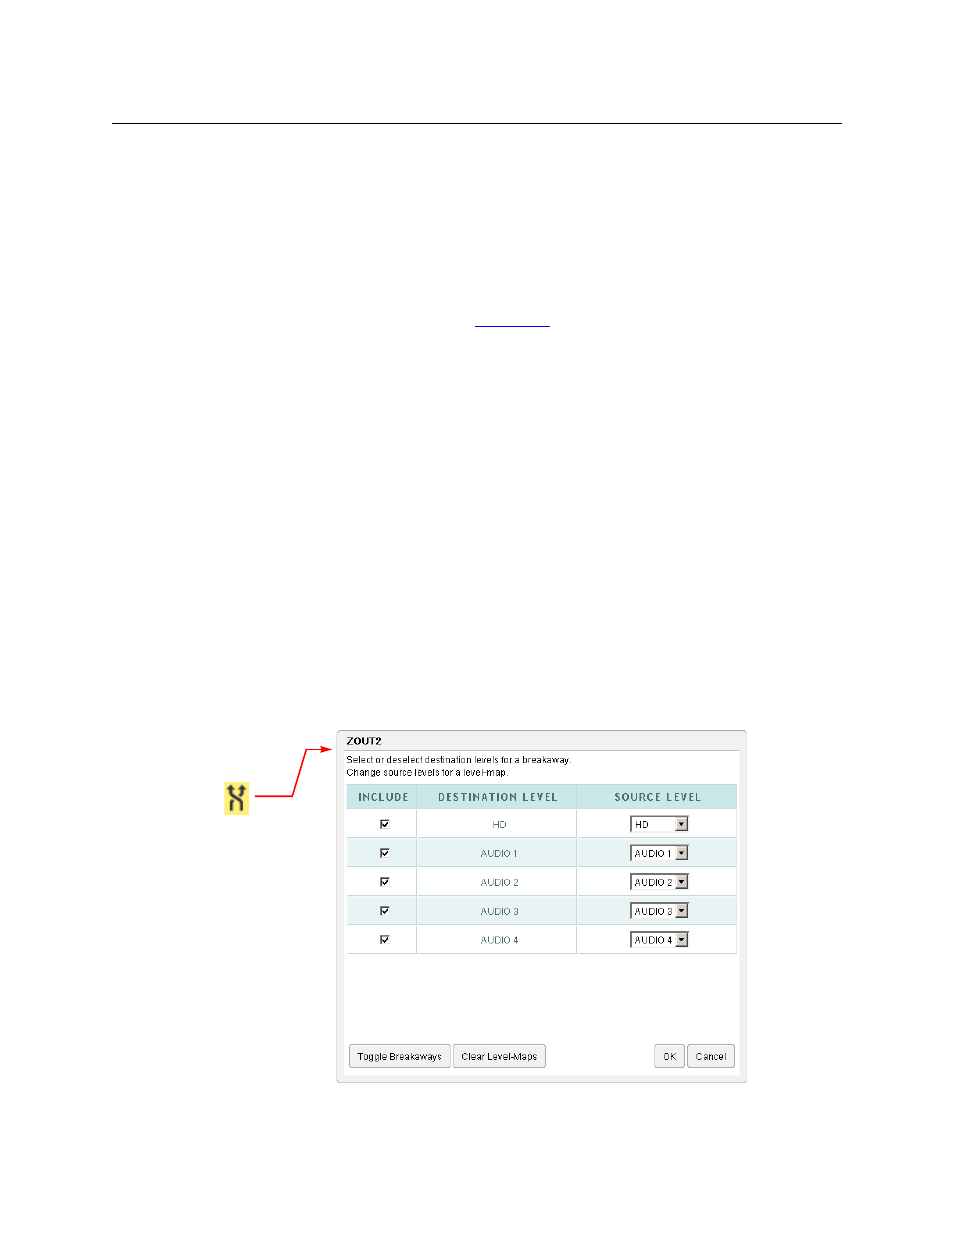
To open the breakaway/level-mapping dialog, click the double arrow icon for the destination to
which you want to route. The dialog appears:
The dialog lists all the levels that were configured for the matrix view.