Destination selection, Options tab – Grass Valley NV9000 Web Suite v.1.2 User Manual
Page 56
46
Options Tab
Configuration Pages
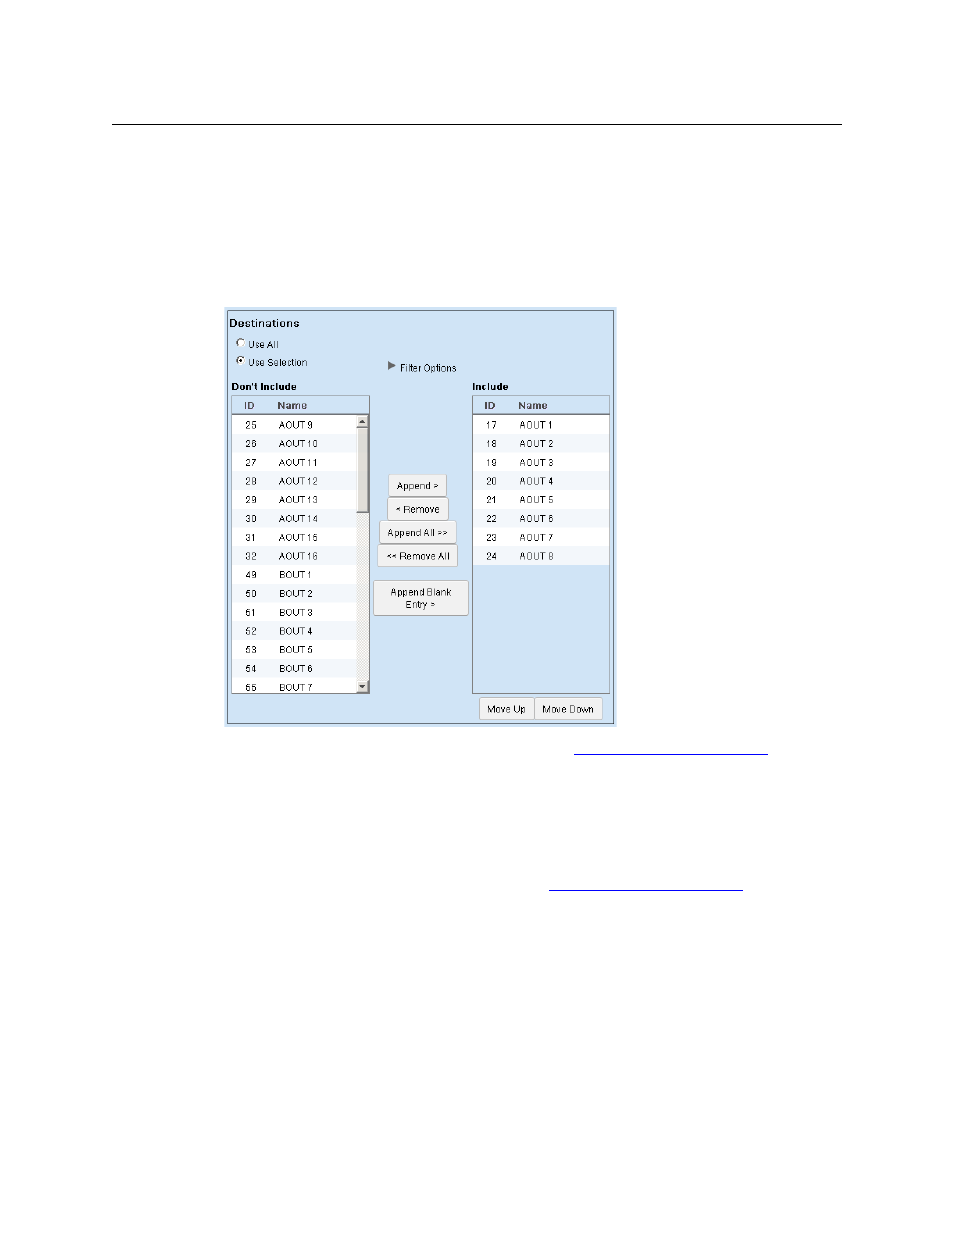
Destination Selection
Choose ‘Use All’ in the ‘Destinations’ region if you want the matrix view to use all NV9000 desti-
nations, regardless of what those destinations are. The NV9000 configuration could change
from time to time, adding or removing destinations, and your matrix view will adjust.
Choose ‘Use Selection’ in the ‘Destinations’ region if you want to specify which destinations the
are used in the matrix. The ‘Destinations’ region expands to allow you to form the destination
selection:
The ‘Use Selection’ fields include filtering options. See
Filter Options for Destinations
, following.
The items on the left
—
under “Don’t Include”—
are the destinations that are not used in the
matrix view.
The items on the right
—
under “Include”—
are the destinations that are used in the matrix view.
The filter options control what destinations you can see (or select) in either list of destinations.
The filters do not affect which destinations are actually present in the lists. If you do not use the
filters, all destinations in the list are displayed. See
Filter Options for Destinations
, following.
To move destinations from the “Don’t Include” list to the “Include” list, select one or more entries
in the “Don’t Include” list and click the ‘Append >‘ button. (Or click ‘Append All >>’.)
To move destinations from the “Include” list to the “Don’t Include” list, select one or more entries
in the “Include” list and click the ‘< Remove‘ button. (Or click ‘<< Remove All’.)
Click ‘Append Blank Entry’ if you want to create a blank line that functions as a separator in your
‘Include’ list. The separator can help you organize the list. The separator also creates a blank row
in the table that is displayed in the page (or pages) of the tab you are editing.
Use the ‘Move Up’ and ‘Move Down’ buttons under the “Include” list to reorder the destinations
(i.e., the table rows). Select one or more destinations in the “Include” list and click ‘Move Up’ or
‘Move ‘Down’ as appropriate to create the ordering you want.