Level display, Performing simple takes, Level display performing simple takes – Grass Valley NV9000 Web Suite v.1.2 User Manual
Page 104
94
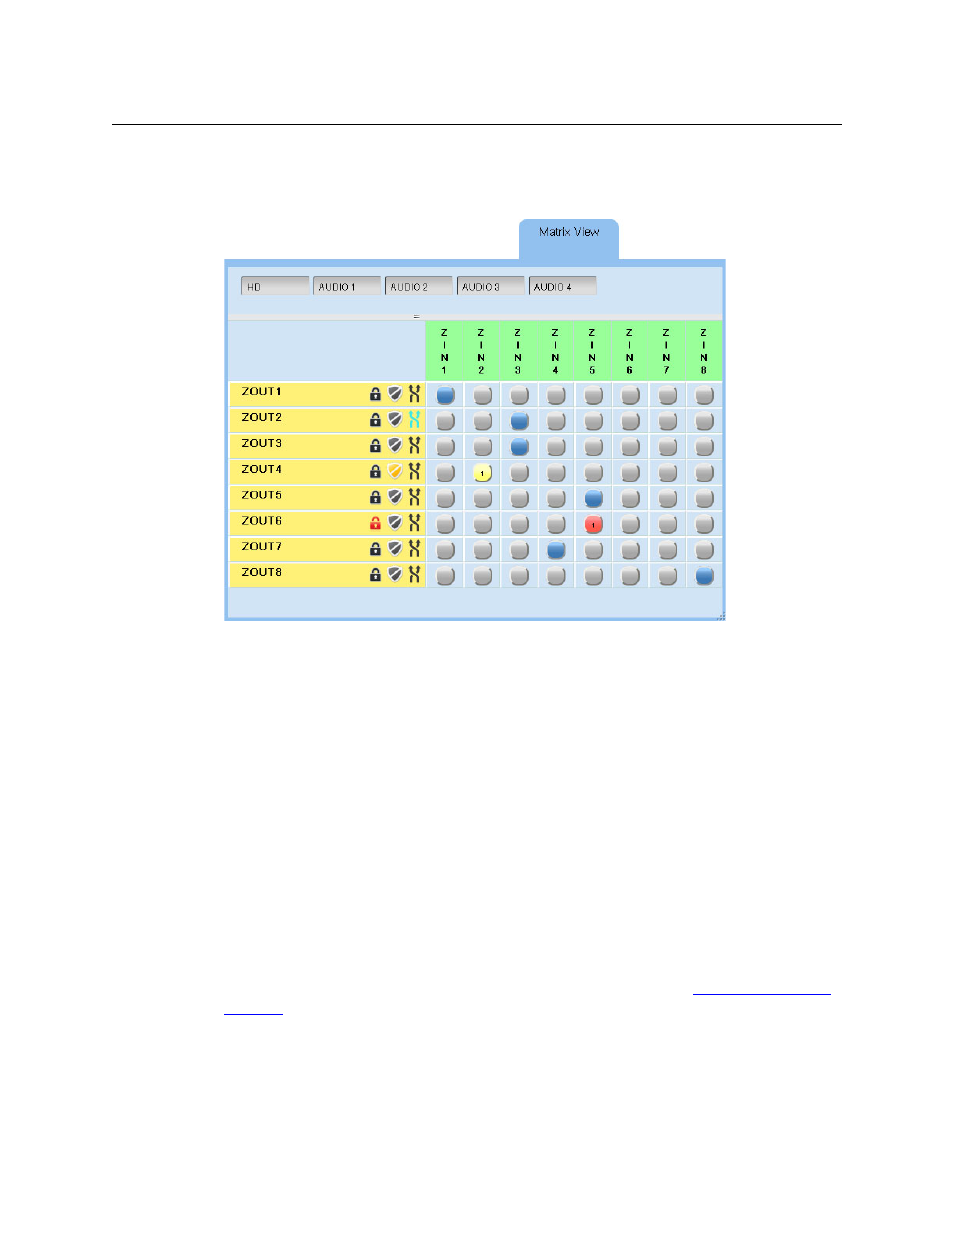
Matrix View
Summary
Figure 7-1, on the previous page, shows that system in an initial state, which is a diagonal matrix.
That is, ZIN1 is routed to ZOUT1, on all levels, and so on, through ZIN8 and ZOUT8.
Figure 7-2 shows the matrix after a few takes, locks, and protects:
Fig. 7-2: Matrix View (Showing Locks, Protects, and Level-Mapping)
Level Display
An option among the page preferences causes the page to show buttons for the levels (that
were selected for the page) at the top of the page. Each of these buttons is a toggle that selects
or deselects a level for which to display crosspoint information. When the level is selected, the
selection button is dark gray; when the level is not selected, it is light gray.
Each button in the matrix is highlighted if a route exists at that point for at least one of the levels
selected for display.
The level buttons do not control on which levels a take, a lock, or a protect is performed.
They merely affect which levels are displayable. Use the breakaway feature to select levels
for takes, locks, and protects.
Performing Simple Takes
To perform a simple take, just click the button in the row for the destination and the column for
the source. (A breakaway or level mapping is slightly more complex. See
on page 95.) The button turns blue
—
if the levels on which the take occurred are
displayed.