Erasing songs, Protecting songs, Erasing songs protecting songs – Teac DP-24 User Manual
Page 41: 5 - song management
TASCAM DP-24
41
Erasing songs
You can erase songs. You can also erase multiple songs at
once. You might want to erase unneeded songs if the SD
card starts to run out of space.
1. When the recorder is stopped, press the MENU
button to open the
MENU
screen.
2. Use the JOG/DATA dial or the CURSOR (5/b/g/t)
buttons to select (green highlight)
SONG
, and then
press the F4 (t) button.
The
SONG LIST
screen appears.
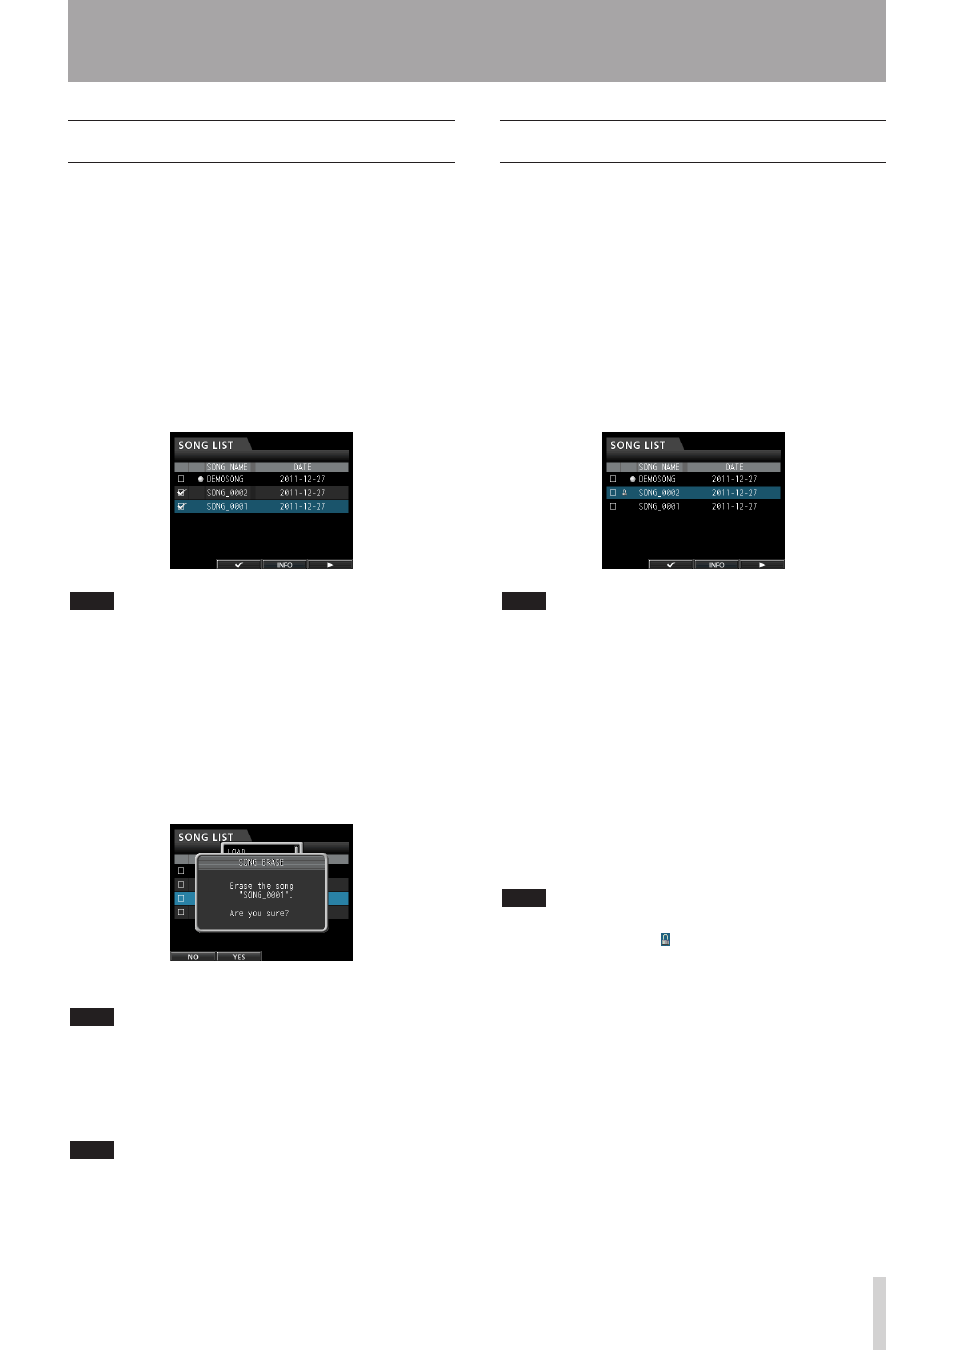
3. Select (blue highlight) the song you want to erase
and then press the F2 (4) button. To erase multiple
songs, select all songs you want to erase.
NOTE
To remove the check mark 4 from a check box, press
the F2 (4) button again while the song is selected (blue
highlight).
4. Next, press the F4 (t) button to open the
corresponding sub-menu. Use the JOG/DATA dial
or the CURSOR (5/b) buttons to select the item
ERASE
from the sub-menu, and then press the F4
(t) button.
A pop-up message appears asking you to confirm the
erase.
5. Press the F2 (
YES
) button to perform the erase.
NOTE
To cancel the song erase operation, press the F1 (
NO
)
button instead of the F2 (
YES
) button.
6. When the song erase operation is completed, the
pop-up window disappears and the display returns
to the
SONG LIST
screen.
NOTE
The MUSIC folder must always have at least one song
stored. Therefore, one song will be automatically created
when you insert or format a card.
5 - Song Management
Protecting songs
If you protect a song, editing, recording and erasing of
that song is prevented.
1. When the recorder is stopped, press the MENU
button to open the
MENU
screen.
2. Use the JOG/DATA dial or the CURSOR (5/b/g/t)
buttons to select (green highlight)
SONG
, and then
press the F4 (t) button.
The
SONG LIST
screen appears.
3. Select the (blue highlight) song you want to
protect and then press the F2 (4) button. To
protect multiple songs, select all songs you want to
protect.
NOTE
To remove the check mark 4 from a check box, press
the F2 (4) button again while the song is selected (blue
highlight).
4. Next, press the F4 (t) button to open the
corresponding sub-menu. Use the JOG/DATA
dial or the CURSOR (5/b) buttons to select the
PROTECT
item from the sub-menu, and then press
the F4 (t) button.
The song protect function is enabled for the selected
song.
5. When the song protect operation is completed, the
pop-up window disappears and the display returns
to the
SONG LIST
screen.
NOTE
In a song list used to copy, erase or perform other
•
functions, a lock icon will appear next to protected
songs.
If you try to perform a prohibited operation
•
(edit, record, erase) on a protected song, a
Song
Protected
message will appear and the operation
will be canceled.
To remove the protection from a song, follow the same
•
procedure above.