Save as – Measurement Computing eZ-TOMAS version 7.1.x User Manual
Page 14
eZ-TOMAS & eZ-TOMAS Remote
988490
Monitoring a Machine 2-3
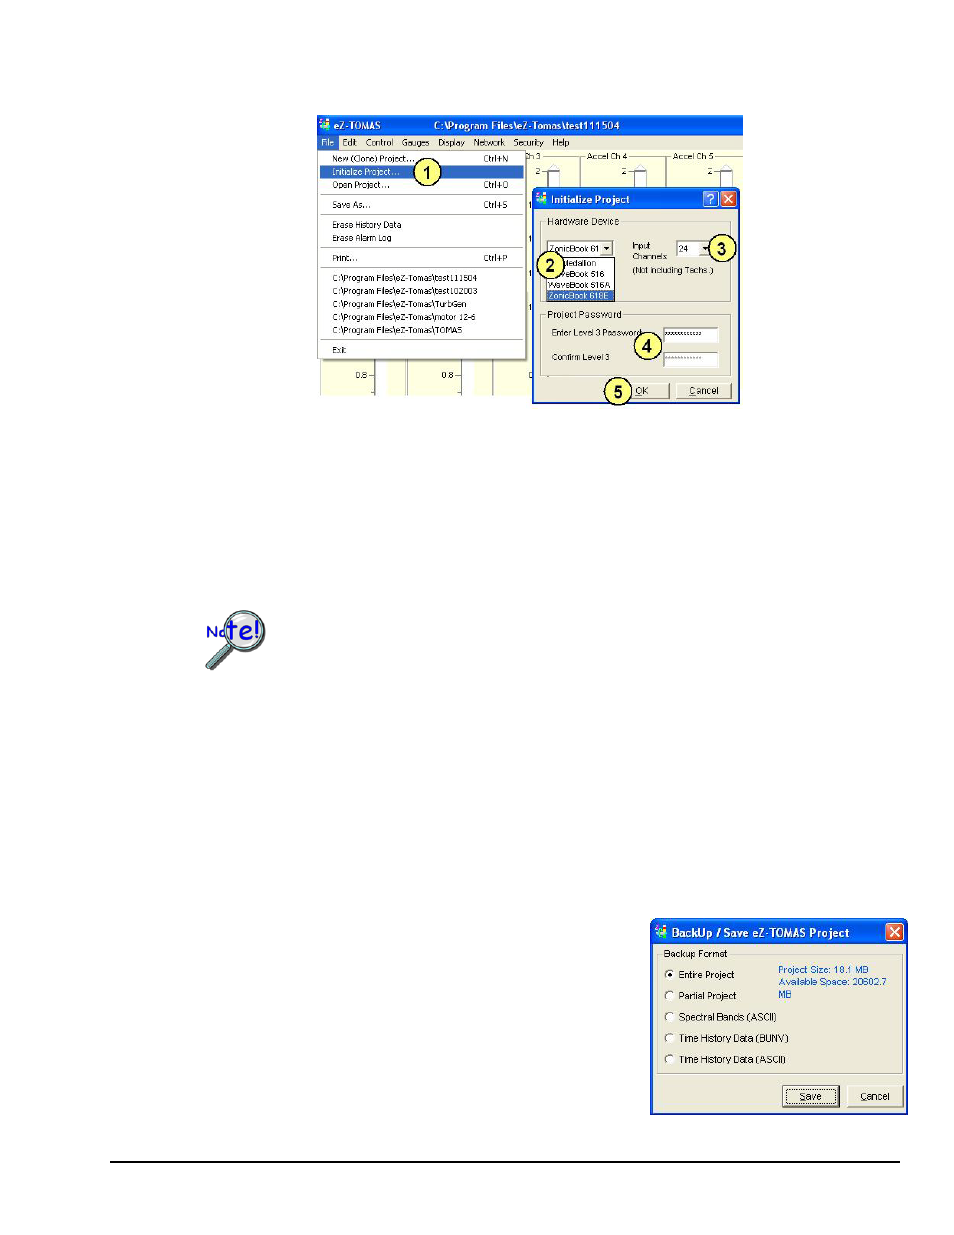
Complete the following steps to initialize a project. Note that the step numbers correspond to the numbers
in the figure.
1. From the File pull-down menu, open “Initialize Project.” An Initialize Project dialog will open.
2. Select the Hardware Device (e.g. 640u, ZonicBook/618E) from the associated pull-down list.
3. Select the number of analog input channels from the associated pull-down list. For
ZonicBook/618E do not count the separate tach channels as input channels.
4. If applicable, enter and confirm the project password.
5. Click the
Note that the last section of the preceding chapter illustrates an example for 24 channels.
Depending on the data acquisition hardware, eZ-TOMAS will automatically enable gauges
for the first 8 or 10 channels. If your device has more channels that you want to display you
will need to enable them manually using the Gauge Display Preferences window (accessed
via the Edit pull-down menu). From the Gauge Display Preferences window, ensure there is
a checkmark in the “Visible” column for each channel that you want to display. Remove
the checkmark for those you don’t want to display. The window is discussed on page 3-21.
Save As
The Save As option allows you to backup history files in a binary file format, or export files in an ASCII
file format. This command opens the Backup/Save eZ-TOMAS Project window. The options in this
window change as you make selections. You can backup and export full or partial files.
Note:
The disk space required to backup the selected records is displayed on the left panel.
Entire Project
The Entire Project option is only available when data
acquisition is turned off. Entire Project performs a file copy
operation to the specified Windows Directory. This backup
method is the fastest.
Save As… Entire Project