Wavebook/516e – Measurement Computing WaveBook rev.5.3 User Manual
Page 139
WaveBook/516E
Observe the Cautions and the important note on page 9-1 prior to beginning
this fuse replacement procedure.
1. If you have not already done so, turn OFF the power to, and UNPLUG the WaveBook/516E
and all connected equipment. Remove all signal I/O lines from the unit.
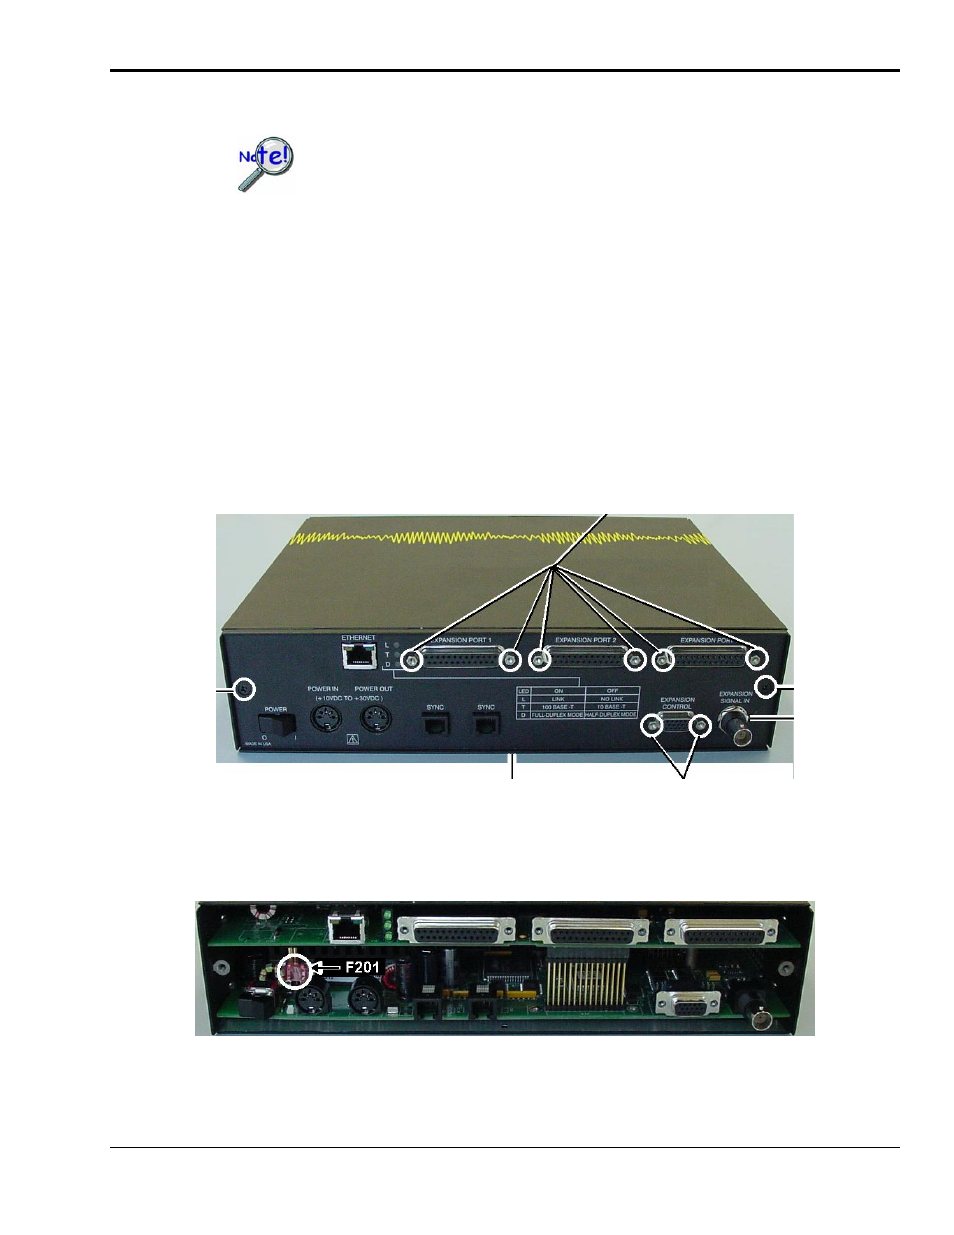
2. Using a Phillips screwdriver, remove the two Rear Panel Side Screws and the Bottom Panel Screw
from the WaveBook/516E. The following figure shows screw locations.
3. Using a 3/16 inch nut-driver, remove the six # 4-40 hex Jackscrews from the EXPANSION PORT
connectors.
4. Using a 3/16 inch nut-driver, remove the two # 4-40 hex Jackscrews from the EXPANSION
CONTROL connector.
5. Using a wrench with a 9/16” deep-well socket, remove the BNC Nut from the EXPANSION
SIGNAL IN BNC connector.
6. Remove the BNC Washer from the base of the EXPANSION SIGNAL IN BNC connector.
Expansion Port Jackscrews
Rear Panel
Side Screw
BNC Nut and
BNC Washer
Rear Panel
Side Screw
Bottom Panel Screw Expansion Control Jackscrews
7. Remove the Rear Panel from the main chassis (see following figure).
WaveBook/516E, Rear Panel Removed
8. Locate fuse F201. It is located near the rear panel edge, close to the DIN5 POWER IN connector.
WaveBook User’s Manual
877697
Fuse Replacement 9-3