Ethernet ce kit, Introduction, Connect the ground line – Measurement Computing ZonicBook 618E rev.3.4 User Manual
Page 83: Ethernet ce kit installation instructions, Caution

Ethernet CE Kit Installation Instructions
Introduction
The Ethernet CE Kit includes three ferrite clamp-on inductive collars to reduce EMI. It also includes a
ground-line for safety. The kit is simple to install and consists of the following components.
•
3 Ferrite Inductive Collars with Tie-wrap, p/n L-8-1
•
1 Ground-Line, p/n CA-250
•
4 Washers, #8 External Tooth, p/n WA-5 – used to lock screws (2 washers per screw)
•
1 Screw, #8-32x1/4 Phillips Pan-head, p/n HA-154-4 – used to secure the ground-line to a
threaded splice-plate hole on the data acquisition device
•
1 Screw, #6-32x5/16 Phillips Pan-head, p/n HA-2-5 – used to secure the ground-line to the PC
Connect the Ground Line
This ground line connection procedure is only required if you are not using a shielded
Ethernet cable [e.g., IOtech’s CA-242] connected to an earth-grounded PC.
CAUTION
Use care when connecting the ground line to the acquisition device and the PC.
The use of screws which are too long can cause damage to circuitry.
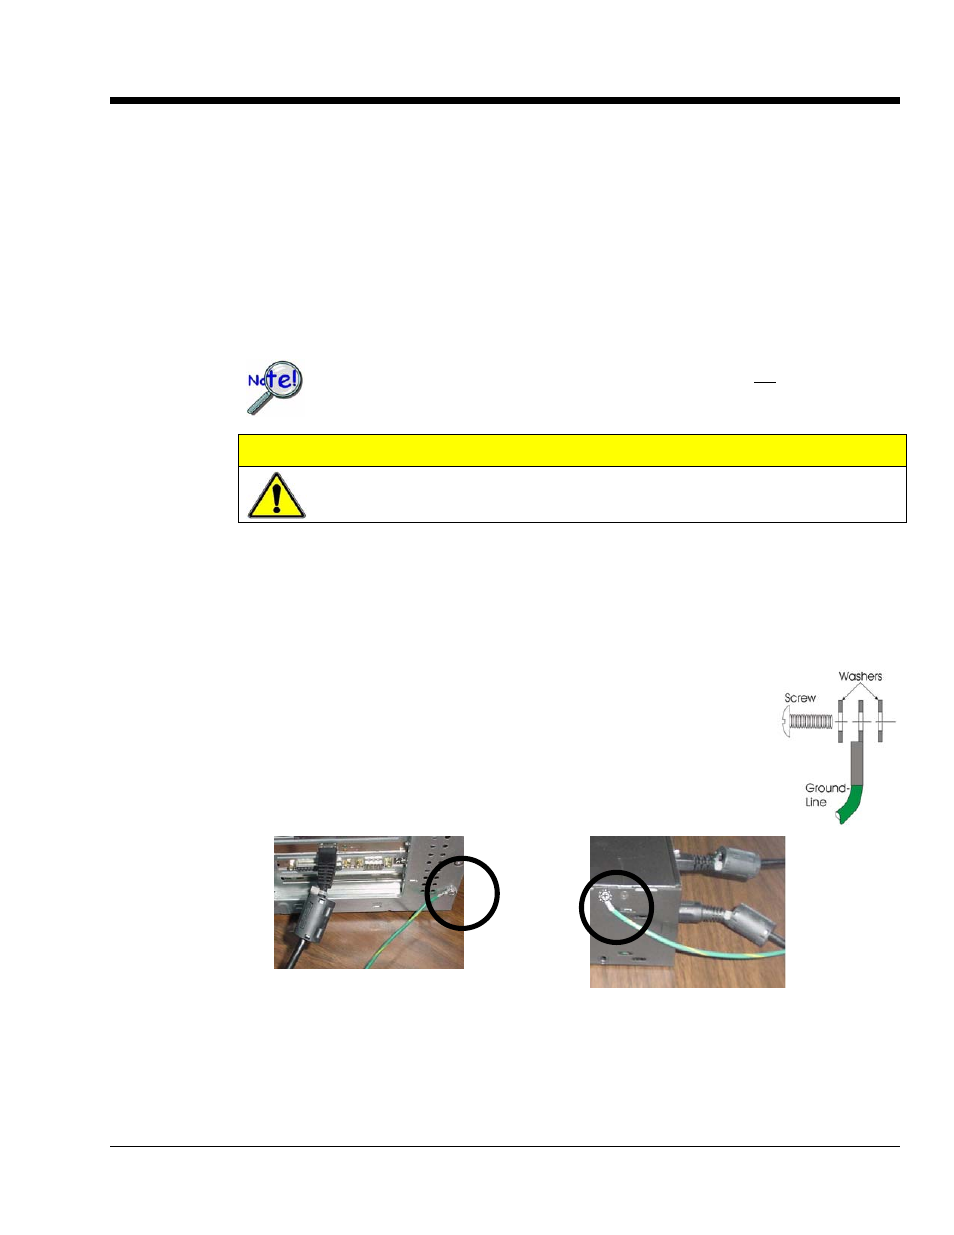
1. If using a desktop or tower PC, (a) remove a screw that secures the computer casing to the
chassis. The first photo shows a good connection point for the PC ground. (b) Use the #6-32x5/16
screw and two #8 tooth washers, orientated as illustrated, to secure one end of the ground line to
the PC chassis.
If using a notebook (laptop) PC, connect one end of the ground-line to a known earth ground.
Depending on the ground chosen, you may need to use a screw other than the one supplied.
2. On the data acquisition device, remove one of the four protective bumpers
(protective ears).
3.
Using the #8-32x1/4 screw and two #8 tooth washers, orientated as
illustrated to the right, secure the free end of the ground line to the chassis of
the data acquisition device. Note that you will be making use of one of the
threaded holes which was used to secure the bumper. The second photo
below shows such a connection.
Ground Line on PC Chassis
Ground Line on Acquisition Device
“Protective Bumper” shown removed.
4. Re-attach the protective bumper to the acquisition device.
929195
p/n
1077-0901
, rev
2
.
0
