2 selecting scanner mode, 3 selecting the file format – Pitney Bowes RISO ComColor Printer User Manual
Page 134
3-4
ComColor Series User’s Guide 03
●
2 Selecting Scanner Mode
1
Press [Scanner] on the mode
screen.
● Press the MODE key to display the mode
screen.
● You may have to log in before the scanner
mode screen is displayed.
● Buttons for modes that the current user is not
authorized to use are grayed out.
● When using an optional IC card reader, you
can login by holding the IC card over the card
reader.
● The mode buttons displayed vary depending
on the optional equipment connected.
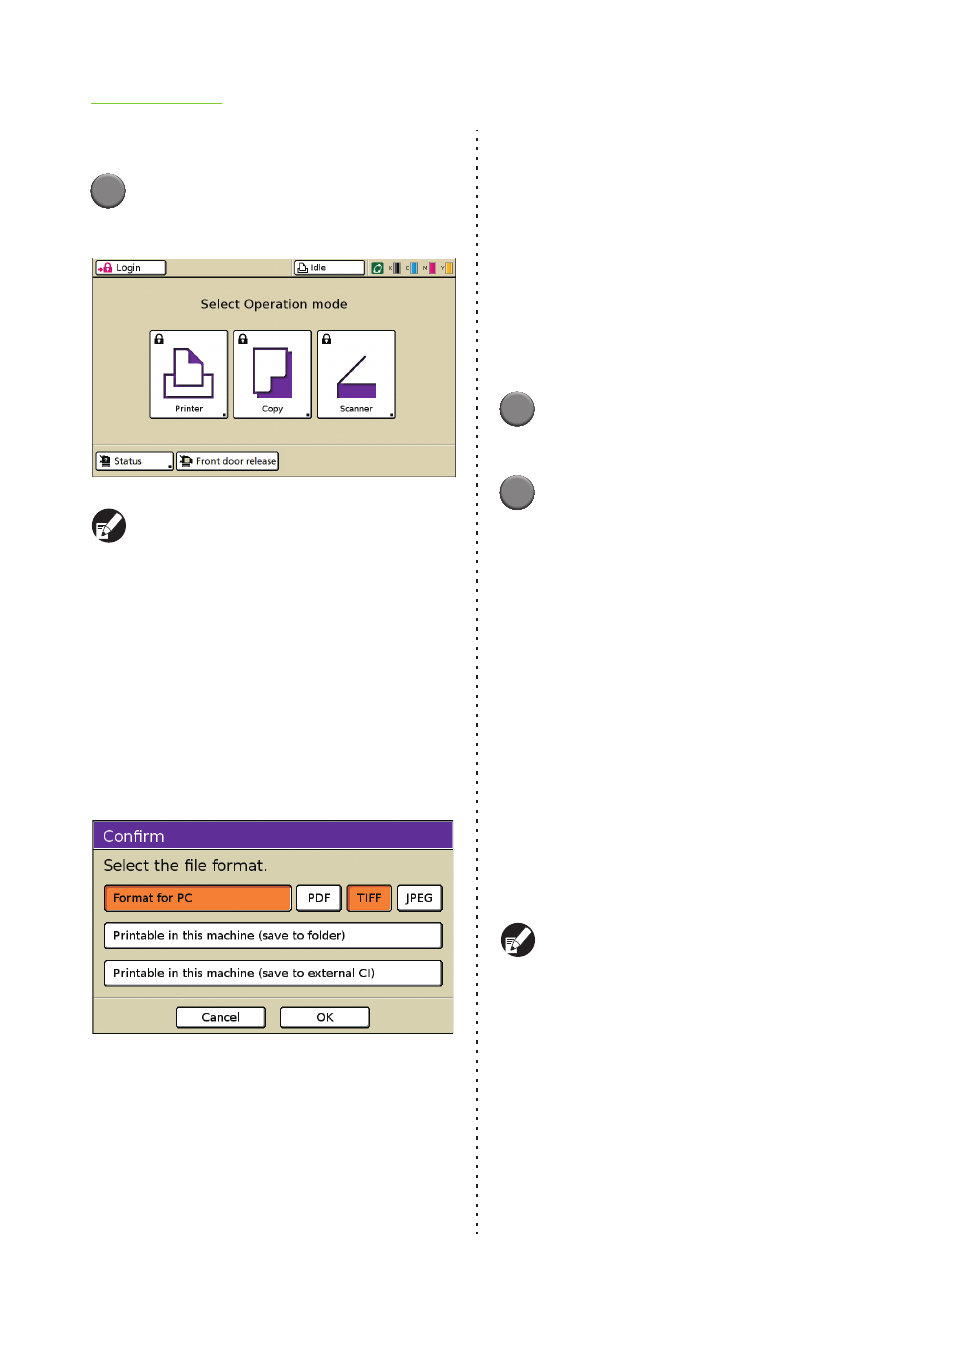
The screen for confirming the scanned data file
format is displayed.
●
3 Selecting the File Format
■ [Format for PC]
Select the file format (PDF, TIFF, or JPEG). You can
use the saved data as follows.
• Save data to the internal hard disk
(Download using RISO Console.)
• Save data to a USB flash drive
• Save data to a computer on the network
• Attach data to an e-mail message
1
Press either [PDF], [TIFF], or
[JPEG].
2
Press [OK].
The scanner mode screen is displayed.
■ [Printable in this machine (save to
folder)]
The [Save to folder] screen is displayed.
Data is saved in folders on the machine and can be
printed from the machine.
See "Save to folder" (p. 2-24) in "Copy" for details.
■ [Printable in this machine (save to
external CI)]
[Printable in this machine (save to external CI)] is
displayed when the optional external controller
(ComColorExpress IS1000C/IS950C) has been
connected to this machine. See "Save to archive"
(p. 2-25) in "Copy" for details.
The [Confirm] screen may not be displayed,
depending on how the administrator has
configured the settings. In this case, configure
[File format] on the scanner mode screen.
See "File format" (p. 3-9) for details.