Elenco Snap Circuits Motion User Manual
Page 73
Build the circuit and turn on the slide switch (S1). Slowly move the lever
on the adjustable resistor (RV2) across its range while watching the
brightness of the red/yellow & color LEDs (D8 & D10).
Project 150
Transistor
Project 149
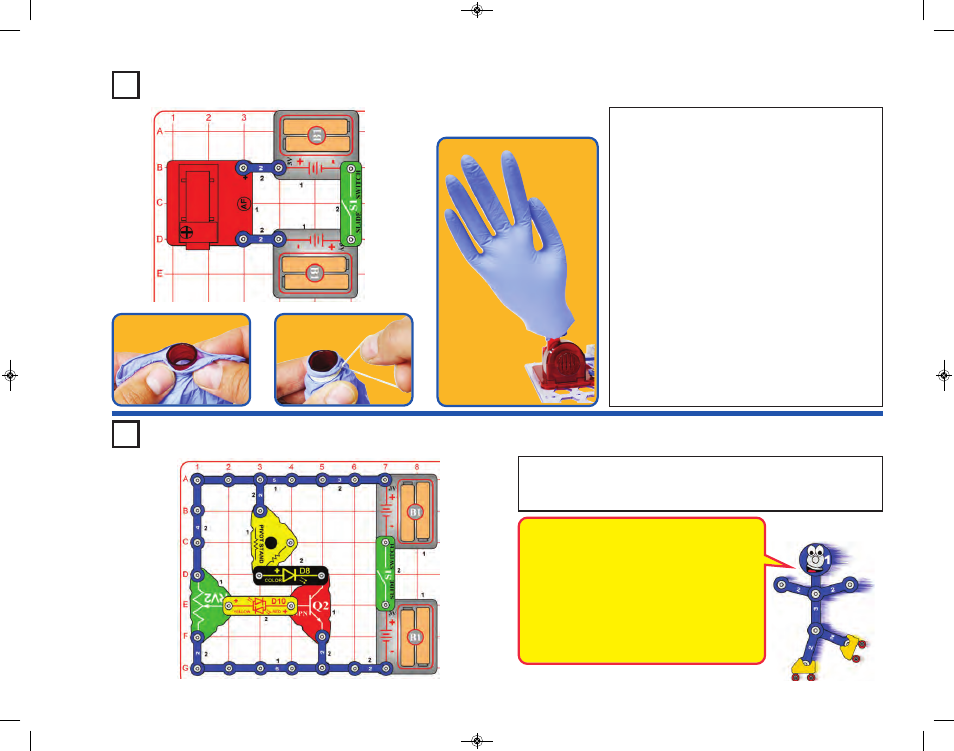
Inflator
-72-
This project requires use of some household
materials. Build the circuit shown, then get an adult
to help you attach a latex glove (not included) or
similar to the spout for the air fountain using a rubber
band (one is included, or use one from your home),
as shown. Place the spout and glove on the air
fountain and turn on the slide switch (S1). Air should
be blowing into the glove, making it inflate. You may
be able to “wave” the glove by turning the slide switch
on and off.
Be sure your rubber band makes a good seal on the
spout, that allows air to flow into the glove without
much escaping. You may have to try it several times
to get it working properly.
You can try this with different materials around your
home. Do not use a balloon, because the air fountain
will not have enough air pressure to inflate it.
WARNING: Be careful not to use anything that could
get sucked into the air intake on the side of the air
fountain as this may damage the air fountain.
Transistors, such as the NPN transistor (Q2),
can amplify electric currents. In this circuit, the
adjustable resistor controls a small current
going to the transistor through the red/yellow
LED. The transistor uses this small current to
control a larger current through the color LED.
At some RV2 settings, the control current is too
small to light the red/yellow LED, but the
transistor-amplified is large enough to light the
color LED.
Wrap glove
around spout
Wrap rubber band
around glove
➧
➧
Place spout onto
Air Fountain (AF)
SCM-165_Manual_061114.qxp_Layout 1 7/7/14 11:29 AM Page 73