Project 68 adjustable motor & more, Project 69 adjustable dancing ball – Elenco Snap Circuits Motion User Manual
Page 45
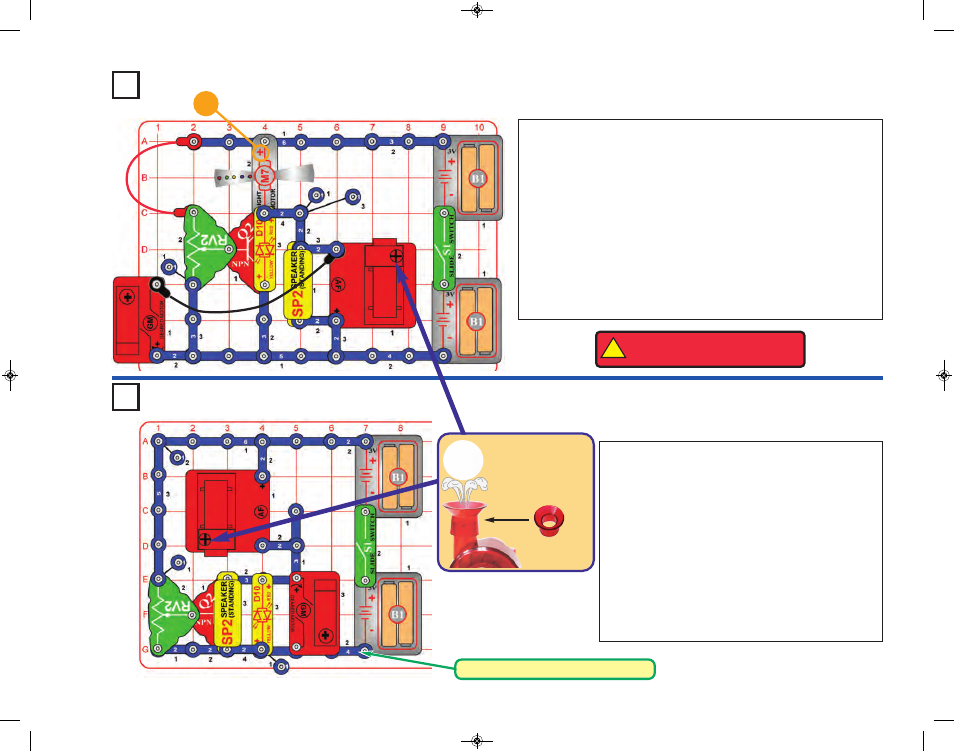
Project 68
Adjustable Motor & More
Build the circuit as shown, being sure that the red & black jumper wires
will not touch the fan on the light motor (M7). Place the spout and ball
on the air fountain (AF). If desired, place the merry-go-round base on
the geared motor (GM), but this will it more difficult to adjust RV2.
Turn on the slide switch (S1) and watch the show! Use the lever on the
adjustable resistor (RV2) to adjust the brightness of the LEDs in the
light motor (M7) and red/yellow LED (D10), and also to just the power
to the geared motor and air fountain. For best effects, dim the room
lights. The ball may spin on the air fountain but may not rise into the
air.
Be sure to try this at very low light levels (where the motor is barely
spinning), as there some cool effects. If the fan on the light motor
doesn’t spin, try giving it a push to get started.
!
WARNING:
Moving parts. Do not
touch the fan during operation.
Project 69
Adjustable Dancing Ball
Build the circuit as shown. If desired, place the merry-
go-round base on the geared motor (GM), Place the
spout and ball on top of the air fountain (AF), and turn
on the slide switch (S1). Use the lever on the
adjustable resistor (RV2) to control the air flow, so the
ball floats in the air. RV2 can be used to adjust how
high the ball is floating, but at stronger air flows the ball
becomes unstable and may fall out.
New alkaline batteries are recommended for this
project.
You may also remove the ball and instead attach a
latex glove or something else that can be inflated, as
described in project
7
(Inflator).
+
-44-
Note: this is a 4-snap wire on level 2.
Place the spout
on top of the air
fountain and the
ball in the air flow.
Spout
SCM-165_Manual_061114.qxp_Layout 1 7/7/14 11:29 AM Page 45