Project 21 mini car project 23, Project 22 mini car with control light, High speed car – Elenco Snap Circuits Motion User Manual
Page 25
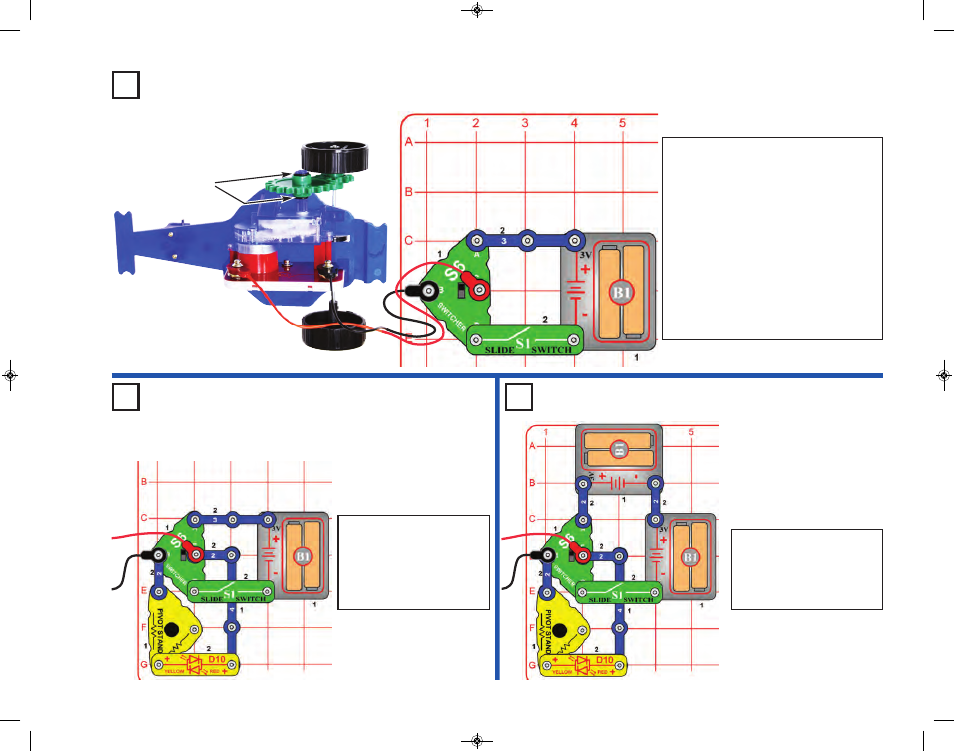
Build the circuit as shown. Mount the
1.75” gear on the geared motor (GM) with
the rubber rings to keep it from sliding out
of position, place it on the mini car frame,
and connect it to the circuit using the red
& black jumper wires. Turn on the slide
switch (S1), and then use the switcher
(S6) to make the mini car go forward,
backward-turning, or stop. You can follow
the car around the room or table carrying
the base grid while using S6 to control it.
Be careful to follow it closely so you don’t
over-extend the jumper wires, and to keep
it from falling off the table.
Project 21
Mini Car
Project 23
Modify the preceding circuit
to use a second battery
holder (B1), as shown. The
car is much faster now, but
more difficult to control.
Project 22
Mini Car with Control Light
Modify the preceding circuit
to include the red/yellow
bicolor LED (D10), which
lights yellow when the car is
going forward, or red when
it goes backward-turning.
High Speed
Car
-24-
Rubber rings
SCM-165_Manual_061114.qxp_Layout 1 7/7/14 11:29 AM Page 25