Project 144 finger touch light, Project 145 slow off light, Project 146 3-position switch – Elenco Snap Circuits Motion User Manual
Page 71
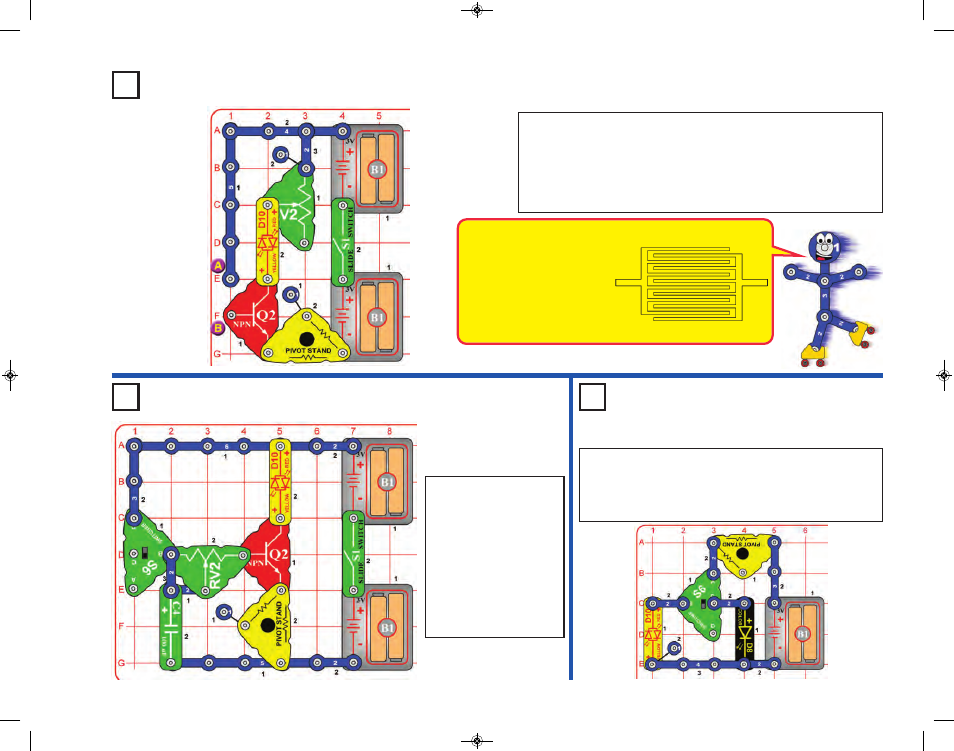
Project 144
Finger Touch Light
Set the adjustable resistor (RV2) to the top position, and turn on the
slide switch (S1). Turn on the red/yellow bicolor LED (D10) by touching
your fingers between points A & B. You may need to press hard or wet
your fingers to make the LED bright.
You can adjust the LED brightness using the lever on RV2, or replace
the red/yellow LED with the color LED (D8).
Project 145
Slow Off Light
Set the switcher (S6) to
the top position and turn
on the slide switch (S1).
The red/yellow bi-color
LED (D10) is on. Now set
S6 to the middle position
and wait; the LED goes
off after a little while. The
adjustable resistor (RV2)
can adjust how quickly
the light goes out.
Project 146
3-Position Switch
-70-
Electricity flowing through
your fingers is amplified by
the NPN transistor (Q2), and
is enough to turn on the LED.
If the contacts at points A & B
were interweaved as shown
below then you could make
this work with just one finger.
The switcher (S6), has 3 positions. In this circuit, one
position turns on the red/yellow LED (D10), one turns on
the color LED (D8), and one turns both LEDs off.
You can change the color on D10 by reversing its orientation.
SCM-165_Manual_061114.qxp_Layout 1 7/7/14 11:29 AM Page 71