Project 60 triple lights motion, Project 61 double lights motion – Elenco Snap Circuits Motion User Manual
Page 40
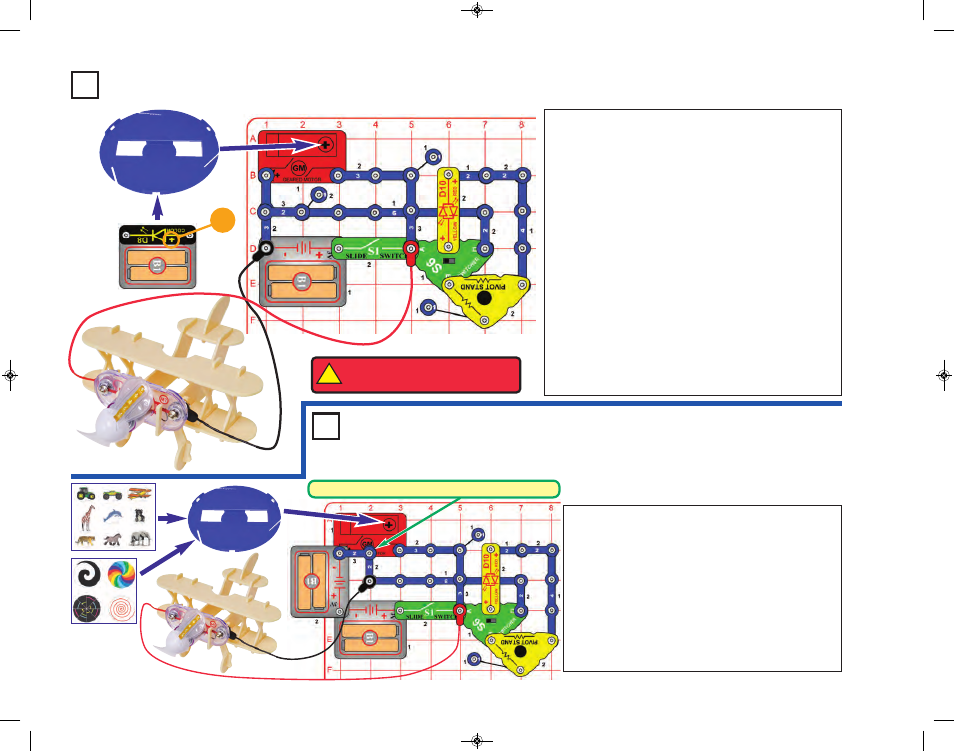
Assemble the airplane using the instructions on page 5,
install the light motor (M7) into the front of it, build the
circuit shown here, and connect the red & black jumper
wires to the light motor (red to “+”). Place the airplane on
a smooth surface and spread out the jumper wires and be
sure they will not interfere with the fan on the light motor.
Mount the merry-go-round base onto the shaft on the
geared motor (GM). Next, place the color LED (D8)
directly across the snaps on the other battery holder (B1)
as shown; the color LED starts flashing. Now place that
battery holder into the slot in the merry-go-round base.
Turn on the slide switch (S1).
The color LED spins, shining its light around the room like
a lighthouse. The fan on the light motor spins and lights
dimly, and the airplane slowly moves around due to
vibration. Move the switcher (S6) switch back and forth to
make the red/yellow bicolor LED (D10) change colors.
Disconnect the color LED from the battery holder when
you are finished, to avoid draining your batteries.
Project 60
Triple Lights Motion
!
WARNING:
Moving parts. Do not
touch the fan during operation.
Modify the preceding circuit by removing the color LED
(D8) and adding the second battery holder (B1) to the
circuit as shown. Either insert some of the cardboard
figures into the 3 slots on the edge of the merry-go-
round base, or install one of the colored discs into the
base. Mount the merry-go-round base onto the shaft on
the geared motor (GM). Turn on the slide switch (S1).
The fan on the light motor spins and lights, and the
airplane slowly moves around due to vibration. Move
the switcher (S6) back and forth to make the
red/yellow bicolor LED (D10) change colors.
-39-
+
Project 61
Double Lights Motion
Note: there is no middle snap on the geared motor here.
SCM-165_Manual_061114.qxp_Layout 1 7/7/14 11:29 AM Page 40