Install a lens mount, Red dsmc operation guide – RED DSMC User Manual
Page 197
RED DSMC OPERATION GUIDE
COPYRIGHT © 2015 RED.COM, INC
955-0020_V5.3, REV-J | 197
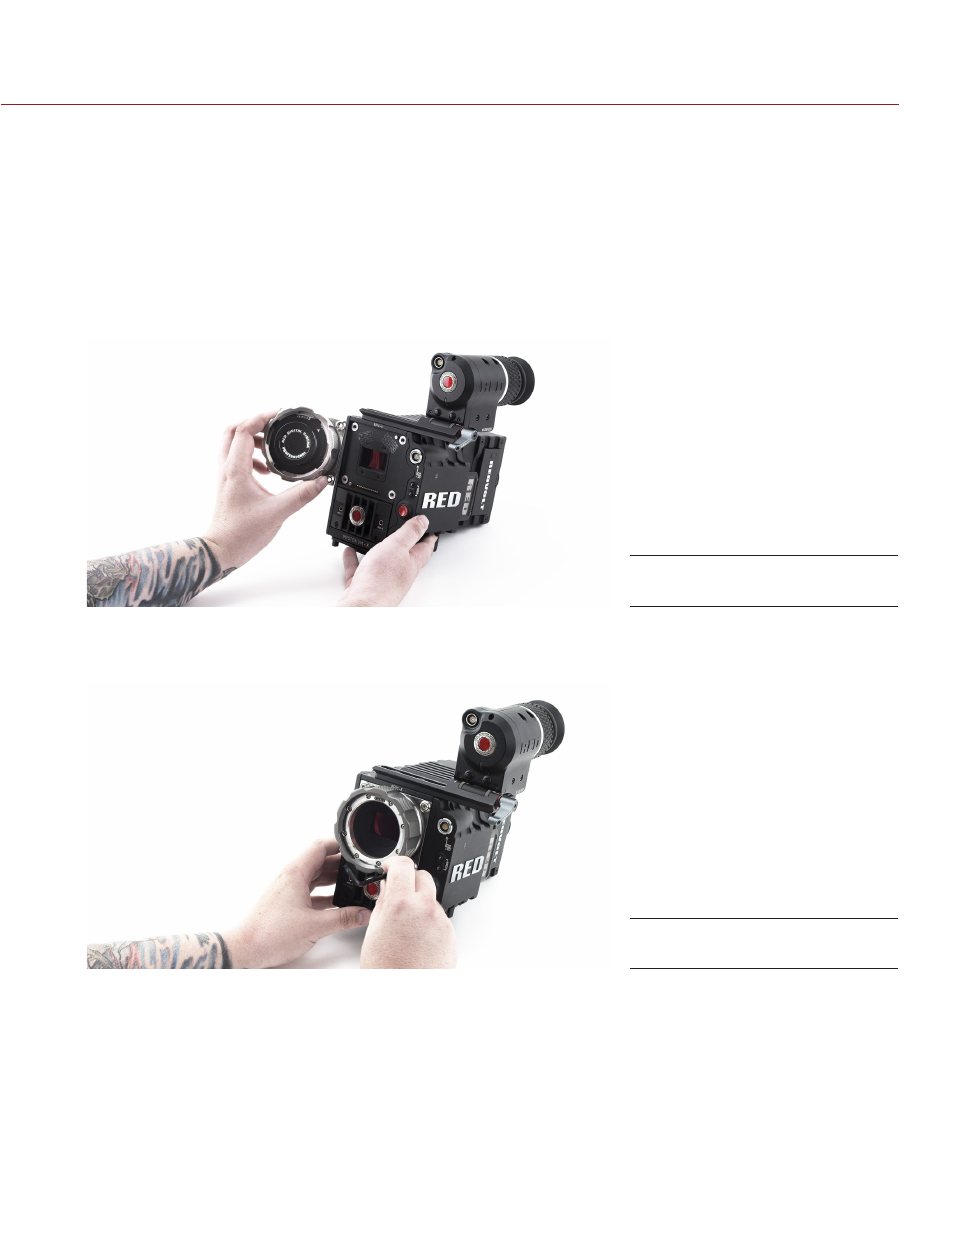
INSTALL A LENS MOUNT
NOTE: You can change lens mounts in the field. However, RED recommends that you change lens mounts only
in dust-free environment.
REQUIRED TOOL: T20 Torx driver
1. Ensure that the DSMC is turned off and remove any accessories or cables that may interfere with installation.
2. Inspect the gold electrical contact pins on the front of the DSMC and the gold contact pads on the rear of
the lens mount to ensure that they are free of any contamination.
3. Align the lens mount on the front of the DSMC BRAIN. The DSMC connection pins must align with the lens
mount pins.
4. Replace and loosely tighten the four (4) M4x0.7 x 8 mm lens mount screws in a cross pattern (“X” pattern)
using a T20 Torx driver.
WARNING: DO NOT FULLY TIGHTEN.
5. Tighten the four (4) lens mount screws evenly in a cross pattern (“X” pattern) using a T20 Torx driver. DO
NOT exceed 350 in-oz, or damage may occur.
WARNING: DO NOT OVERTIGHTEN.
6. After installation, a hardware rediscover or firmware upgrade may be required, particularly if you are installing
a MOTION MOUNT. If a MOTION MOUNT is not recognized, you will be unable to access the Motion Mount
menu at Menu > Settings > Setup > Lens.
To perform a hardware rediscover, go to Menu > Settings > Maintenance > Rediscover. A system reboot is
required after a hardware rediscover.
NOTE: If you need to replace any screws, please contact your Bomb Squad representative.
Align lens mount pins
Tighten screws