Master/slave operation, Set up master/slave operation, Red dsmc operation guide – RED DSMC User Manual
Page 155
RED DSMC OPERATION GUIDE
COPYRIGHT © 2015 RED.COM, INC
955-0020_V5.3, REV-J | 155
MASTER/SLAVE OPERATION
This section describes operation in Master/Slave configuration and clip naming conventions for clips recorded
on those cameras. Master/Slave is the most common configuration for Stereo/3D productions.
When cameras are operated in Master/Slave configuration, you can perform the following operations:
Power: Turn off the Master camera to turn off both cameras.
Record: Press the PWR/REC button on the Master camera to start/stop recording on both cameras.
Change settings: Change settings on the Master camera, to change settings on the Slave camera.
NOTE: The Master camera controls metadata and basic camera parameters of the slave cameras. Any other
setting changes required by the Slave cameras must be made before recording.
NOTE: For a Master/Slave configuration to function correctly, the cameras must be on the same firmware
version, and must be using the same project time base and sensor frame rate.
SET UP MASTER/SLAVE OPERATION
1. Connect cameras using a Master/Slave Gig-E Cable.
2. On the Master camera, follow the instructions below:
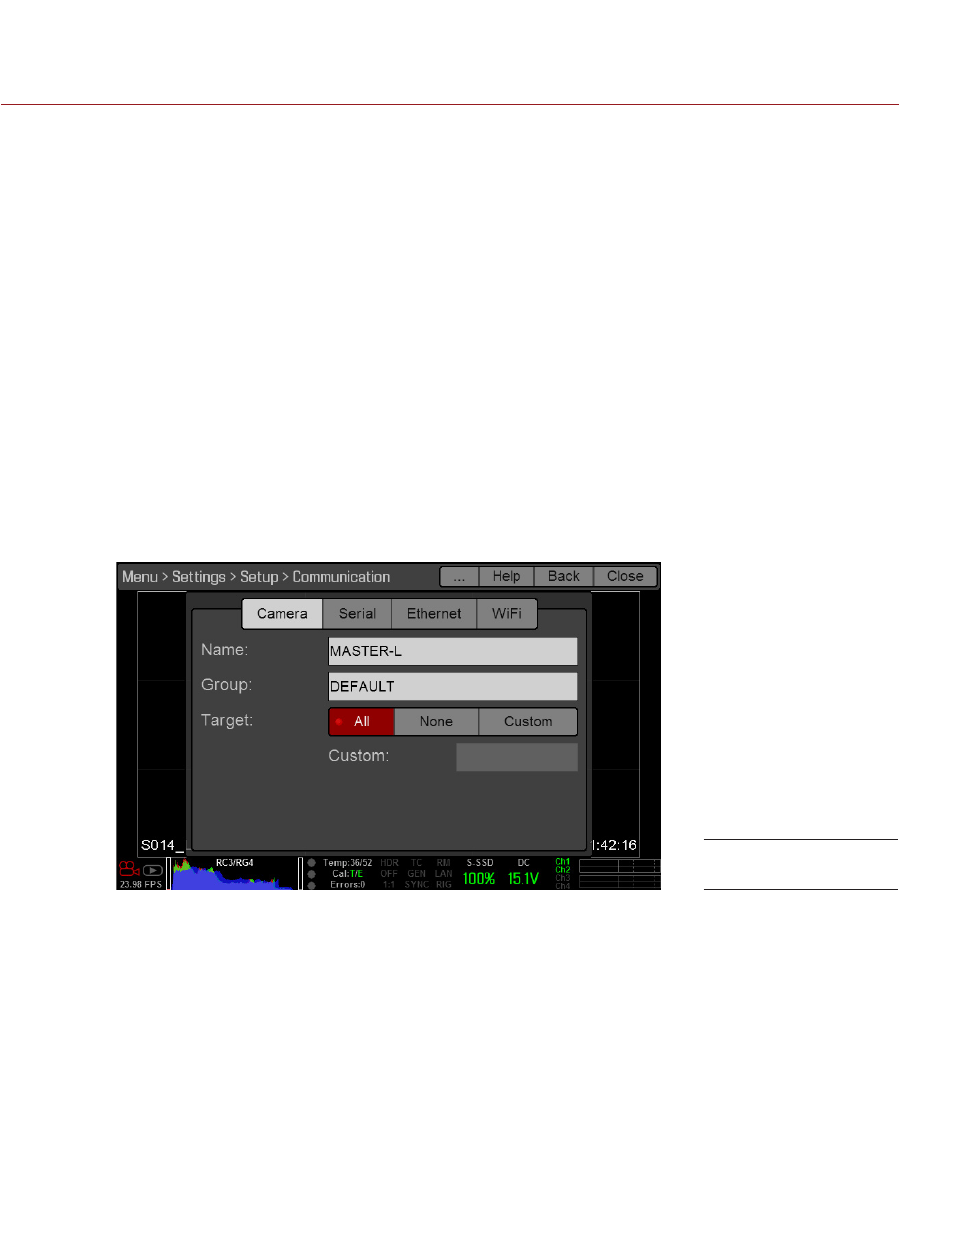
A. Go to Menu > Settings > Setup > Communication.
B. Type a name for the camera (Example: CAM A, LEFT, MASTER, etc) in the Name field.
C. Set Target to All.
D. Go to Menu > Settings > Setup > Communication and select the Ethernet tab.
E. Verify the Enable Camera to Camera check box is selected.
3. On the Slave camera(s), follow the instructions below:
A. Go to Menu > Settings > Setup > Communication.
B. Type a name for the camera (Example: CAM B, RIGHT, SLAVE, etc) in the Name field.
Master Settings