2 installing the bl-u1, Power supply bl-u1 – KEYENCE BL-180 User Manual
Page 96
Power Supply BL-U1
90
2.2
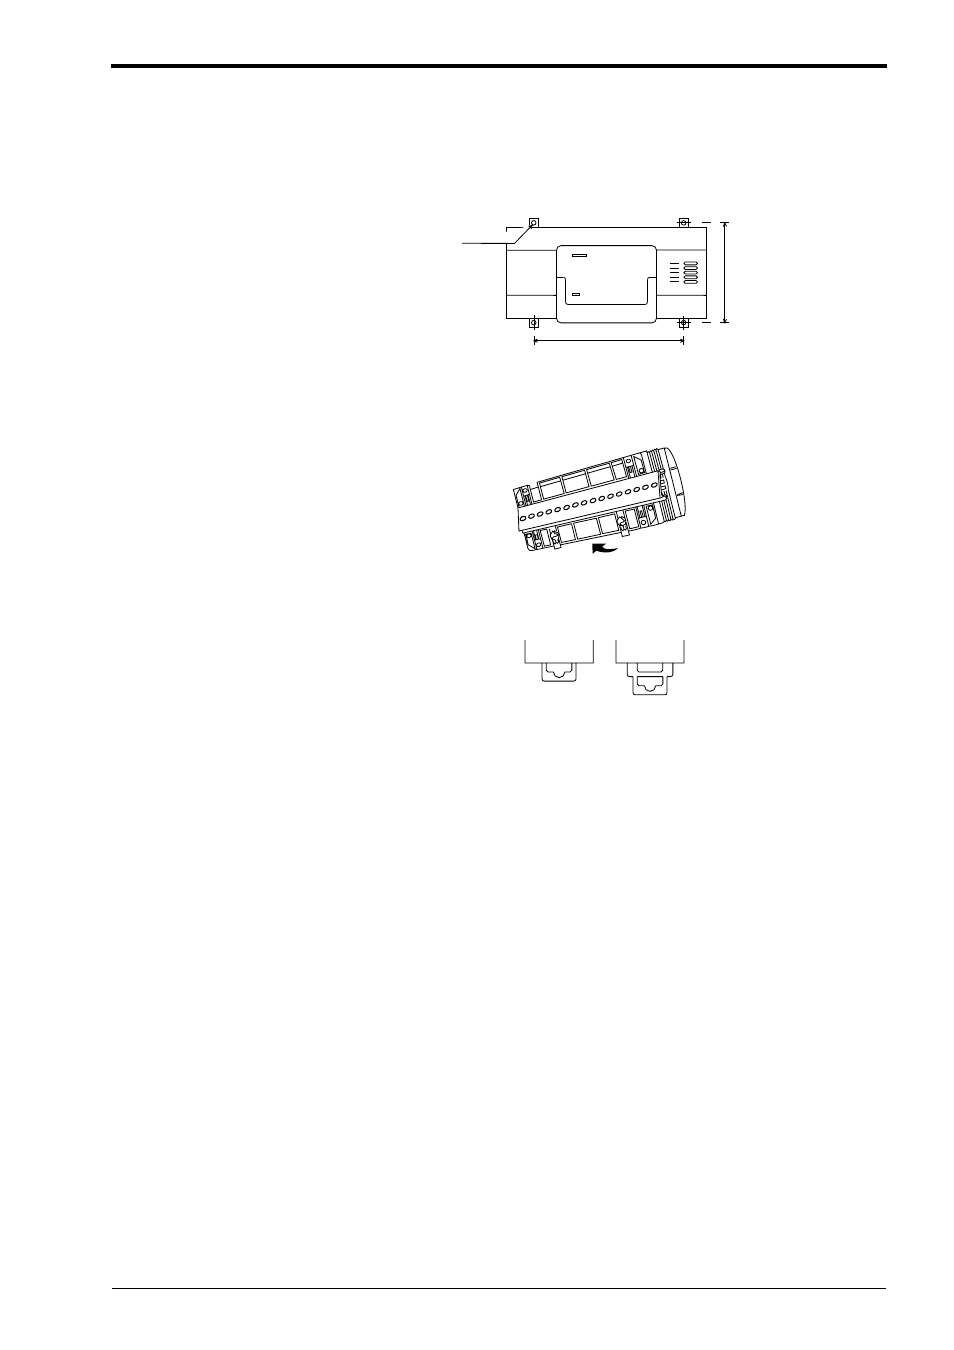
Installing the BL-U1
There are two methods for installing the BL-U1:
When installing the BL-U1 directly
Pull out the four screw slots on the rear panel and screw them to the base.
When installing the BL-U1 to the DIN rail
1. Hook the BL-U1 to the DIN rail groove from its top. Push the BL-U1 bottom
against the DIN rail until you hear a click.
2. Check that the DIN rail mounting notch is shaped like notch A below. If not,
push the BL-U1 further.
3. To remove the BL-U1 from the DIN rail, pull out the notch until its shape turns
from Fig. B to Fig. A. Then, disengage the BL-U1 from the DIN rail.
4. When you want to re-install the BL-U1 to the DIN rail, return the notch from
that of Fig. A to Fig. B.
4-ø5
150
98
OK
Insufficient
Fig. A
Fig. B
- LR-TB2000 Series (12 pages)
- LR-TB5000 Series (12 pages)
- LR-ZB250AN/AP (4 pages)
- LR-ZB250AN/P (3 pages)
- LR-ZBxN/P Series (3 pages)
- LR-ZBxxB (3 pages)
- OP-85135 (1 page)
- PZ-G Series (2 pages)
- PZ-V/M (2 pages)
- PS-N10 Series (12 pages)
- PX-10 (10 pages)
- CZ-V21A(P) (10 pages)
- CZ-K1(P) (8 pages)
- CZ-V1 (8 pages)
- FS-N10 Series (116 pages)
- FS-N10 Series (6 pages)
- FS-N15CN (1 page)
- FU-93(Z) (2 pages)
- FU-V Series (2 pages)
- FS-V30 (6 pages)
- FU-A40 (1 page)
- NU/FS-N Series (16 pages)
- FS-V33(P) (8 pages)
- FS-V21 (4 pages)
- FS-V22 (4 pages)
- FS-V11(P) (4 pages)
- FS-V1(P) (4 pages)
- LV-N10 Series (12 pages)
- LV-N10 Series (112 pages)
- LV-S62 (1 page)
- OP-84350 (1 page)
- LV-SA (10 pages)
- LV-SB (12 pages)
- OP-87305 (1 page)
- LV Series (10 pages)
- LV-B102 (1 page)
- EV-108M(U) (1 page)
- EZ Series (1 page)
- EM Series (1 page)
- ES-M1(P) (3 pages)
- EX-V Series (120 pages)
- EX-500(W) Series (16 pages)
- GV Series (10 pages)
- IA Series (8 pages)
- LB-1000(W) (24 pages)