Hardy HI 2151/30WC Single-Scale Controller User Manual
Page 34
HI 2151/30WC MANUAL
3-4
Step 3.
Gently slide the controller into the cutout in the enclosure. Be
sure to secure the controller with both hands when installing.
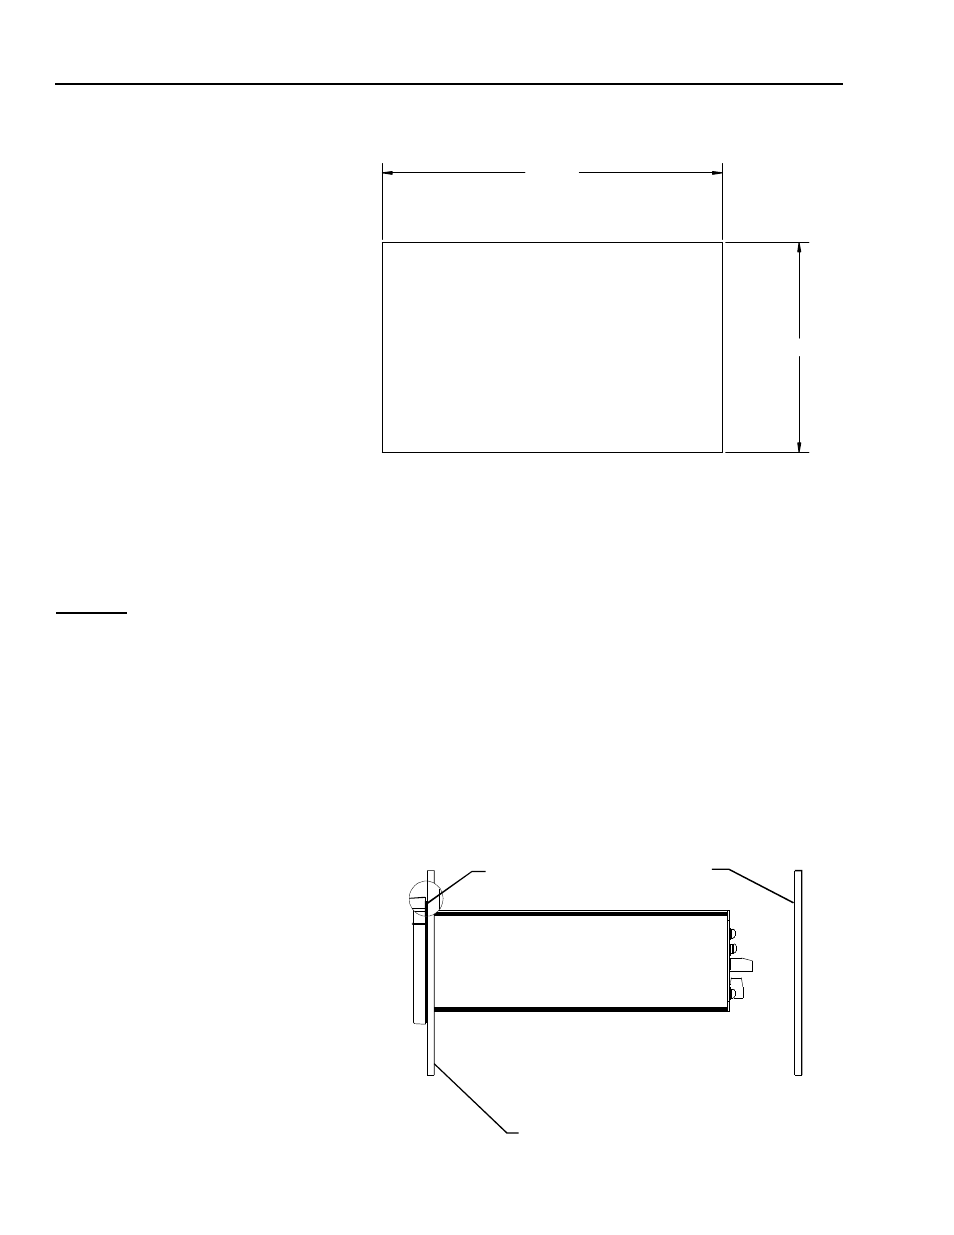
FIG. 3-2 PANEL CUTOUT DIMENSIONS
Step 4.
Slide the controller into the panel cutout until the NEMA 4 &
4X gasket is flush against the front panel of the enclosure.
(See Fig. 3-3)
CAUTION
ONCE THE GASKET IS COMPRESSED IT SHOULD NOT BE USED
AGAIN. WHENEVER THE CONTROLLER IS REMOVED FROM THE
PANEL, RE INSTALL WITH A NEW GASKET. (HARDY PRT. # 0524-0011)
Step 5.
Install the four mounting bars.
•
Slide each of the mounting bars into the slots at the rear of
the controller.
•
One end of the mounting bar is recessed. Make sure you
install the bars from this end.
•
Check to be sure the mounting bars are flush against the
inside surface of the front panel.
FIG. 3-3 NEMA 4 GASKET FLUSH AGAINST THE FRONT PANEL
PANEL CUTOUT
5.75"
3.09"
Front Panel
Rear
Panel
Compression
Gasket