Cvt removal: driving pulley, 4 x 2 drive system - (steel bed) – Cub Cadet 4 x 2 Big Country - Poly Bed & Steel Bed User Manual
Page 57
4 X 2 Drive System - (Steel Bed)
53
5.5.
Key points to inspect on the driven pulley are the
ramp surfaces on the cams, and the polymer
buttons that ride against the ramps.
See Figure 5.5.
•
A worn ramp surface on the cam will change the
acceleration and power characteristics of the
drive system.
•
A rough ramp surface on the cam will cause
sticking and inconsistent pulley reaction.
•
Polymer buttons worn to less than 1/16” may
damage the ramp surface.
5.6.
Installation notes for the driven CVT pulley CVT:
•
Apply a light coating of anti-seize compound to
the input shaft before pulley installation. Wipe off
any excess.
•
Apply a small amount of releasable thread lock-
ing compound such as Loctite 242 (blue) to the
threads of the bolt.
•
Tighten the bolt to a torque of 60 + 5 ft.-lbs.
•
Re-connect the spark plug leads.
•
Test-drive the vehicle before returning it to ser-
vice.
5.7.
Beyond the warranty period, if a dealer chooses
to service a driven clutch, service information
and specialized tools are available from:
Hoffco/Comet Industries
358 NW F Street
Richmond, IN 47374
(765) 966-8161
Figure 5.5
Ramp Surface of Cam
Buttons
6.
CVT REMOVAL: DRIVING PULLEY
6.1.
Disconnect and ground the spark plug H.T.
leads.
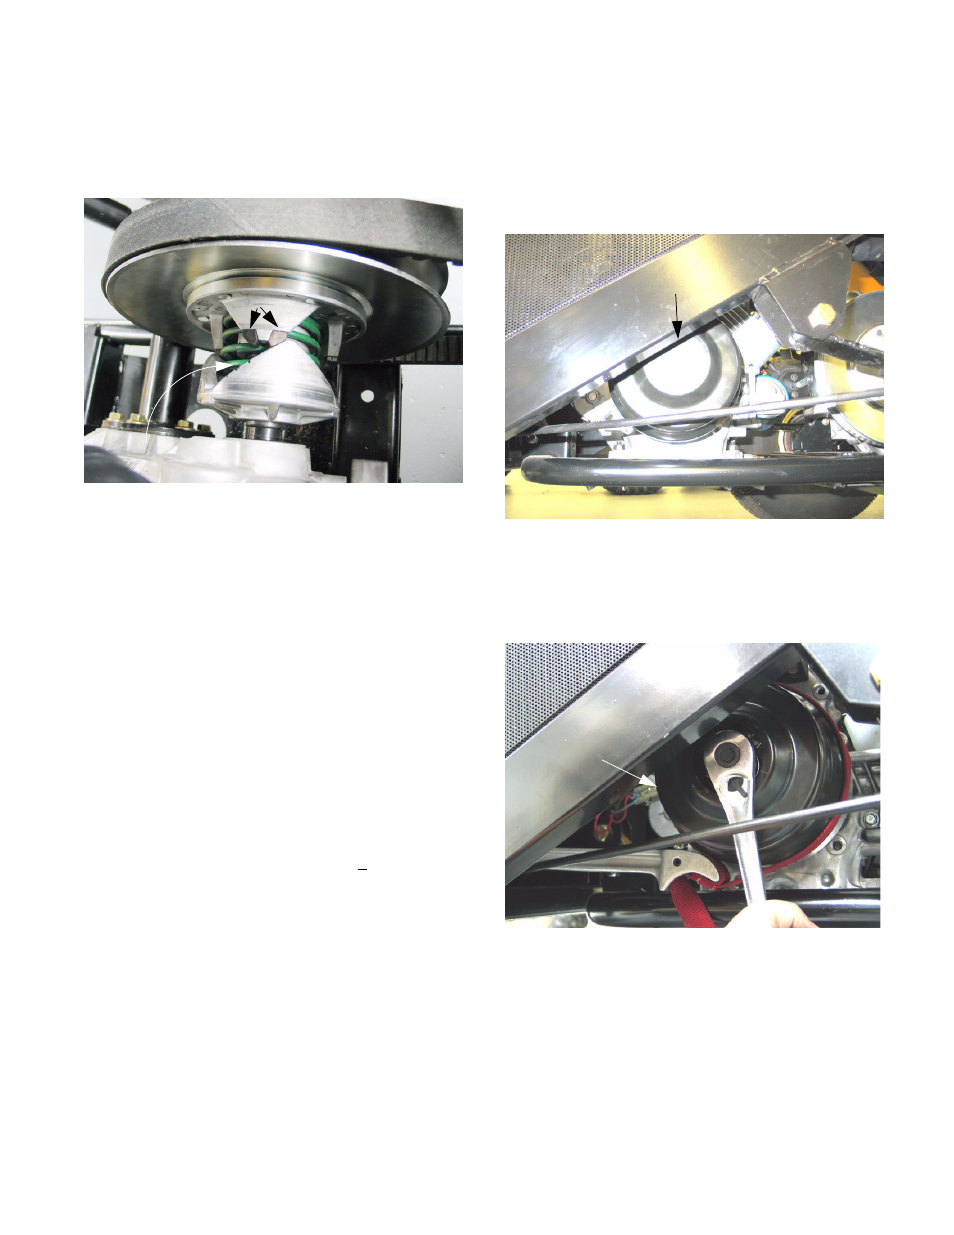
6.2.
Carefully pry the plastic plug out of the center of
the clutch cover. See Figure 6.2.
6.3.
Loosen the bolt securing the driving pulley to the
engine crankshaft using a 9/16” wrench.
See Figure 6.3.
NOTE: If working without an impact wrench, it
may be necessary to hold the clutch with a strap
wrench. If this is the case, position the strap
wrench around the largest diameter section of
the pulley, where the lip of the cover is attached
to the sheave. This is the strongest point. Hold-
ing the pulley there is not likely to damage the
cover.
Figure 6.2
Plastic Plug
Figure 6.3
Pulley