Poly bed 4 x 2 brake system – Cub Cadet 4 x 2 Big Country - Poly Bed & Steel Bed User Manual
Page 48
Poly Bed 4 X 2 Brake System
44
3.2.
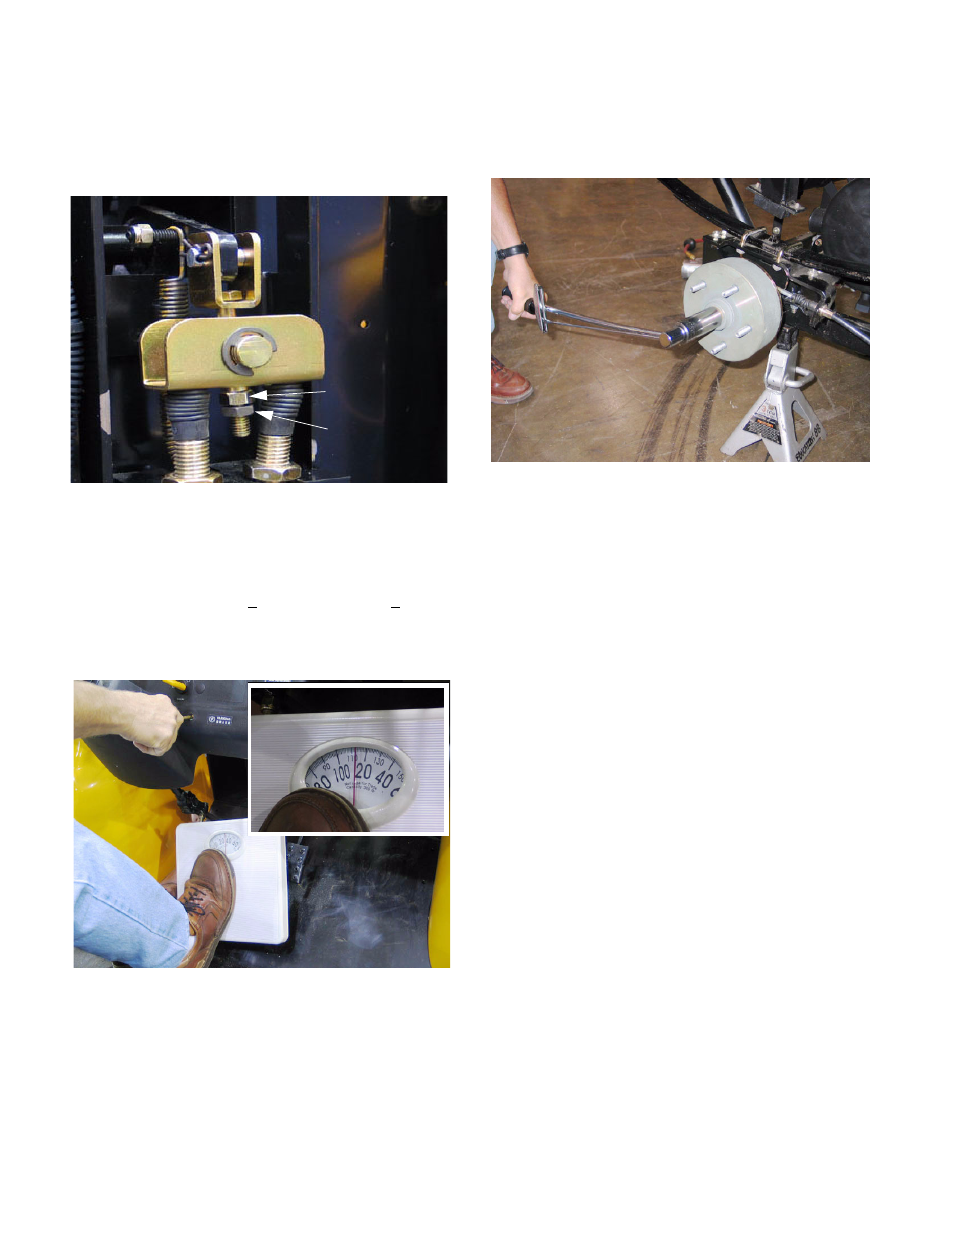
Adjust the nut and jam nut on the bolt that joins
the clevis (pinned to the brake pedal arm) to the
pivot pin that goes through the equalizer bracket.
See Figure 3.2.
3.3.
Place a bathroom scale between your foot and
the brake pedal. Depress the brake pedal and
set the parking brake. It should take approxi-
mately 110 pounds + 10 pounds (50 Kg. + 5 Kg.)
of pressure on the pedal to reach the point
where the parking brake will engage.
See Figure 3.3.
3.4.
After making any necessary adjustment using
the two large jam nuts on the end of each cable,
or the nut and jam nut on the bolt that connects
the clevis to the equlizer link pivot pin, check all
adjustment hardware to confirm that it is tight.
3.5.
Set the parking brake.
3.6.
Tighten the hub nuts to 110 ft-lbs. (145 N-m) and
secure each with a new cotter pin.
See Figure 3.6.
3.7.
Replace the rear wheels and tighten the lug nuts
to 25 foot-pounds (34 N-m).
3.8.
After confirming you have the correct brake
pressure, start the vehicle while it is on the jack
stands and test the brakes by accelerating the
engine and applying the brakes.
3.9.
With the brakes released, and the engine
turned-off, confirm that the rear wheels rotate
without drag.
3.10. Lower the rear wheels to the ground, and per-
form several test stops in a clear, safe area to
confirm the correct adjustment and operation of
the brake system before returning the Big Coun-
try vehicle to service.
•
After this initial brake adjustment is performed,
any further brake adjustment should be done
using the large jam nuts on the forward end of
the brake cable.
•
If the brake pedal bottoms-out, the adjustment
may be tightened, but pedal effort to apply the
parking brake should not exceed 120 lbs.
•
Confirm correct operation of the brakes after
performing any adjustment or service, and check
the tightness of all hardware to ensure ooperator
safety.
Figure 3.2
Adjustment nut
Jam nut
Figure 3.3
Figure 3.6