Transaxle repairs, Poly bed 4 x 2 drive system – Cub Cadet 4 x 2 Big Country - Poly Bed & Steel Bed User Manual
Page 30
Poly Bed 4 X 2 Drive System
26
8.6.
Remove the nut and bolt (top) that connect the
link assembly to the frame using a pair of 15/16”
wrenches. See Figure 8.6.
8.7.
Remove the nut and bolt (bottom) that connect
the link assembly to the engine and transaxle
cradle using a pair of 19mm wrenches.
8.8.
With the bolts removed, the link can be lifted out
and replaced. See Figure 8.8.
8.9.
Installation notes:
•
Apply anti-seize compound to the bolts so that
they may be easily removed in the future.
•
Tighten the top nut and bolt to a torque of 100 +
10 ft.-lbs.
•
Tighten the bottom nut and bolt to a torque of 40
+ 5 ft.-lbs.
9.
TRANSAXLE REPAIRS
Axle Assemblies:
NOTE: It is possible to replace axle bearings
and seals without removing the transaxle from
the vehicle. If this is done, inspect the axle
tubes carefully. If the axle tubes have been bent
by over-loading the suspension (static or shock)
then a mis-alignment of the bearings may have
occurred. This misalignment will cause the rapid
demise of the replacement bearings. Overload-
ing constitutes abuse of the vehicle. The result-
ant damage is NOT warrantable.
NOTE: If the transaxle is being removed with the
anticipation of disassembly, steps can be saved
in the removal process by leaving the brake
drums and wheels attached to each other:
9.1.
Remove and discard the cotter pins that secure
the castle nuts on the end of each axle shaft.
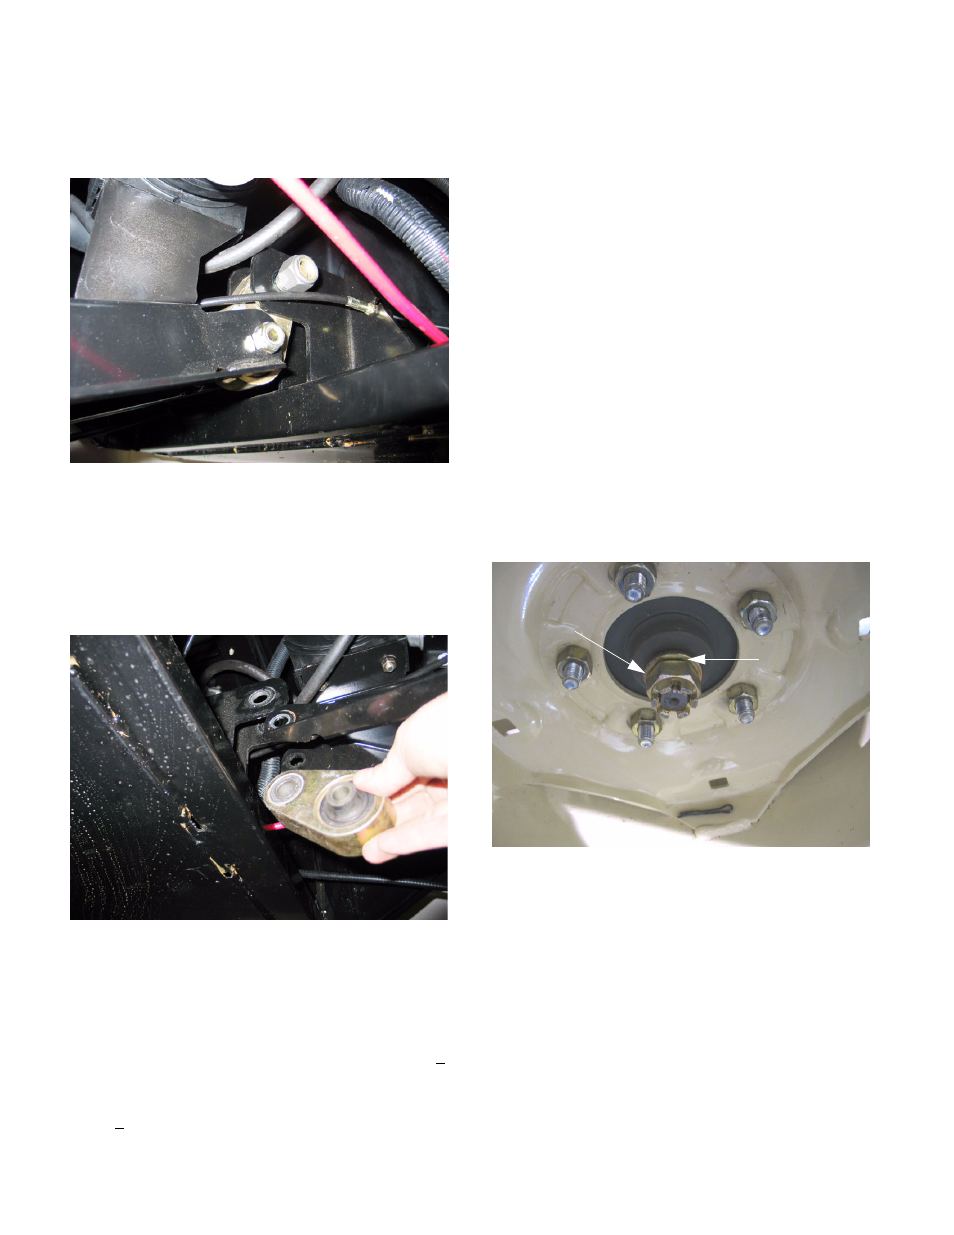
9.2.
Set the parking brake, and remove the castle
nuts and washers using a 27 mm socket.
See Figure 9.2.
9.3.
Release the parking brake, and remove the tran-
saxle assembly as described in the “Transaxle
Removal” portion of this manual.
9.4.
Slide the brake drums off of the axle shafts with-
out removing them from the wheels.
Figure 8.6
Figure 8.8
Figure 9.2
Castle nut
Washer
Cotter pin removed