Key and hold it, Key and press – HP 2566C User Manual
Page 73
Attention! The text in this document has been recognized automatically. To view the original document, you can use the "Original mode".
Continuous Test
Specific Sub-test
Selection
To run a continuous self-test, press the
fjEST 1
key and hold it
down
for more than two seconds until the display changes from “5” to
“4.” Release the
(
test
]
key and press
[
enter
j. The self-test will
run continuously. Exit the continuous test by pressing the
[
test
) or
[
on
line
I
key.
Individual sub-tests can be selected and run from the Operator Control
Panel. Table 5-2 lists the sub-tests available for your printer. To run
a sub-test, press the
[
test
!
key to enter the TEST mode. A sub-test
number appears in the display window and the right decimal point
lights up indicating that the printer is in the TEST mode. Use either
[
fine
ADJ.I
key to move to the desired sub-test number. Once the
number is displayed, press
[
enter
]
to start the sub-test.
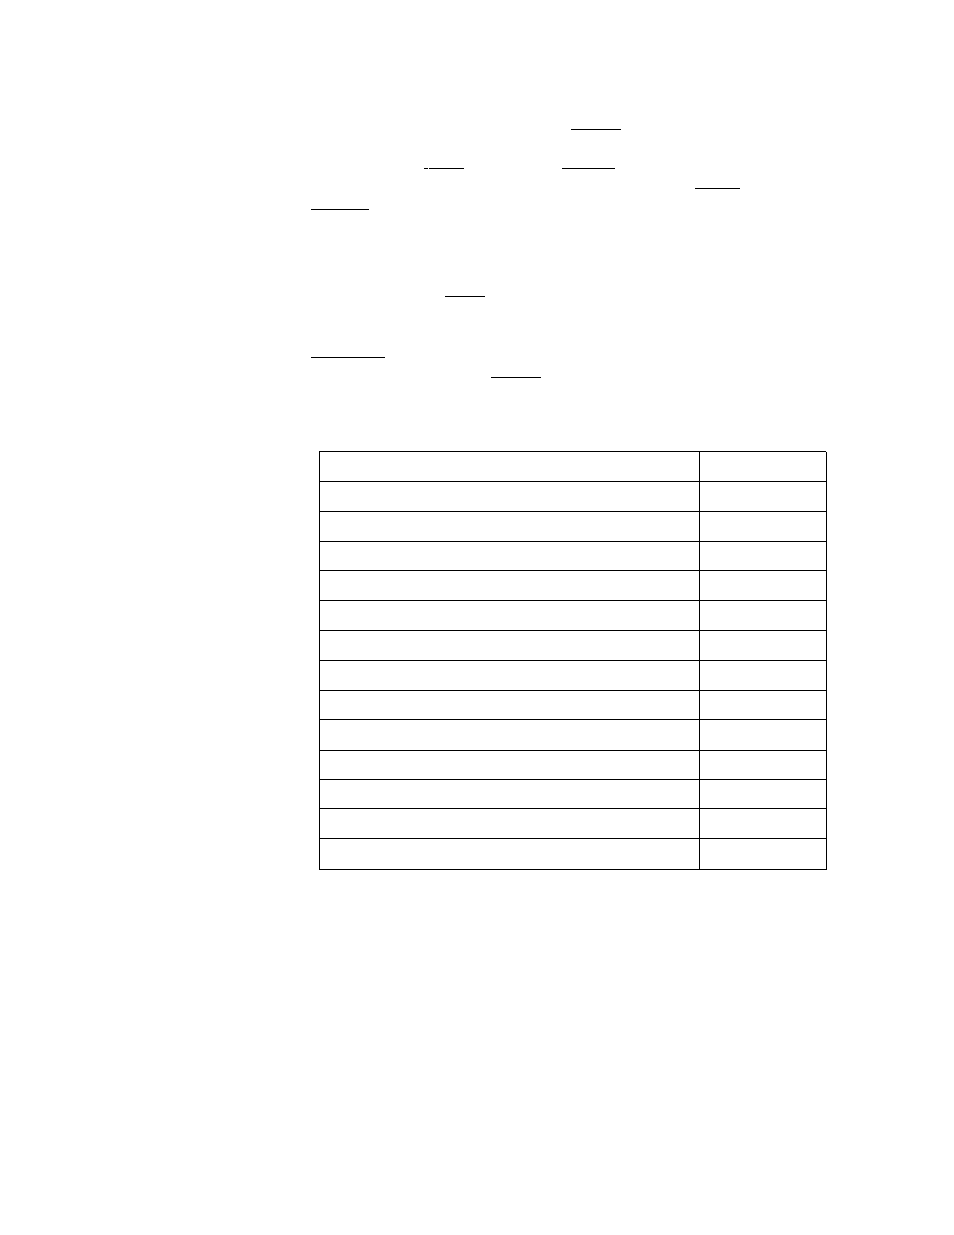
Table 5-2. Sub-Test Numbers
Sub-Test
Numbers
Standard Self-Test
0
Standard Ripple Print
1
Double Size Ripple Print
2
Compressed Ripple Print (16.7 cpi)
3
High Density Ripple Print (optional)
4
Raster Graphics (herring bone)
5
High Density Raster Graphics (herring bone)
6
Printer Configuration print-out
8
900/1200 LPM Ripple Print (upper case)
9
High Speed Draft Ripple Print (upper case)
10
Flight time/forms thickness adjust patterns
15
Interface tests
30-38
Gmphics tests (if installed)
40-48
5-8 PRINTER CONFIGURATION