Establishing a connection to the bds receiver, Connection options, Figure 1 connection dialog – Bird Technologies BDS-Manual User Manual
Page 24
10
Establishing a Connection to the BDS Receiver
These instructions cover connecting to the receiver using a direct PC-to-receiver Ethernet connection on port 1 (left port).
1.
Connect an Ethernet cable connected from the PC to port 1 on receiver.
Note: It does not have to be a crossover cable, the BDS will auto-negotiate the
hardware.
2.
Apply power to the BDS receiver.
3.
Confirm that the yellow LED (the one on right) of port 1 is illuminated.
4.
Wait for the BDS to finish booting.
Note: The four status LED’s on the front panel will all turn green when the BDS
is ready (GGGG).
Note: If there is not a probe connected, the following pattern will be displayed:
GGGY. Any other pattern indicates a possible system failure. See “Status LEDs”
on page 13 for more information.
5.
Using the BDS GUI, Select “Connection->New…” from the main menu.
6.
Enter the following IP address of port 1 in the “Address:” field: 192.168.0.151
7.
Click the “Connect” button.
Note: “CONNECTED” should be displayed in the left-most indicator field of the
main status bar at the bottom of the application window.
Note: The BDS GUI will save your connection settings as defaults. If discon-
nected from the receiver, a connection can be reestablished by either clicking the
“Connection” icon, using “Connection->Open”, or simply by starting a data
acquisition. This also works on subsequent launches of the BDS GUI application.
For more information see the "Connection Options" on page 10.
There are two modes of operation with the Bird GUI: Standard Tracking and Spectral Search (Sweep). In addition, the
BDS also has arc detection capability that is available in both operating modes. In all modes data is captured in 12-bit
hi-resolution (Hi-res) or in 8-bit low-resolution (Low-res).
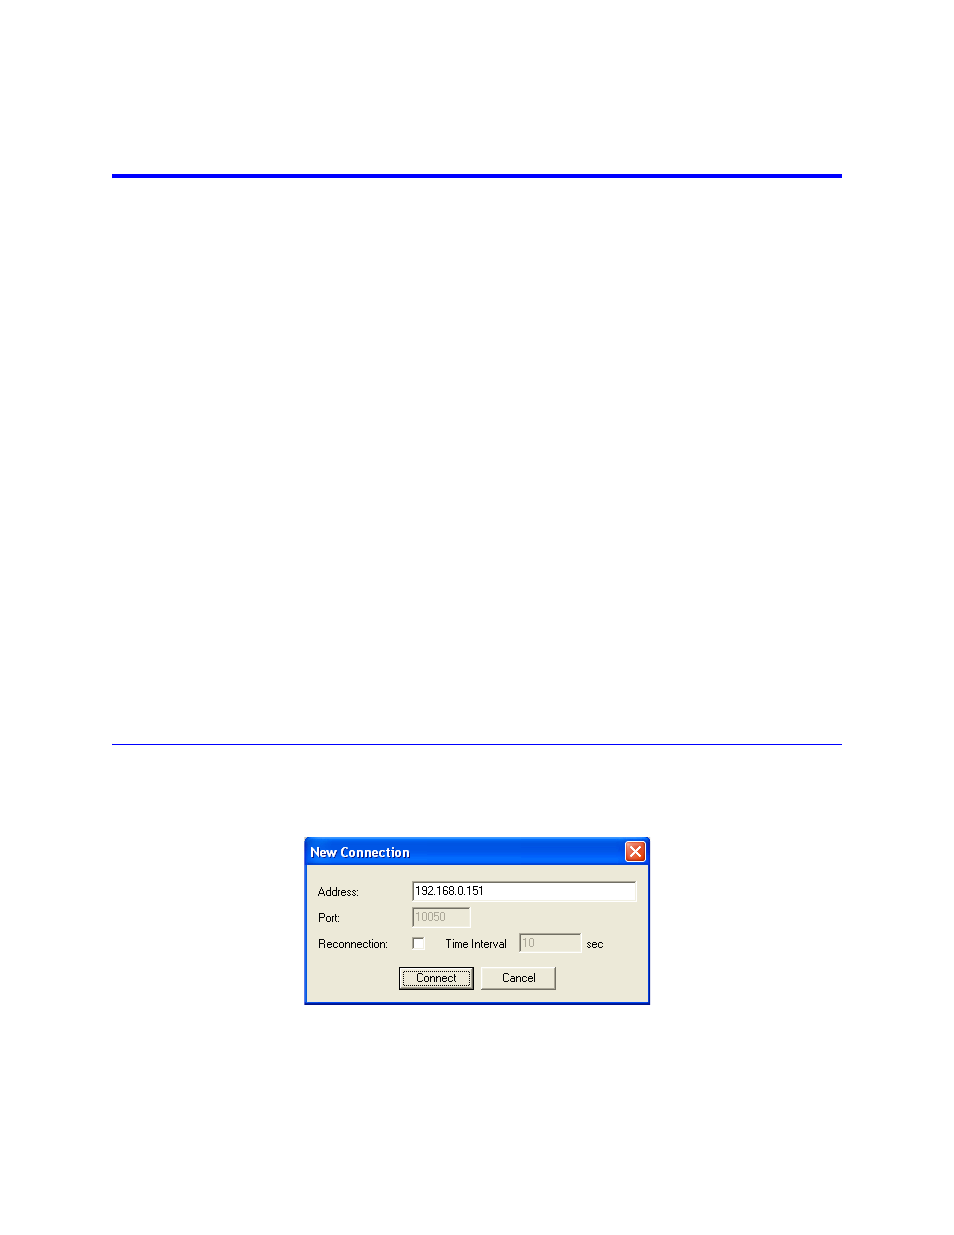
Connection Options
The BDS GUI communicates with the receiver over Ethernet. In order to establish a connection to the BDS receiver you
first need to make sure that the receiver must be on the subnet (it has an IP address that is addressable by the PC).
Figure 1 Connection Dialog
Address -
The IP address or host name of the BDS receiver.
Note: Default IP addresses:
•
Ethernet Port 1 (left): 192.168.0.151
•
Ethernet Port 2 (right): 10.10.0.29