Warning – MacDon D60 Draper Headers User Manual
Page 96
SECTION 8. MAINTENANCE AND SERVICING
Form 169441
94
Revision B
8.7.2 SICKLE
REMOVAL
WARNING
Stand to rear of sickle during removal to
reduce risk of injury from cutting edges. Wear
heavy gloves when handling sickle.
a. Stroke sickle to its outer limit, and clean area
around sickle head.
b. Remove zerk from pin (A).
c. Remove nut and bolt (B).
d. Insert screwdriver in groove of pin (A), and pry up
on sickle head pin to free sickle. Pin does not
have to be removed from arm.
e. Seal bearing in sickle head with plastic or tape.
f.
Wrap a chain around sickle head, and pull sickle
out.
NOTE
For single drive sickles with splice plate,
remove bolts from splice plate and pull
sickle out from both ends.
8.7.3 SICKLE
HEAD
BEARING
REPLACEMENT
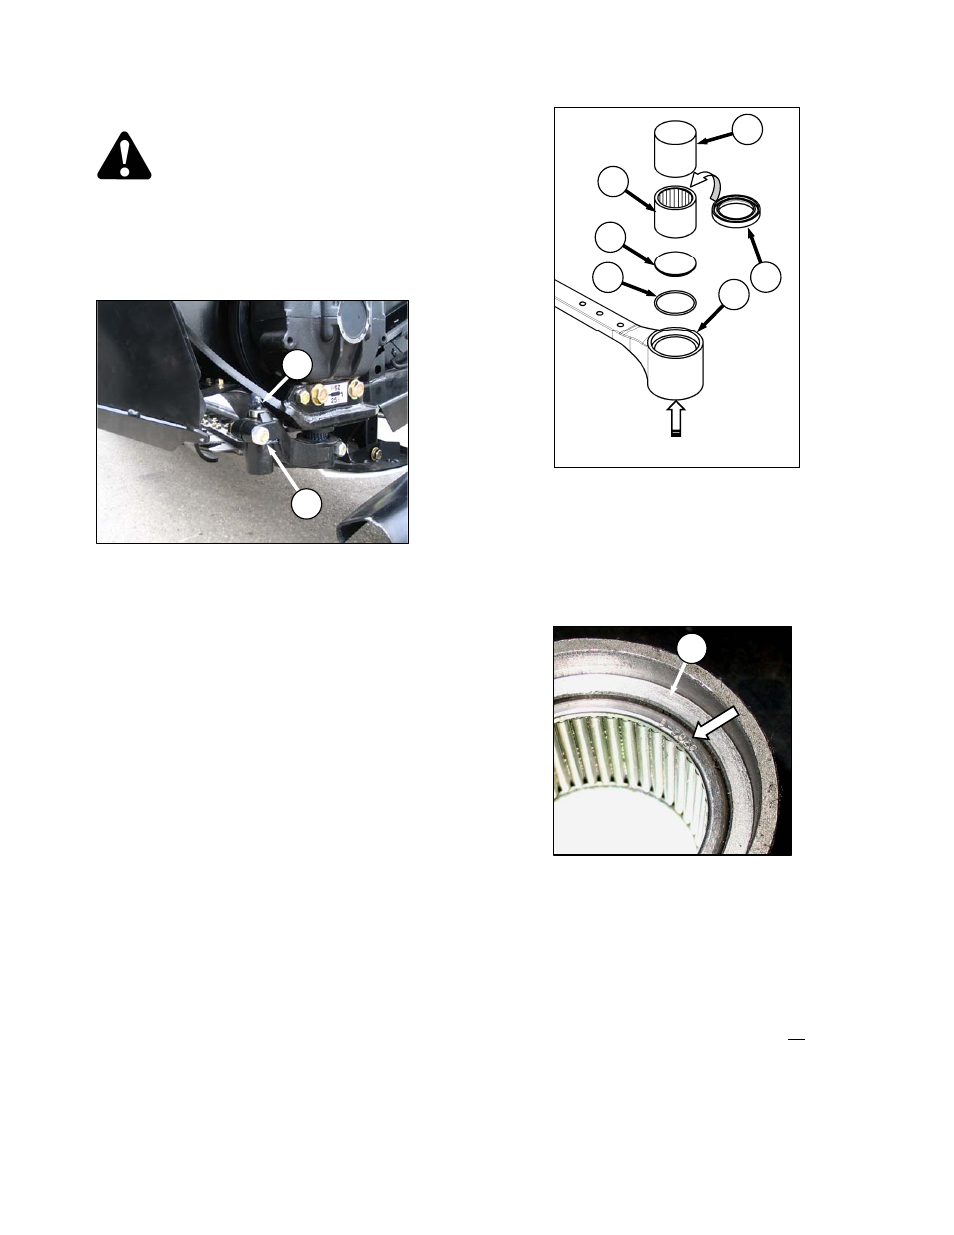
8.7.3.1 Bearing
Removal
a. Remove sickle. Refer to previous section.
b. Using a flat-ended tool (D) with approximately the
same diameter as the plug (E), tap out the seal
(F), bearing (G), and plug from the underside of
the head (shown at top of next column).
NOTE
The seal can be replaced without
removing the bearing. When changing
seal, check pin and needle bearing for
wear. Replace if necessary.
8.7.3.2 Bearing
Installation
a. Place O-ring (C) and plug (E) in sickle head.
IMPORTANT
Install the bearing with the stamped
end (the end with identification
markings) against the tool.
b. Using a flat-ended tool (D) with approximately the
same diameter as the bearing (G), push the
bearing into the sickle head until the top of the
bearing is flush with the step (H) in sickle head.
c. Install seal (F) in top of sickle head with lip facing
outwards.
IMPORTANT
To avoid premature sickle head or
wobble box failure, be sure there is no
looseness in:
• Fit of sickle head pin and needle
bearing, and
• Fit of sickle head pin and pitman arm.
B
A
H
REMOVAL
C
D
H
G
F
E