Float switches/alarm beacon (auto mode), Mounting the float switches, Float switch/alarm beacon connections – Multiquip AP6 Series User Manual
Page 27
AP6/AP8 SERIES TRASH PUMPS • OPERATION AND PARTS MANUAL — REV. #0 (06/11/14) — PAGE 27
FLOAT SWITCHES/ALARM BEACON (AUTO MODE)
Table 7. Pumping Range
Tether Length
in. (cm.)
2
(5.08)
4
(10.1)
6
(15.24)
8
(20.32)
10
(25.4)
12
(30.48)
14
(35.56)
16
(40.46)
Pumping Range
in. (cm.)
6 in.
(15.24)
10
(25.4)
14
(35.56)
(18)
(45.72)
22
(55.88)
27
(68.58)
31
(78.74)
35
(88.9)
Mounting The Float Switches
1. Determine the required
cord tether length as shown
in Figure 11 and Table 7.
2. Place the cord into the clamp as shown in Figure 11.
3. Secure the clamp to the suction hose as shown in.
DO
NOT install cord under hose clamp.
4. Using a screwdriver, tighten the hose clamp.
DO NOT
over-tighten. Make sure the float cord is not allowed to
touch the excess hose clamp band during operation.
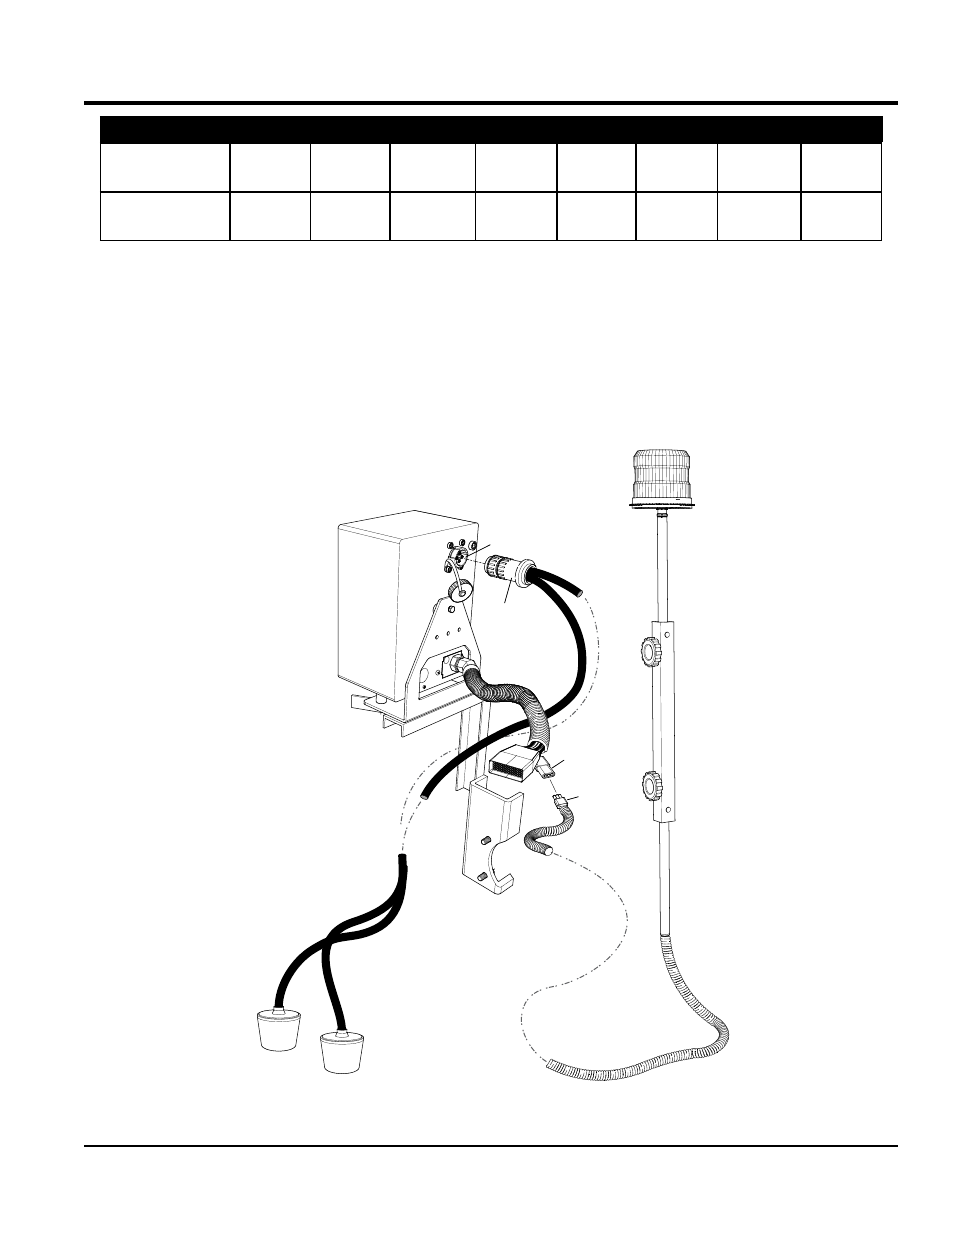
Float Switch/Alarm Beacon Connections
Connect the float switches and alarm beacon to the control
box as shown in Figure 14.
Figure 14. Float Switches/Alarm Beacon Connections
FLOAT
SWITCH #2
BEACON
RECEPTACLE
FLOAT SWITCH
CABLE
4-PIN FLOAT SWITCH
RECEPTACLE
BEACON
PLUG
FLOAT
SWITCH #1
REAR VIEW OF CONTROL BOX
ALARM BEACON