Connect ride thru option wiring – ETC Unison ERn Rack-mount Control Enclosure User Manual
Page 27
4
Install Rack Options
23
Step 2:
Align the ride through option board to the mounting studs in the right corner of
the ERn enclosure (see graphic on the previous page).
•
Notice the mounting holes on the option board. Two are open ended slots
used to set the board in place and the remaining two standard mounting
holes are used to secure the board in place.
•
Align the open ended slots to the studs located closest to the bottom of the
enclosure.
Step 3:
Secure the board to the top two mounting pems with the screws provided.
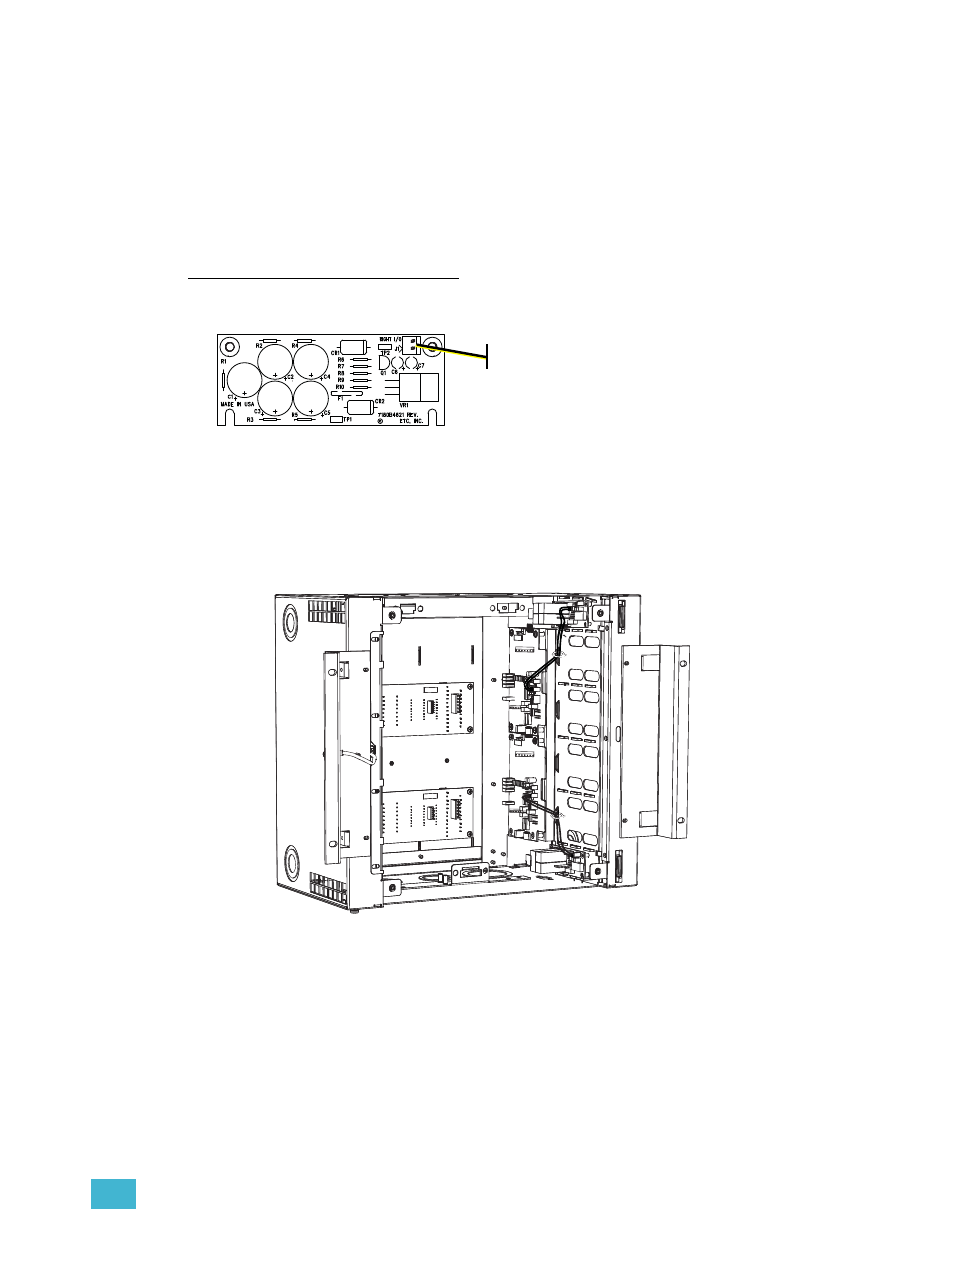
Connect Ride Thru Option Wiring
The Unison ride thru option board is provided with a wiring harness for connection to the
ERn right I/O board.
Step 1:
Connect one end of the wiring harness to the two pin receptacle on the option
board.
Step 2:
Connect the other end of the wiring harness to the two pin receptacle labeled
“Ride Thru / Batt” on the ERn right I/O board. When two ride thru option boards
are installed, the top ride thru option wiring harness terminates to the I/O board
in the top and the bottom ride thru option wiring harness terminate to the I/O
board in the bottom of the unit.
Step 3:
Secure the wiring harness to the ERn enclosure using the cable tie and cable tie
mount provided in with the ride thru option board. A loose or poorly routed wiring
harness could interfere with option module (ERn-NET or ERn-RPS) installation
in the lower option module slot. In the top module slot the wiring harness could
interfere with the rack power supply (ERn-PS).
2008
Step 1: