Changing operating modes, Calibration, Menu structure – Det-Tronics UD10 DCU Emulator FlexVu Universal Display Unit User Manual
Page 36
G-3
95-8656
4.2
chAnGinG operAtinG moDes
When used with a PIR9400, the operating mode of the
UD10-DCU must be changed from “HART Device” to
“PIR9400” mode. Refer to the “Startup” section of this
manual for details.
cAlibrAtion
To initiate calibration of the PIR9400 from the UD10-DCU
Display:
1. Using the magnet to activate the switches on the
UD10-DCU display, navigate to the “Calibration”
menu.
Main Menu
Process Vars
Display Status
Device Status
Display Setup
Device Setup
Device Cal
Display Test
Device Cal
Calibration
Cal Gas Conc
Calibration
Execute
Abort
2. Activate “Execute” (Enter/Select) to start calibration.
3. The UD10-DCU will display “Waiting for Zero” on the
main display screen.
4. The UD10-DCU will then display “Waiting for Gas”
on the screen.
5. Apply calibration gas to the PIR9400.
6. The UD10-DCU will continue to display “Waiting for
Gas” on the screen.
7. When the UD10-DCU displays “Remove Cal Gas”
on the screen, remove the calibration gas from the
PIR9400.
8. The UD10-DCU automatically returns to the normal
mode after successful calibration.
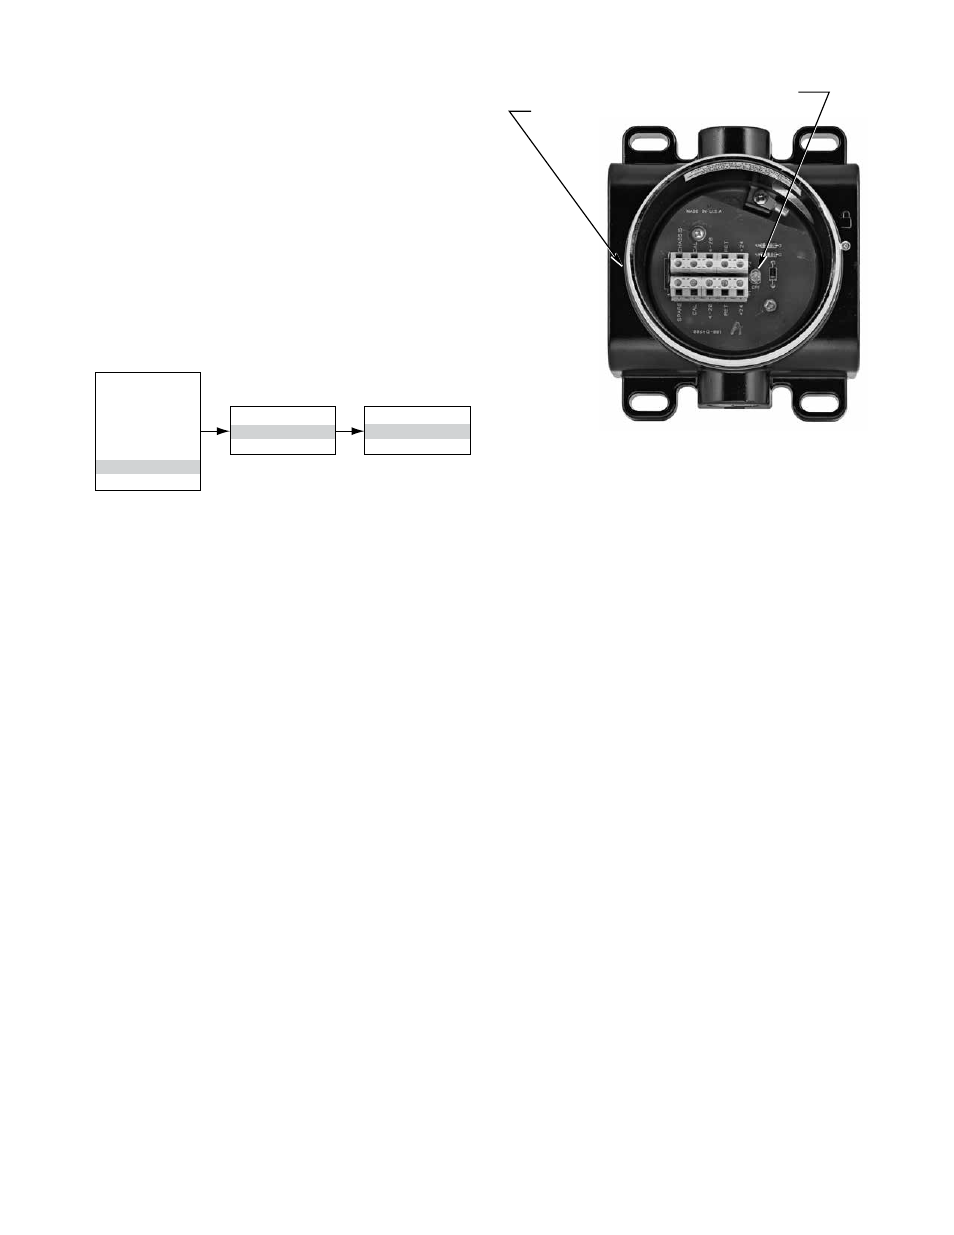
To initiate calibration from the PIRTB Termination Box
while monitoring calibration using the UD10-DCU
display:
1. Using the magnet, activate the magnetic calibration
switch on the PIRTB Termination Box. The LED at
the PIRTB turns from off to steady red.
2. The UD10-DCU will display “Waiting for Zero” on
the main display screen, with a solid red LED at the
PIRTB.
3. The UD10-DCU will then display “Waiting for Gas”
on the screen, while the LED at the PIRTB is flashing
red.
4. Apply calibration gas to the PIR9400 detector.
5. The UD10-DCU will display “Waiting for Span” on
the screen, with a red flashing LED at the PIRTB.
6. When the UD10-DCU displays “Remove Cal Gas”
on the screen and the LED at the PIRTB turns off,
remove the calibration gas.
7. After successful calibration, the UD10-DCU
automatically returns to the normal mode, and the
LED on the PIRTB remains off.
menu structure
UD10-DCU with PIR9400 Pointwatch Detector
Refer to the following menu when using the
UD10-DCU’s LCD display and internal magnetic
switches.
menu HeLp
Status menus only allow the user to view the data.
The Setup menus allow the user to both view and
edit the data.
CALIBRATE SWITCH
B2056
HOLD CALIBRATION MAGNET
AT OUTSIDE BASE OF JUNCTION
BOX AT THIS LOCATION
TO ACTIVATE CALIBRATION SWITCH
REMOTE LED
PIRTB Termination Box